Hurak │ Blog
Stay informed with course info, industry updates, best practices and news for learners and industry workers.
Featured article
How to Renew Your SIA Licence in 2025
You must renew your SIA Licence to keep working in the private security industry in the UK. Before renewing, you need to complete SIA Refresher Training and a First Aid Course.The licence must be renewed every three years, and to meet industry rules, employees must undergo extra training and pass a criminal background check.Can I Still Renew My SIA Security Licence After It Expires?You can renew your SIA security licence online, starting about four months before it expires. However, SIA licences do not renew automatically and must be renewed every three years.Your employer may be able to renew your licence for you. If not, you will need to complete the renewal process yourself.You should apply for renewal as early as possible to avoid delays affecting your workability. You cannot legally work in the security sector without a valid SIA licence.SIA Renewal CostRenewing your SIA licence costs £204, the same as applying for a new licence. This fee is required every three years.No additional training or qualifications are needed for most licence renewals, except for renewing a Door Supervisor Licence, which requires extra training.How to Renew the SIA LicenceRenewing your licence is straightforward. Follow these steps:Step 1If you haven't already, create a personal online account on the SIA website. You will need this account to start the renewal process.Step 2Log in to your account and submit your renewal application. You must provide personal information, such as your addresses from the past five years. After submitting, you�ll receive instructions on the next steps.Step 3Follow the instructions provided and pay the renewal fee.The SIA may request additional documents, which they will notify you about. Once everything is submitted, the renewal process typically takes around 14 days.How to Work in the Security SectorYou must have an SIA licence to work as a Door Supervisor, Security Guard, or CCTV operator in the security sector.You must complete a relevant training course to get an SIA licence. After completing the course, you can apply for your licence and start working in security.Please note: Renewing your CCTV Licence does not require any refresher training. You can renew your licence by paying a fee of �204. The renewal process can be started up to four months before your licence expires.When Do I Need to Renew My SIA Licence?You must renew your SIA licence every three years to continue working in regulated security roles.It�s important to keep track of your licence expiration date and start the renewal process early to avoid any gaps in your ability to work. While the SIA usually sends reminders when your licence is due for renewal, it is your responsibility to renew on time.The renewal process may include updating your details, providing proof of required training or qualifications, and paying the renewal fee. If you don�t renew your licence before it expires, you won�t be allowed to work in a regulated security role until the renewal is complete.SIA Licence TypeRefresher Course RequiredCourse DurationDoor Supervisor LicenceTop-Up Door Supervisor Training2 daysSecurity Guard LicenceTop-Up Security Guard Training1 dayClose Protection LicenceTop-Up Close Protection Training3 daysCCTV Operator LicenceNo refresher course is requiredN/ASIA Top-Up Refresher Training for Door SupervisorsThe SIA Top-Up Refresher Training allows Door Supervisors to renew their expired licences. This updated course covers all the requirements for licence renewal and ensures compliance with the latest SIA standards.The SIA occasionally introduces extra training requirements to ensure licence holders stay updated with important new topics.For example:Door Supervisors: If you hold an SIA Door Supervisor Licence valid for three years, you must complete the Top-Up Door Supervisor Training to renew it.Security Guards: If you've completed the SIA Security Guard course, you must take the Top-Up Security Guard Training to continue working in the private security industry.Additional training is especially required if you have not obtained updated licence-linked qualifications introduced since the summer of 2010. This ensures all licence holders meet current standards.Looking to Book the SIA Licence Renewal Course?To renew your SIA licence, you must complete the required SIA Top-Up Training based on your licence type. Door Supervisors must complete a two-day Top-Up Training for Door Supervisors course, while Security Guard Top-Up is a one-day course. An Emergency First Aid course is compulsory for all licence renewals. Once you pass the required training, your certificate information will be uploaded to the SIA portal, allowing you to apply for your renewal immediately.What's New in the SIA Top-Up Refresher CourseThe course includes important updates, such as:Terror Threat AwarenessVulnerability Awareness, including issues like spikingAdvanced Physical Intervention SkillsThese updates align with current SIA standards, providing the skills to handle modern security challenges and ensuring a smooth licence renewal process.FAQsHow often do I need to renew my SIA licence?You must renew your SIA licence every three years to continue working in regulated security roles in the UK.Can I still renew my SIA licence after it expires?Yes, you can renew your SIA licence online for up to four months before it expires. However, SIA licences do not renew automatically, so you must complete the renewal process on time.What is the cost of renewing an SIA licence?Renewing your SIA licence costs �204, the same amount as applying for a new licence. This fee is required every three years.What additional training is required for renewing a Door Supervisor licence?To renew a Door Supervisor licence, complete the SIA Top-Up Door Supervisor Training. This course is mandatory for all Door Supervisors.How do I renew my SIA licence?To renew your SIA licence, create a personal account on the SIA website, log in, and submit your renewal application. You may need to provide personal information and pay the renewal fee. The process usually takes around 14 days.Can I work in the security sector without an SIA licence?You cannot legally work in the security sector without a valid SIA licence. Working as a Door Supervisor, Security Guard, or CCTV Operator is required in the UK.ConclusionRenewing your SIA licence is important for continuing to work in the UK security industry. Complete any necessary training, such as the Top-Up Training and Emergency First Aid, and submit your renewal application on time. Following the simple renewal process, you can maintain your eligibility and stay compliant with industry standards.
Aliza Hasnain
Trending articles
Consequences Of Poor Health & Safety Procedures in a Workplace
There can seem to be too many health and safety standards at times. It may not seem critical at the time, but delaying a legally necessary cleaning programme or skipping a periodic equipment maintenance check might have major repercussions.This essay will show the consequences of dispensing with your health and safety obligations, which should inspire you to prioritise health and safety in your company.Spending the time and money necessary to correct your health and safety culture is crucial because it can devastate your company, customers, and employees. Poor health and safety measures can leads to:Increased Risk of Ill Health and DeathSerious injuries or fatalities may occur due to your failure to implement sufficient health and safety procedures. A work-related illness or injury can affect an employee�s quality of life and keep them out of work for a while, but it can also hurt your business�s productivity, finances, and reputation, all of which can be challenging to repair.Four riders were seriously hurt when the Smiler roller coaster at Alton Towers crashed in the summer of 2015. An HSE investigation revealed no issues with the track, the vehicles, or the system intended to keep them apart while the ride was in operation. Nevertheless, HSE investigators �found the main reason to be a lack of comprehensive, reliable systems for taking safety-critical judgments. When working with passengers on the ride, personnel made several mistakes that the entire system [�] was unable to prevent.Following a guilty plea to violating section 3(1) of the Health and Safety at Work Act, 1974, Merlin Attractions was given a $5 million fine. Many people were hurt in the collision, and two teenagers had to have their legs amputated as a result. All of this was brought on by Merlin�s failure to give health and safety responsibilities more importance.The Smiler incident has served as a reminder that safety is of the utmost importance to the entire industry. Since then, Alton Towers has upgraded their safety systems and made technological changes to the Smiler roller coaster. �It is something we will never forget and it is something we are utterly determined will never be repeated,� said Nick Varney, chief executive of Merlin Entertainments.Loss of ReputationFor a company to prosper, it is essential to have a positive reputation. It may result in more customers and investors, a more positive perception of your company in the community, and more people wanting to join it. However, a weak health and safety culture will harm a company�s reputation.The Deepwater Horizon oil rig exploded in the Gulf of Mexico in 2010, killing eleven people and gravely injuring many more. When it was discovered that hazily written safety regulations caused the explosion, BP came under harsh criticism for the incident. According to the U.S.A. Chemical Safety and Hazard Investigation Board, �Several regulation features are inadequate or lacking.�BP lost about $40 billion as a result of the Deepwater Horizon accident, and their stock price fell.Legal RepercussionsMaking a workplace a safe place for employees is the legal obligation of an employer. If the employers don�t take care of their legal obligations, they could end up paying a lot in legal fees, paying a lot in fines, and even going to jail.A planned arson attack culminated in a fire and explosion at Crofty Point Metals Ltd in Swansea in July 2013. Even though the owner was fully aware that the security and safety procedures needed to be improved, he was nonetheless held accountable. He repeatedly disregarded enforcement notices that advised him to tighten security to stop unauthorised people from entering the site, both to the company and himself. After receiving their notifications, HSE inspectors returned to the facility in December 2016 and discovered open, unattended gates, loose gas cylinders dispersed throughout, and insufficient safety requirements.The business admitted guilt and paid heavy fines for breaking Sections 2 (1) and 3 (1) of the Health & Safety at Work Act, 1974. After entering a plea of guilty to violating Sections 2 (1), 3 (1), and 37 (1) of the Health & Safety at Work Act, 1974, the site owner received a year in prison and a 7-year ban from serving as a director or manager of any company.Decrease in Productivity, Increase in TurnoverIf you don�t value health and safety, your company may experience a decline in productivity and a rise in staff turnover as morale drops. Why should employees be encouraged to put in extra effort if you don�t demonstrate appreciation for them by meeting even the most basic needs? When going to work, everyone should feel secure. If not, they probably will search elsewhere.You should keep your team motivated and keep responsible staff who can work safely and productively by upholding your health and safety obligations.
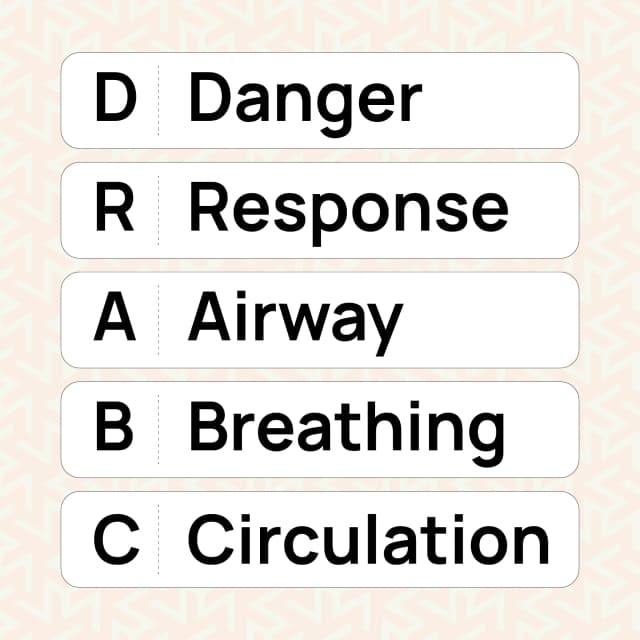
How To Perform the Primary Survey Using the DRABC Steps
When someone is unconscious, their life is in danger. Their airway might be blocked, they may not be breathing, and their blood circulation could have stopped. It is important to follow the primary survey steps to assess casualties in the order of DRABC: Danger, Response, Airway, Breathing, and Circulation. Remember to take quick action because brain damage or even death can happen quickly. A secondary survey is performed after completing the primary steps of first aid.Primary Survey in First Aid Using DRABCWhen helping someone in an emergency, you always start with the primary survey. This means you quickly assess what is happening and the person's needs.The primary survey uses the letters DRABC to help you remember the steps: Danger, Response, Airway, Breathing and Circulation.D - Danger: First, you check for danger around you, such as oncoming traffic or a falling object.R - Response: Next, see if the person responds. Gently shake their shoulders when you talk to them. Are they awake or unconscious?A - Airway: Then, make sure their airway is clear. That means checking if anything is blocking their breathing passage.B - Breathing: After that, check if they're breathing normally. Look, listen, and feel for any signs of breathing.C - Circulation: Finally, check for signs of circulation, like a pulse. This tells you if their heart is beating.Knowing what to do next could help save someone's life, so it's important to follow these steps in the correct order. .main{ border:3px solid #0f7c90; border-radius:20px; position: relative; font-family:roboto; font-weight: 400; color: #000; } .main-two{ position: absolute; top:-25px; left:45px; background-color:white; } .img-div{ border-radius : 100%; padding:2px 7px; background-color:#0f7c90; margin-right:5px; width: 50px; height: 50px; } .img{ width:30px; object-fit:contain; height:auto; border-radius : 100%; } @media only screen and (max-width: 600px) { .heading{ font-size:20px; } .img{ width:20px; object-fit:contain; height:auto; border-radius : 100%; } .img-div{ width: 40px; height: 40px; } .main-two{ left:25px; } } Ready to Learn More? Put your knowledge of the primary survey into practice by enrolling in a course today! Our First Aid courses offer complete training to help you handle critical situations. Whether you want to improve your skills or workplace safety, these courses help build confidence and expertise. View our Emergency First Aid at Work (EFAW) and Level 3 First Aid at Work courses. These courses meet the UK legal requirements and help you keep people safe. DRABC StepsDANGER - 1st Step of the Primary Survey DRABCThe first thing to do in an emergency is to check for dangers. Look around to see if anything could harm you, the person needing help, or anyone nearby. This helps you decide if it's safe to go close to someone who needs help.WHAT TO DOIf you see any hazards, like live electricity, try to make the area safe first. For example, if there's electricity, turn it off. Otherwise, use an insulating object, such as wood or plastic, to move the person away. When there is a risk of electricity, do not touch them directly.When you are sure it is safe, you can approach the person who needs assistance. But if it's still not secure, don't go near them. Instead, get emergency medical helpRESPONSE - 2nd Step of the Primary Survey DRABCA person can lose consciousness when something disrupts the brain's normal functioning. Here are some signs that someone might be unconscious:They can't respond to simple questions or touch.They might not realise when they're in danger and can't protect themselves.They can't clear their airways by coughing or swallowing. This means saliva, blood, vomit, or objects could block their breathing tubes. The tongue, which becomes floppy, might also fall back and block the throat.WHAT TO DOFirst, try to determine whether the person is unconscious by asking simple questions or telling them to do something simple, such as "What's your name?" or "Open your eyes," and gently shake them. If they don't respond, they're probably unconscious. Don't shake them vigorously, especially if they're children or babies.Place the individual in the side position, and examine his airway, breathing and pulse.If the unconscious person is breathing and has a pulse, keep them in the side position. Ensure their airway remains open and clear, and monitor their breathing and pulse regularly until medical assistance arrives.�How to Keep the Unconscious Person in a Side PositionThis is also called the lateral, recovery, or stable side position.Kneel beside the person.Straighten their far arm out, perpendicular to their body. Bend their near arm at the elbow and place it across their chest, with the fingers near the far shoulder.Bend their near leg up to the right angle of their body.Hold the shoulder and hip closest to you, gently rolling them onto their side. Their top leg should rest on the ground with the thigh at a right angle and the calf parallel to the straight leg.Rest their uppermost, bent arm on the elbow of the straight arm.the person is a child older than 1 year, gently tilt their head back. Their face should be slightly downwards so any fluid can drain from their mouth, and their tongue can fall forward, away from the airway.Pro Tip:When someone is unconscious, act fast. Use DRABC: Danger, Response, Airway, Breathing, Circulation. Brain damage or death can happen quickly if you delay.AIRWAY - 3rd Step of the Primary Survey DRABCNow, ensure the person's airway is clear. If they're unconscious:Gently tilt their head back and lift their chin with your hand on their forehead.Peep in their mouth to check whether something is obstructing their passageway.What to Do: If the person is responsiveCheck whether anything is obstructing their airway and causing difficulty breathing.If you see something, encourage them to clear it by coughing or using their hands.For adults and kids, you can help them by giving back slaps or abdominal thrusts. For babies under a year old, you can help them with back blows or chest thrusts.Once the blockage is cleared, move on to the next step.What To Do: If the person is responsiveCheck whether anything is obstructing their airway and causing difficulty breathing.If you see something, encourage them to clear it by coughing or using their hands.For adults and kids, you can help them by giving back slaps or abdominal thrusts. For babies under a year old, you can help them with back blows or chest thrusts.Once the blockage is cleared, move on to the next step.What To Do: If the person is unresponsiveIf you see something, try to remove it carefully. But don't put your fingers in their mouth if you can't see anything, as you might push a blockage deeper.BREATHING - 4th Step of the Primary Survey DRABCBreathing should be regular, quiet, and easy. Tilt the head back, watch the chest for movement, and listen for breathing sounds. Do this for about ten seconds to see if air comes from the mouth or nose.WHAT TO DOIf they're unresponsive and not breathing normally, call emergency services immediately. If you know CPR, start with rescue breaths. If not, do chest compressions. If there's an AED nearby, ask someone to bring it.Giving Rescue BreathsMouth-to-mouth resuscitation is the best way to give rescue breaths. Mouth-to-nose resuscitation is used for a jaw injury or if the person needs to be revived in water. Mouth-to-mask resuscitation is done by trained people to avoid direct contact, especially if the person might have a disease like hepatitis or HIV.Typically, 30 compressions followed by 2 rescue breaths are performed in case of abnormal breathing.Mouth-Mouth ResuscitationKneel beside the person.Lay them on their back.Gently tilt their head back and support their jaw with your fingers. Don't press on their throat. Their mouth should be slightly open.Pinch their nose closed. Take a deep breath and cover their mouth with yours, sealing gaps.Keep their head tilted and give 2 breaths, enough to make their chest rise slightly.Start compressions as recommended.When they start breathing again, please put them in the side position and check their airway, breathing, and pulse regularly.Follow similar steps for mouth-to-nose and mouth-to-mask resuscitation but adjust for the different techniques.CIRCULATION - 5th Step of the Primary Survey DRABCIn this step, check the person for any significant bleeding.What To DoIf they're bleeding heavily, try to stop it by pressing directly on the wound with a clean cloth or dressing. Then, call emergency services for help.Stay with them until help arrives. Try to keep them calm and reassure them that help is coming. If they're not bleeding but still unresponsive, put them in the recovery position. This helps keep their airway clear if they vomit.Cardiopulmonary Resuscitation (CPR)If someone's heart has stopped, CPR is vital to keep them alive until help arrives. CPR is exhausting, so it's best if two people can take turns to keep the rhythm right. Remember, even if you're not trained, attempting CPR is better than doing nothing.What To Remember During an EmergencyPlease don't go near the person unless it's safe. Check for danger to yourself, others, and the injured person first.Stay as calm as possible, even though you might feel upset, and try to reassure the injured person.Time is significant.Don't move the person unless you have to for safety reasons.Please don't leave them alone. Get someone to call for medical help straight away. But if you're alone and help won't come soon, you'll need to go for help yourself. Call 999 or the emergency number in your area.Keep messages to the emergency services short: say where you are, what's happened, how many people are involved, and how badly they're hurt.Please don't give them anything to eat or drink.First-Aid TrainingThe Emergency First Aid training course is designed for low-risk environments such as offices and small retail stores. It gives participants the fundamental knowledge and skills to effectively manage emergencies in these settings. .banner { border-radius: 10px; overflow: hidden; border: 2px solid #ccc; box-shadow: 0 4px 8px rgba(0, 0, 0, 0.2); background-color: #fdf9ee; } .book-now { color: white; background-color: #DF3D52; border: none; padding: 15px 60px; border-radius: 5px; cursor: pointer; font-size: 20px; text-decoration: none; } .book-now:hover { /*text-decoration: none;*/ color: white; background-color: #c33f50; } Get Trained in All First-Aid Skills First Aid Courses Book Now Rated Excellent on major review sites FAQsWhat does DRABC stand for in first aid?DRABC in the first-aid primary survey stands for Danger, Response, Airway, Breathing and Circulation.Should you carry out a primary survey on every casualty?Use a primary survey and apply the DRABC steps whenever you witness a casualty, such as an accident or a fall, provided it is safe to approach the injured person.What is the purpose of the primary survey?The purpose of the primary survey is to treat life-threatening casualties quickly. These accidents could include airway blockage, breathing difficulties, shock or a brain injury.How can you assess the responsiveness of a casualty?First, check if the person is unconscious by asking simple questions and gently shaking them. If they don't respond, they're likely unconscious. Avoid shaking them vigorously, especially if they're children or babies. Next, put the person in the side position and check their airway, breathing, and pulse.How many compressions must be performed in case of abnormal breathing?Typically, 30 compressions followed by 2 rescue breaths are performed in case of abnormal breathing.

Importance of Hard Hat Colour Codes on Construction Sites
Hard helmets must be worn on construction sites at all times to ensure worker safety since the risk of head injury can still be very high, even with all the safety precautions in place. Therefore, it is critical that everyone is aware of the rules governing them, including the use of colour coding.The Personal Protective Equipment Regulations of 1992 address PPE regulations. These rules now also apply to hard helmets on building sites. The most recent colour coding scheme, nevertheless, was unveiled by Build UK in 2016.The purpose of the hard hat colour codes for construction will be covered in this article.Hard Hats on Construction Sites: Compulsory or NotThe Health and Safety Executive (HSE) asserts that even though it isn�t explicitly stated in the regulations, all construction sites must have hard hats:�Does the law require head protection on construction sites? For the vast majority of cases yes � on almost all construction sites the risk of head injury are such that the law requires head protection.�Health and Safety Executive: Construction PPEEmployers are required under the Personal Protective Equipment Regulations of 1992 to give hard helmets to workers who may be in danger of head injuries. Even with safety precautions, this risk is typically considerable on construction sites; hence hard hats are always required.Construction site employees are the most apparent group at risk, but visitors and anyone else who could be vulnerable should also be taken into account. Employers are required to supply hard helmets that adhere to PPE safety standards to these groups of persons once they have determined who might be hurt and how during a risk assessment.Hard helmets are frequently colour-coded so that everyone on the job site can recognise those around them.Hard Hat Colour Codes and Their MeaningsBuild UK introduced a new colour-coding scheme for hard helmets in 2016. The construction industry and its member sites adhere to their colour scheme because they are the major representative organisation for the UK construction sector. The colours denote a specific position or rank, ensuring uniformity and comprehension across all building sites.The following are the hard hat colour codes:White: site managers, operatives, and traffic marshals.Black: site supervisors.Orange: slingers and signallers.Blue: everyone else on site who does not fall into the above categories, including visitors.A red fire marshal sticker will be on the hard hats of fire marshals, while a green first aider sticker will be on the hard hats of first responders. Furthermore, variously coloured high visibility vests can help identify particular roles.Significance of Hard Hat ColoursBuild UK introduced the new colour coding scheme to provide uniformity throughout the sector. It deals with consistency problems that frequently cause misunderstandings and even safety dangers. Everyone will be identified based on their function or status if they wear colour-coded hard hats.For instance, a site manager can be quickly recognised by their white hat in an emergency. Similar to this, visitors who may be particularly vulnerable to site risks will be identified by blue caps.There will be less uncertainty, a clearer definition of the hierarchy of workers on site, and a reduction in possible hazards if people can identify their level of responsibility and position on construction sites.Despite the fact that these colour codes are accepted as industry best practices and standards, many construction sites continue to utilise their colour coding scheme. For instance, you might still find yellow hard hats in use. Although using a colour scheme creates consistency, it is crucial that the hard hats adhere to safety rules.
Safe Lifting Guidelines and Techniques
Manual handling is one of the main factors contributing to occupational accidents and illness in the UK. It was the second-leading cause of work-related ill health, accounting for 30% of instances, and caused 8.9 million lost working days. There were 480,000 total cases, including long-standing ones, of work-related musculoskeletal illnesses in 2019�20, including 152,000 new cases (one of the most frequent repercussions of improper manual handling techniques).Understanding what influences a person�s capacity for safe task performance is essential. These figures show that the effects of inadequate manual handling are too widespread and can seriously impact people�s health. Therefore, you must comprehend proper manual handling, weight restrictions, and handling practices to guard against bodily harm.Businesses in the UK are required by law to safeguard the health and safety of their employees. Therefore, employing safe manual handling practices and abiding by weight restrictions will guarantee that your company complies with the requirements of the pertinent UK legislation and guidance guidelines.Your training in the principles and techniques of safe manual handling will be sufficient thanks to our manual handling training. A variety of our health and safety courses are also available here.This article will comprehensively review the manual handling weight restrictions and recommendations provided by the Health and Safety Executive and outlined in the law (HSE).Manual Handling Weight Limits for LiftingThere are no set restrictions on how much manual handling and lifting can be done at work because it relies on many variables, including the nature of the task and the worker�s unique skills.Employers are required to take adequate action to minimise the risk of injury caused to employees by manual handling activities to the lowest level reasonably possible under the Manual Handling Operations Regulations (MHOR) 1992. Different weight restrictions and techniques will be needed to achieve this depending on the sort of manual handling activity.The hierarchy of measures outlined by the MHOR states that production lines and other forms of automation should always be used before manual handling procedures are avoided. If this is not feasible, the responsibility holder must evaluate the hazards presented by manual handling activities at work and decide how to control them. Perform a risk analysis of the manual handling operations as part of this. Then, to lessen the dangers to people�s health and safety, they must implement the required safety measures.During the risk assessment for manual handling, duty holders must take into account the following 4 important factors:Task � For instance, how much time it will take, how often it will be performed, whether it is repetitive, whether it offers enough time for rest or recovery, and whether it requires twisting, stooping, or reaching upwards. All of these factors may influence how demanding the work is.Individual � Everyone has different physical abilities and limitations depending on various factors, such as age or physical make-up. New or pregnant mothers, persons with impairments, and people returning to work after an injury may all be particularly at risk. Since no two persons are similar, employers must tailor the work and safety procedures to each employee�s talents to ensure that everyone is equally protected from health and safety concerns.Load � It can be challenging for a person to secure a firm grip and maintain control of the weight if it is too large or bulky, challenging to hold, and has a fluctuating centre of gravity (for example, if it contains liquid). The body might be put under extra stress as a result of this.Environment � The task will be more challenging and consequently more physically demanding to do, for instance, if there isn�t enough room in the area for the person managing the weight to move comfortably, if the floor is uneven or has different levels, or if the person can�t see clearly. High workloads, short deadlines, and a lack of control over the task and working methods can all cause psychological reactions that increase the risk for people.TILE, or occasionally LITE, is the name of these four elements. They are crucial when determining safe lifting techniques and weight restrictions for particular manual handling activities. The MHOR and related HSE manual handling advice publications recommend weight restrictions for lifting, carrying, pushing, pulling, and team actions in light of these variables and other guidance.This information must be considered in the context of the particular manual handling activities at your place of employment because there is no one size fits all solution. However, the guidelines are helpful resources for the individual in charge of establishing the essential manual handling restrictions.Safe Lifting WeightsAlthough the MHOR does not specify weight restrictions, the HSE provides some lifting and lowering best practices. Although the HSE claims they employ �broad assumptions or generalisations where, if met, the risk of injury is deemed to be low,� they should not be referred to as �safe limits� because this depends on all the elements involved, as was noted above. Work performed outside these advised ranges is probably more likely to result in an injury.Based on information from the general population, the HSE�s lifting and lowering risk filter specifies overall safe lifting capacities for men and women as follows:This demonstrates that the average man�s safe upper limit for manually handling a load is 25 kg, and the average woman�s is 16 kg.It�s important to remember that this only applies if the person carrying the load can hold it close to their body and at knuckle height. It is no longer safe to manage a 25 kg burden if the load moves across the zones, such as when you lift a box from knuckle height to a shelf at shoulder height. The lower weight must be used if the load is anticipated to move across zones while the task is being completed.The fact that these risk filters only apply to manual handling operations where the load:Simple to hold in both hands.Is working under appropriate conditions.Can be supported using secure lifting and handling techniques with the worker�s body in a stable position.Enables holding against the body.It is not carried more than 10 metres without stopping.Does not impede the person�s ability to walk normally.Does not interfere with the carrier�s vision.Requires neither much below knuckle height nor much over elbow height for the carrier�s hands.without having to be hoisted first, it can be safely put upon the shoulder The filter values can be used up to 20 metres in this circumstance.Certain elements will necessitate a complete evaluation of manual handling activities and possibly differing weight limitations and handling techniques.For instance, if the weights are greater than those in the risk mentioned above, filter if the handling requires twisting, if there is more than one lift every two minutes, if a team is involved, if the weights vary significantly, if the load is challenging to grasp, and if the person is at an elevated risk (e.g. those with disabilities or a recent injury).Safe Lifting Weights and TechniquesDuty holders can assess the most frequent risk elements in lifting and lowering, carrying, and team handling tasks using the HSE Manual Handling Assessment Charts (the MAC tool). It uses a number of visuals and infographics to help illustrate how different elements enhance the amount of risk and how each risk range will demand careful thought on how to preserve people�s health.For instance, determining the weight and frequency of the loads involved in lifting is the first topic covered in this tutorial. It demonstrates how the level of risk rises as lift rate and weight increase.As opposed to lower bands, the risk has increased as tasks move into a new colour band, and more safety controls are likely to be needed.The MAC tool addresses the following manual handling risk areas:Lifting Operations:Load weight/frequency.Vertical lift zones.Postural constraints.Hand distance from the lower back.Floor surface.Torso twisting and sideways bending.Grip on the load.Environmental factors.Carrying Operations:Load weight/frequency.Asymmetrical torso or load.Floor surface.Hand distance from the lower back.Obstacles on the route.Carry distance.Postural constraints.Grip on the load.Environmental factors.Team Handling Operations:�Load weight.Vertical lift zones.Hand distance from the lower back.Grip on the load.Torso twisting and sideways bending.Carry distance.Postural constraints.Communication, coordination, and control.Floor surface.Obstacles on the route.Environmental factors.It will be crucial for your employer to take into account the advice in the MAC tool and the risk zones specified for each location if any of these relate to your line of work
Tips for Reversing Safely
Many individuals do not consider reversing to be a big risk because of the relatively slow impact speed; however, over 60% of all commercial vehicle accident claims include reversing, with heavy goods vehicles (HGVs) leading the pack with 19% of these claims, vans coming in at 15%, and corporate cars coming in at 10%.However, people can also get hurt in addition to risking damage to their cars and other property. Surprisingly, reversing accounts for nearly a quarter of all vehicle-related workplace fatalities.Poor rearward view and the driver�s failure to account for the vehicle�s size and obstruction are two factors contributing to many collisions. Most reversing collisions happen at modest speeds and might be avoided with basic safety measures and altered driving habits.Even experienced drivers occasionally require assistance while trying to reverse their cars in tricky situations. Attending a driving school that offers specialized courses on reversing and maneuvering in tight spaces can be incredibly beneficial. We can all contribute to lowering these statistics by taking extra care and attention. Here are some of our top suggestions for safer reversing.Safety Tips Before ReversingWalk around the car to check for dangers and ensure the path is clear of obstacles. If it�s blocked, is there another way to get there?Is the area where you need to be clear of other workers and/or pedestrians?Check for impediments from the overhead and ground levels. Think about whether your car will fit in this space.Before reversing, get out of your vehicle and verify if you can see behind you.Put on your hazard warning lights or use your horn to warn nearby workers and/or pedestrians.What is the distance that you intend to go backwards? If possible, steer clear of reverse-driving long distances.Keep an eye out for other people, pedestrians, and kids. Children are unpredictable and have no idea why you�re relocating the car.Safety Tips After ReversingUtilise the assistance of a trained banksman (enrol in a traffic marshal course to become a trained banksman) whose responsibility it is to direct traffic and maintain the reversing area clear of pedestrians. Always ask for assistance if needed rather than taking a chance of getting hurt.Make sure you comprehend the banksman�s signs before beginning the reversing manoeuvre when using one. Stop right away if you lose sight of him or her.Reversing into space is significantly simpler than doing so to enter moving traffic. When you deliver, start your reversing manoeuvre as soon as you get there.Use any floor-mounted recommendations that are there to precisely position your car.Reverse gently and cautiously, keeping the distance to a minimum. Be ready to cease right away.If the area you can see in your mirrors becomes blocked or you�re unsure of the distances, stop, exit your car, and inspect the area�s accessibility before attempting the manoeuvre again.Tips for Reversing SafelyTo lessen the risk involved with reversing automobiles, consider the following advice:Is reversing both prudent and required?Ensure the car�s rear-view mirrors are clean and correctly set to maximise rear vision.Consider installing blind spot mirrors or �fish eye� mirrors to improve side and rear vision.A long reverse should not be performed. Driving around the block or turning around may be safer and simpler.Visually scan the environment as you approach a reverse parking spot for obstructions.Any road should always be approached and exited from in a forward orientation.Never go backwards onto a major road from a minor road.Use the horn on the car to alert pedestrians before reversing over a path that is obscured or another area where there may be pedestrians, or add an audible reverse alarm.Whenever entering a roadway from a driveway, give way to pedestrians.Use the mirrors to examine both sides as you carefully reverse. Look back and keep looking back while you are travelling backwards.Vehicles in reverse do not have the right of way. If a car comes up behind you, stop and GIVE WAY until it passes.Someone might be able to direct the driver if there is any doubt about whether the path is clear due to blind spots. If not, the driver should exit the vehicle and look for obstructions.Don�t be embarrassed to ask someone to advise you when you reverse. Using a guide is less awkward than crashing a car.Before reversing from a parking space with a limited rear view, walk around the car and look for any hazards.When operating an unknown vehicle, practise backing up to become familiar with the vehicle�s turning radius, blind spots, and rear view.Use smaller automobiles for the greatest fit and simpler parking in confined parking spaces.Vehicle Safety DevicesExternal rear-view and side-mounted mirrorsRefractive lenses are installed in rear-view mirrors or CCTV systems to improve rear-view visibility for drivers.Fitted reversing alarms, either audible or with flashing lights�Sensing� or �trip� systems that alert the driver or cause the vehicle to stop when they detect an impediment close to or in touch with the vehicle
How to Avoid Manual Handling Risks?
Manual handling refers to moving or supporting a burden with the hands or using physical force. It entails moving, carrying, pushing, tugging, and lifting a load. An object that can be moved, such as a box or package, a person or an animal, or something that is being pushed or dragged, such as a roll cage or pallet truck, is referred to as a load.What are manual handling injuries?Injuries caused by manual handling are a subset of musculoskeletal illnesses (MSDs). Musculoskeletal disorders are illnesses and injuries that can hurt the back, joints, and limbs.Where can manual handling risks be found?There are risks associated with manual handling in all workplaces, including farms, construction sites, offices, warehouses, hospitals, and when making deliveries. Risk factors for developing MSDs include strenuous physical labour, repetitive handling, uncomfortable postures, and previous or current injuries or conditions. Additionally, a non-job-related injury, such as one sustained during sports, may worsen due to employment.While you can prevent some MSDs by taking the steps outlined here, you cannot prevent all of them. Encourage employees to notify you or their worker representative of any symptoms as soon as possible, before they worsen, so you can take precautions to lower the risk.Consider seeking guidance from an occupational health practitioner regarding a worker�s fitness for work and any limits or changes to their employment that may be necessary if your employees have manifested symptoms, especially if they work in a fitness studio.What are manual handling regulations?You must evaluate your employees� health and safety risks under the Management of Health and Safety at Work Regulations.You should also abide by the Manual Handling Operations Regulations, which identify dangerous manual handling of loads (the Manual Handling Regulations).According to the Manual Handling Regulations, there is a clear hierarchy of steps you must take to reduce the hazards associated with hazardous manual handling.Avoid dangerous manual handling tasks �as far as reasonably feasible�;Evaluate the risk of worker injury from any dangerous manual handling that cannot be avoided;Lower the risk of worker injury from hazardous manual handling to the least reasonably practical level.Workers also have duties. They shouldEnsure that their activities do not endanger others by adhering to the systems of work established for their health and safety,Use any equipment provided for that purpose properly,Cooperate with the employer on health and safety issues, inform them about changes, and identify hazardous handling activities.Consult with and involve the staff. Your employees and their representatives are familiar with the dangers associated with the workplace and frequently provide helpful suggestions for reducing them.How to access manual handling?When performing potentially dangerous manual handling tasks that cannot be avoided, evaluate the risk of injury.You should take into account the assignment, the workload, the setting, and each person�s capacity, for instance:the frequency of the taskhow far the load is lifted, lowered or carriedthe frequency of the taskpoor floor surfacespoor lighting, extremes of temperatureworkers� strength, fitness and underlying medical conditionsthe nature of the loadthe weight of the loadthe postures adoptedHow to avoid hazardous manual handling?You can stay away from risky manual handling tasks by:Automating or mechanising the process, restructuring the operation to prevent transferring the loadDesigning a plant or work system is the optimal moment to decide about mechanisation or automation.Design a process� arrangement to minimise the mobility of materials.To lessen the risk of damage, think about adding things like a conveyor, chute, pallet truck, electric or manual hoist, or lift truck. Manual handling dangers can also be decreased or eliminated with mechanical aids.Manual Handling TrainingSafety in manual handling can be achieved through information and training. The handling activities should always be designed with safety as the primary consideration. However, it cannot defeat a problem by itself. If the activity cannot be avoided and you have already taken precautions to lessen the risk, manual handling training is crucial to further manage the risk of damage.inadequate mechanical assistance,poorly designed activities,inappropriate weights, andan unsatisfactory working environment.Hurak�s manual handling training encompasses information relevant to the position, such as:Factors that increase the risk of injury from manual labour;Systems of work that is appropriate for the individual�s tasks and environment;Usage of tools and machineryHow to handle objects safely, including appropriate handling practices;Practical task that is appropriate for the position to enable the trainer to spot and correct anything the trainee is performing unsafely;Ways to report symptoms and injuries.
Everything to Know About CITB
AnalysisWhat is CITB?The Construction Industry Training Board is known by its initials �CITB�. They are responsible for enhancing industry training and assisting skill development to boost the UK�s construction sector. Despite its strong collaboration with the government and the education department, they remain an independent organisation.To achieve this goal, CITB has developed some essential courses for various jobs in the construction sector. The majority of construction employees benefit greatly from�CITB courses, particularly when it comes to workplace health and safety.Is CITB the same as CSCS?Construction Skills Certification Scheme, or CSCS, is the organisation that grants employees the certification they need to demonstrate their employment readiness. The most popular way to accomplish this is by giving employees CSCS cards. Although it is not required by law, most construction employees must possess the appropriate CSCS card for their job function to enter the site.CITB and CSCS are two distinct organisations, sharing several well-known names in construction health and safety training. However, the two organisations are connected; for instance, candidates for a Labourer�s Green Card must have successfully completed the CITB Health and Safety Awareness course and the CITB Health, Safety & Environment (HS&E) test within the previous two years. Any CSCS card application must include the HS&E test. Later, we shall discuss this test in further depth.Check out last week�s blog, �What is CSCS?� for a detailed explanation of the various card kinds and the eligibility requirements.�How do I get a CITB card?Due to the affiliation between the two organisations, CSCS cards may occasionally be referred to as �CITB cards.� Do not be concerned; they are the same.Applicants must have fulfilled the appropriate requirements to obtain a CSCS card. These often include the individual finishing an applicable NVQ. This is not true for CSCS red cards, which are given to learners who have experience but have not finished their certifications. As a temporary remedy, red cards are given out to staff on-site so they can finish their training.Workers must have passed the�CITB Health, Safety & Environment test�within the last two years to receive a CSCS card of any colour. Later, we shall discuss this test in further depth.�Visit the CSCS page�on our website for a more thorough overview of the requirements accepted for CSCS cards.�How long does a CITB card last?The length of time a red card is valid varies based on the issued type. Most CSCS cards have a 5-year expiration date. The card must be renewed when this period has ended.Please remember that it cannot be renewed after a red card has expired. Once their training is complete, employees must apply for a change of colour card.What is the CITB test?Any construction worker�s training must include the CITB Health, Safety & Environment (HS&E) test to guarantee their safety while working on the job site. When applying for any CSCS card, it is a requirement that you have passed this test within the last two years.A series of questions about their fundamental construction health and safety standards make up the test. Each exam allows applicants 45 minutes to respond to 50 questions that gauge their knowledge of environmental, health, and safety issues.Operatives, Specialists, and Managers & Professionals tests are the three categories of CITB assessments. All three examinations cover much of the same material; however, the tougher tests will have more challenging questions pertinent to the position. Candidates may request questions on specialised tests relevant to the position they are applying for. For instance, questions tailored specifically to the field of demolition workers are possible.By going to the CITB website, you can register for your test online. The tests are $21 each.What to bring for a CITB test?Before taking the test, candidates must present a legitimate form of identification with their photo and signature. Passports and licences that are no older than six months will be accepted.The student will need to present two kinds of alternative identification if they don�t have either of these forms of identity. There are two categories of acceptable forms of identification: A and B.�ABNon-UK Driving LicenceMarkWork ID CardDebit CardStudent ID CardPaper Driving LicencePassport without signatureNational Insurance Card / HMRC LetterCitizen�s CardCheque Guarantee CardEU Country ID CardBank StatementCITB Scheme CardInland Revenue CardTrade Union CardUK Travel DocumentBritish Armed Forces CardB79 Notification of Discharge LetterYoung Scots CardBuilding Society PassbookProof of Age Card�The candidate must present both category A and B forms of identification if they cannot present a current passport or photo driver�s licence. They won�t be able to take their exam and get a refund if they don�t comply. For a complete explanation of their ID requirements, visit the CITB website. div.wpforms-container-full .wpforms-form label.wpforms-error{ display: none; } /* The Modal (background) */ .ebook-modal { display: none; /* Hidden by default */ position: fixed; /* Stay in place */ z-index: 1; /* Sit on top */ padding-top: 100px; /* Location of the box */ left: 0; top: 0; width: 100%; /* Full width */ height: 100%; /* Full height */ overflow: auto; /* Enable scroll if needed */ background-color: rgb(0,0,0); /* Fallback color */ background-color: rgba(0,0,0,0.4); /* Black w/ opacity */ } div.wpforms-container-full .wpforms-form input[type=submit], div.wpforms-container-full .wpforms-form button[type=submit], div.wpforms-container-full .wpforms-form .wpforms-page-button { border: 1px solid #ddd; font-size: 1em; font-family: inherit; padding: 9px 31px; background: #0f7c90; color: white; /* display: flex; */ /* width: 100%; */ position: absolute; bottom: -418px; right: -150px; /* margin: auto; */ justify-content: center; align-items: center; } /* Modal Content */ .ebook-modal-content { display: flex; flex-direction: column; justify-content: space-between; align-items: baseline; background-color: #fefefe; margin: auto; padding: 31px; border: 1px solid #888; width: 30%; position: relative; } /* The Close Button */ .ebookModal-close { color: #aaaaaa; float: right; font-size: 20px; font-weight: bold; cursor: pointer; position: absolute; right: 21px; top: 10px; } .ebookModal-close:hover, .ebookModal-close:focus { color: #000; text-decoration: none; cursor: pointer; } div.wpforms-container-full { margin: 0px auto 20px;!important } .ebookModal-header{ color:#0f7c90;font-size:30px;margin:0 30px } @media (max-width:576.888px){ .ebook-modal-content { width: 90%; } } @media (max-width:768.888px){ .ebook-modal-content { width: 70%; } .ebookModal-header{ font-size:20px!important; margin:0 } } @media (min-width:768.888px){ .ebook-modal-content { width: 50%; } } @media (max-width:1024.888px){ div.wpforms-container-full .wpforms-form input[type=submit], div.wpforms-container-full .wpforms-form button[type=submit], div.wpforms-container-full .wpforms-form .wpforms-page-button { width: 100%; position: static; } .ebookModal-header{ margin:0; font-size: 25px; } } @media (max-width:1280.888px){ .ebookModal-header{ margin:0; font-size: 30px; } } @media (min-width:992px){ .wpforms-submit-spinner{ max-width: 100%!important; position: absolute!important; top:250px!important; left:150px!important; transform: translate(-50%,-50%)!important; } @media (min-width:1280.888px){ div.wpforms-container-full .wpforms-form input[type=submit], div.wpforms-container-full .wpforms-form button[type=submit], div.wpforms-container-full .wpforms-form .wpforms-page-button { border: 1px solid #ddd; font-size: 1em; font-family: inherit; padding: 9px 31px; background: #0f7c90; color: white; /* display: flex; */ /* width: 100%; */ position: absolute; bottom: -380px; right: -150px; /* margin: auto; */ justify-content: center; align-items: center; } } Download our CITB Operatives and Specialists Test Prep Book for free! × [wpforms id="14869" title="false"] #myImg{ cursor: pointer; } Site Safety Plus CoursesHurak offers a variety of CITB courses from the Site Safety Plus catalogue. Specifically for the building, civil engineering, and related industries, Site Safety Plus courses have been developed. The construction industry�s training programmes are offered in a variety of disciplines and career levels:Site Supervision Safety Training Scheme (SSSTS)�� This course examines health and safety, employee welfare, and expanding environmental concerns within the construction industry in addition to covering the legal obligations that all supervisors need to be aware of when it comes to managing a construction site.Site Management Safety Training Scheme (SMSTS)���The CITB SMSTS course is designed for managers working in the construction industry and takes a comprehensive look at health and safety regulations and documentation. Participants will leave this 5-day training with a practical understanding of how to correctly document health and safety requirements.Site Management Safety Training Scheme � Refresher (SMSTS-R)�� The CITB SMSTS Refresher Course enables delegates to renew their initial qualification when it is about to expire by going over all of the material that was covered in the initial course. To make sure that all delegates are completely aware of their responsibilities, any recently enacted amendments to health and safety regulations will be covered.Site Supervision Safety Training Scheme � Refresher (SSSTS-R)���This course will update your knowledge of health and safety issues and provide you with insight into recent legislative developments and how they may affect the day-to-day operations of your company.

How To Administer CPR
Medical emergencies that require CPR can occur unexpectedly in any location. According to the Resuscitation Council UK, most cardiac arrests (72%) occur in the home or workplace (15%). Everyone needs basic CPR knowledge, as this skill could save someone's life.What is Cardiopulmonary Resuscitation (CPR)?Cardiopulmonary Resuscitation (CPR) is a critical procedure in first aid. It involves artificial respiration, which supplies oxygen to the lungs, and artificial circulation, which maintains blood flow throughout the body.CPR's primary objective is to provide an appropriate supply of oxygenated blood to reach the brain and other organs.This prevents tissue damage until the heart can resume normal function or professional medical assistance arrives. It is important to note that CPR is most effective when chest compressions are performed continuously.Why Perform CPR: Understanding Cardiac ArrestWhen someone experiences cardiac arrest, their heart stops beating properly, blocking blood flow to the brain. The person becomes unresponsive and stops breathing.Although a cardiac arrest marks a state of clinical death, applying CPR on time and a defibrillator presents a chance to restore a regular heartbeat.Common causes of cardiac arrest include:heart attackssevere injurieselectrical shockdrug overdosedrowningsuffocationWhen administering CPR, you are responsible for the casualty's cardiovascular and respiratory function. This procedure slows down the progression of their life-threatening condition till professional medical help arrives to take control of the situation.When to Use CPRCPR is needed when someone is unresponsive and not breathing normally. It is also required when a person is not breathing at all. For instance, if someone is rescued from drowning, they may need CPR to help them start breathing again. Similarly, if someone is severely choking, bleeding heavily, or in shock, CPR may be necessary.If you encounter an unresponsive person who has collapsed, you should perform a primary survey using the DRABC steps. This involves checking if the person is breathing by placing your cheek near their mouth.Observe their chest for any movement for about 10 seconds. If the person is unconscious but breathing normally, you should put them in the recovery position. However, if they are unconscious and not breathing properly, you should be prepared to administer CPR. .main{ border:3px solid #0f7c90; border-radius:20px; position: relative; font-family:roboto; font-weight: 400; color: #000; } .main-two{ position: absolute; top:-25px; left:45px; background-color:white; } .img-div{ border-radius : 100%; padding:2px 7px; background-color:#0f7c90; margin-right:5px; width: 50px; height: 50px; } .img{ width:30px; object-fit:contain; height:auto; border-radius : 100%; } @media only screen and (max-width: 600px) { .heading{ font-size:20px; } .img{ width:20px; object-fit:contain; height:auto; border-radius : 100%; } .img-div{ width: 40px; height: 40px; } .main-two{ left:25px; } } Ready to Learn More? Knowing CPR is important in emergencies, but there's more to first aid. Our First Aid courses offer complete training to help you handle critical situations. Whether you want to improve your skills or workplace safety, these courses help build confidence and expertise. View our Emergency First Aid at Work (EFAW) and Level 3 First Aid at Work courses. These courses meet the UK legal requirements and help you keep people safe. How to Administer CPR on an AdultFirst, assess the safety of the scene. Then, check the person's responsiveness by tapping and asking if they are okay. Conduct a primary survey by gently tilting the head back to make sure the airway is clear.Check for breathing for 5 to 10 seconds by looking, listening, and feeling for breaths.How To Do a CPR Compression on an AdultIf the person is not breathing or their breaths are weak (known as agonal breaths), place your hands in the middle of their chest with your shoulders directly above your hands. Keep your elbows straight.Agonal Breathing:Agonal breathing occurs when someone's breathing is irregular and gasping, often making odd sounds. It can sometimes occur during a cardiac arrest. Bystanders may think the person is breathing normally. Treating someone with agonal breathing as if they are not breathing at all is essential.Give 30 chest compressions - press down firmly and quickly!Use the heels of your hands to push straight down on the breastbone, about 5-6 cm (2-2.4 inches) deep.Release pressure entirely after each compression to let the chest come back up. Keep a steady rhythm, aiming for 100 to 120 compressions per minute. Count out loud to keep track.How To Breathe into an Adult�s Mouth During CPRNext, if you are trained, tilt the person's head back and lift their chin to open the airway. Pinch the soft part of their nose closed. If you have a barrier device, use it. Then, give two breaths into the person's mouth, each lasting about one second, enough to raise the chest.This makes one cycle of 30 compressions followed by 2 breaths.�Keep doing CPR until an AED arrives, the person starts responding, or you are too tired to continue. When the defibrillator arrives, apply it to the person immediately.How to Administer CPR on a ChildLook around the area where the casualty has occurred.Check to see if the child responds. If not, get medical help and an AED if possible.If you are alone and do not have a phone, do CPR for 5 cycles (around 2 minutes), then go for help. If you can, bring the child with you.Next, check the airway and breathing for between 5 and 10 seconds. .banner { border-radius: 10px; overflow: hidden; border: 2px solid #ccc; box-shadow: 0 4px 8px rgba(0, 0, 0, 0.2); background-color: #fdf9ee; } .book-now { color: white; background-color: #DF3D52; border: none; padding: 15px 60px; border-radius: 5px; cursor: pointer; font-size: 20px; text-decoration: none; } .book-now:hover { /*text-decoration: none;*/ color: white; background-color: #c33f50; } Get Trained in All First-Aid Skills First Aid Courses Book Now Rated Excellent on major review sites How To Do a CPR Compression on a ChildIf the child is not breathing or breathing well, place your hands in the middle of their chest and press down firmly. Keep your elbows straight. Depending on the child's size, you can use one or two hands.Give 30 chest compressions: Push firmly and quickly!Use the heels of your hands to press straight down on the breastbone. Each compression should be about a third of the chest depth or 5 cm (2 inches) deep.�After each compression, release pressure completely to let the chest back up. Keep a steady rhythm, aiming for 100 to 120 compressions per minute. Count out loud to keep track.How To Breathe into a Child�s Mouth During CPROnce you have performed compressions, open the airway by tilting the head back and lifting the chin. Use a barrier device if you have one. Then, give two breaths into the child�s mouth, just enough air to raise their chest.This makes one cycle of 30 compressions followed by 2 breaths.Keep doing CPR until an AED arrives, the person starts responding, or someone else takes over. If you get too tired, stop. Apply the AED as soon as it comes.How To Administer CPR for Babies - Infant Casualty Perform a scene survey of where the casualty occurred. Check if the baby responds. Gently tap their feet. If there is no response, get medical help and an AED if possible. If you are alone and do not have a phone, do CPR for 1 minute, then get help. If you can, carry the baby with you. Next, open their airway by touching their forehead and gently tilting their head back. Use the fingertips of your other hand to lift their chin. Put your lips around the infant�s mouth and nose and blow gently for one second until their chest rises. Remove your mouth and wait for your chest to fall back to normal. Repeat this for a total of five rescue breaths.How To Do a CPR Compression on an InfantPlace two fingers just below the nipple line on the baby's chest.Press down on the breastbone about 4 cm (1 1/2 inches), around one-third of the chest depth.Do 30 chest compressions followed by 2 breaths (30:2)Keep doing CPR until an AED is used, someone else takes over, or you are too tired. Use the AED as soon as it arrives.How To Breathe into an Infant�s Mouth During CPRBabies have big heads compared to their bodies, which can cause their airways to close. When babies lie on their backs, their heads tilt forward, closing their airway further.When performing CPR, you might find putting a thin pad under the patient's shoulders useful to help keep the airway open. But do not spend time looking for one.Types of CPRDepending on the circumstances and the number of people involved, CPR can be of different types:Chest compression-only CPRDispatcher-assisted CPRHow to take over CPR from another rescuerTwo-rescuer CPRChest Compression-Only CPRCPR guidelines emphasise recognising emergencies early and the importance of calling 9-1-1 if you find someone collapsed and unresponsive.Compression-only CPR means doing chest compressions without mouth-to-mouth breaths. Give solid and quick compressions at the centre of the chest, aiming for 100 to 120 compressions per minute. Although this does not give the person oxygen, it is an option for people not trained in traditional CPR or those unsure of their ability.Dispatcher-assisted CPRIn some areas, when you call 9-1-1, the dispatcher can guide you through the emergency until medical help arrives. Put your phone on speaker and place it near the person's head. Keep talking to the dispatcher while you help the person.Hand-Over CPR: Taking Over CPR from Another RescuerOffer your assistance and let the rescuer know you are trained in CPR. Make sure medical help has been called.Do 30 chest compressions followed by 2 breaths. Use your barrier device if you have one.Two-Rescuer CPRIf two trained rescuers are available, they can work together to do CPR on someone who needs it. There are three good reasons why it is better for two people to do CPR:Doing CPR can be tiring. As the first aider gets tired, their chest compression quality might worsen. If two people share the job of compressing the chest, they can keep doing good compressions for longer.With two people doing CPR, they can take turns doing chest compressions and giving breaths. This means the compressions do not have to stop as often.When two people work together, they can encourage and help each other during a difficult situation. One person stays by the casualty's head to do CPR with two rescuers. He keeps the airway open and breathes after every 30 compressions. The other person does the chest compressions.To keep the compressions effective, they should switch roles every 5 cycles of compressions and breaths, about every 2 minutes.ConclusionIf someone is not responding and breathing normally, CPR can help them survive until paramedics arrive. So, everyone needs to know how to do CPR, even if you still need to be formally trained in first aid. If you are not qualified, you should do chest compressions only for adults. But for children and babies, it is best to call for help first and then do CPR. Either way, doing CPR increases the chances of the person surviving.
Protecting Construction Workers From Asbestos Dust
What is asbestos?Asbestos is a naturally found fibrous rock. Up until 1999, it was frequently utilised in residences and other constructions. The 3 main categories of asbestos are:Crocidolite (also known as blue asbestos)Amosite (also known as brown asbestos)Chrysotile (also known as white asbestos)Asbestos provides high fire protection qualities, inhibits corrosion, and functions as an insulator (to keep heat in and cold out). It was widely utilised from the 1950s to the middle of the 1980s. As a result, it can be found in various building fixtures and construction materials, including ceiling tiles, pipe insulation, boilers, and sprayed coatings. However, it can still be found in structures constructed before 2000.When asbestos fibres become airborne, the materials threaten your health. This occurs when asbestos-containing materials are cut, drilled, or otherwise damaged while being used in construction. High levels of asbestos fibres may be inhaled while working on or near damaged asbestos. The total amount of these fibres you breathe is a major risk factor for asbestos-related disease. Regularly completing simple tasks can put you at risk. The Control of Asbestos Regulations 2012 established guidelines for safeguarding workers and others from the dangers of asbestos exposure.What is the risk to construction workers?The most significant occupational illness risk for construction workers is asbestos. According to data the HSE commissioned, the industry�s cancer mortality accounted for more than two-thirds of the over 2,500 deaths of construction workers in 2005. There are two types of cancers that asbestos can cause:Mesothelioma � a lining-related lung cancer. It almost usually results in death and is brought on by asbestos exposure.Asbestos-related lung cancer � Almost always, this is lethal.The other diseases caused by asbestos are:Asbestosis Diffuse Pleural ThickeningThe cumulative effect of asbestos exposure makes you more likely to develop diseases linked to asbestos in the future. However, these illnesses won�t harm you right away because it might take anywhere between 15 and 60 years for symptoms to appear. It is also significant to keep in mind that smoking greatly increases your risk of lung cancer caused by asbestos.How to Prevent this risk?You can take several actions, starting with always keeping in mind the chance that the building you are working on might contain asbestos.Employers are required to do a risk assessment before beginning any maintenance, renovation, demolition, or other construction work to determine the presence of asbestos.It is the responsibility of non-domestic property owners or managers to manage asbestos. This entails locating and documenting any asbestos location and state. Anyone working must access this information to help them manage exposure risks to themselves, their employees, and others.�5 Ways for Construction Workers to Avoid Asbestos ExposureTake an Asbestos Safety CourseAll personnel working on job sites with asbestos are expected to receive asbestos awareness training. These training sessions cover the following topics and instruct participants on how to prevent asbestos exposure:How to spot asbestos-containing itemsContributing factors to asbestos exposureUse of respiratorsWorkplace asbestos prevention measures Potential health implications of asbestos exposureRequirements for medical surveillance programmesasbestos exposure increases the risk of lung cancer in smokersInformation about how to reach smoking cessation programmesWhen it comes to asbestos exposure, knowledge is power. To safeguard yourself and your family from exposure, learn everything you can about prevention.Use a HEPA-Filter Mask and VacuumThe best defence against asbestos fibre inhalation is a HEPA-filter mask. High-efficiency particulate air (HEPA) filters can capture 99.97% fibres with a diameter of 0.3 micrometres or less. Most asbestos fibres are captured by these filters when they are utilised appropriately. Employees who work around asbestos must have access to these masks from their employers.Local exhaust ventilation with HEPA-filter dust collection devices is required to collect as many asbestos fibres as feasible during certain asbestos jobs. To remove asbestos dust and debris, vacuums with HEPA filters are necessary.Avoid Practices That Disturb DustOn projects involving asbestos, specific work techniques that cause the emission of asbestos fibres are forbidden.Some examples of these practices are:Use of saws lacking a HEPA-filtered exhaust or a point-of-cut ventilatorCompressed air is used to get rid of asbestos-containing materialsAny method of dry sweeping or shovelling that involves removing asbestos-related dust or debrisRequiring workers to put in extra time at asbestos construction sitesWet MethodApply water frequently while you work with asbestos-containing materials (ACM) and moisten it first to avoid the release of asbestos fibres. It�s crucial to keep dust and debris moist to keep asbestos material contained in one place.Know if the Workplace Contains AsbestosThese days, demolition and restoration projects account for most construction work that poses a risk of asbestos exposure. Besides roofing items, older construction materials are more likely to contain asbestos than new ones.When there is asbestos in a building, the only people to contact are the owners and homeowners. Owners shall identify ACM and provide notice to anyone who will perform work on the building. No databases keep track of which structures house asbestos. Make inquiries regarding ACM with the building owner to safeguard yourself against exposure.