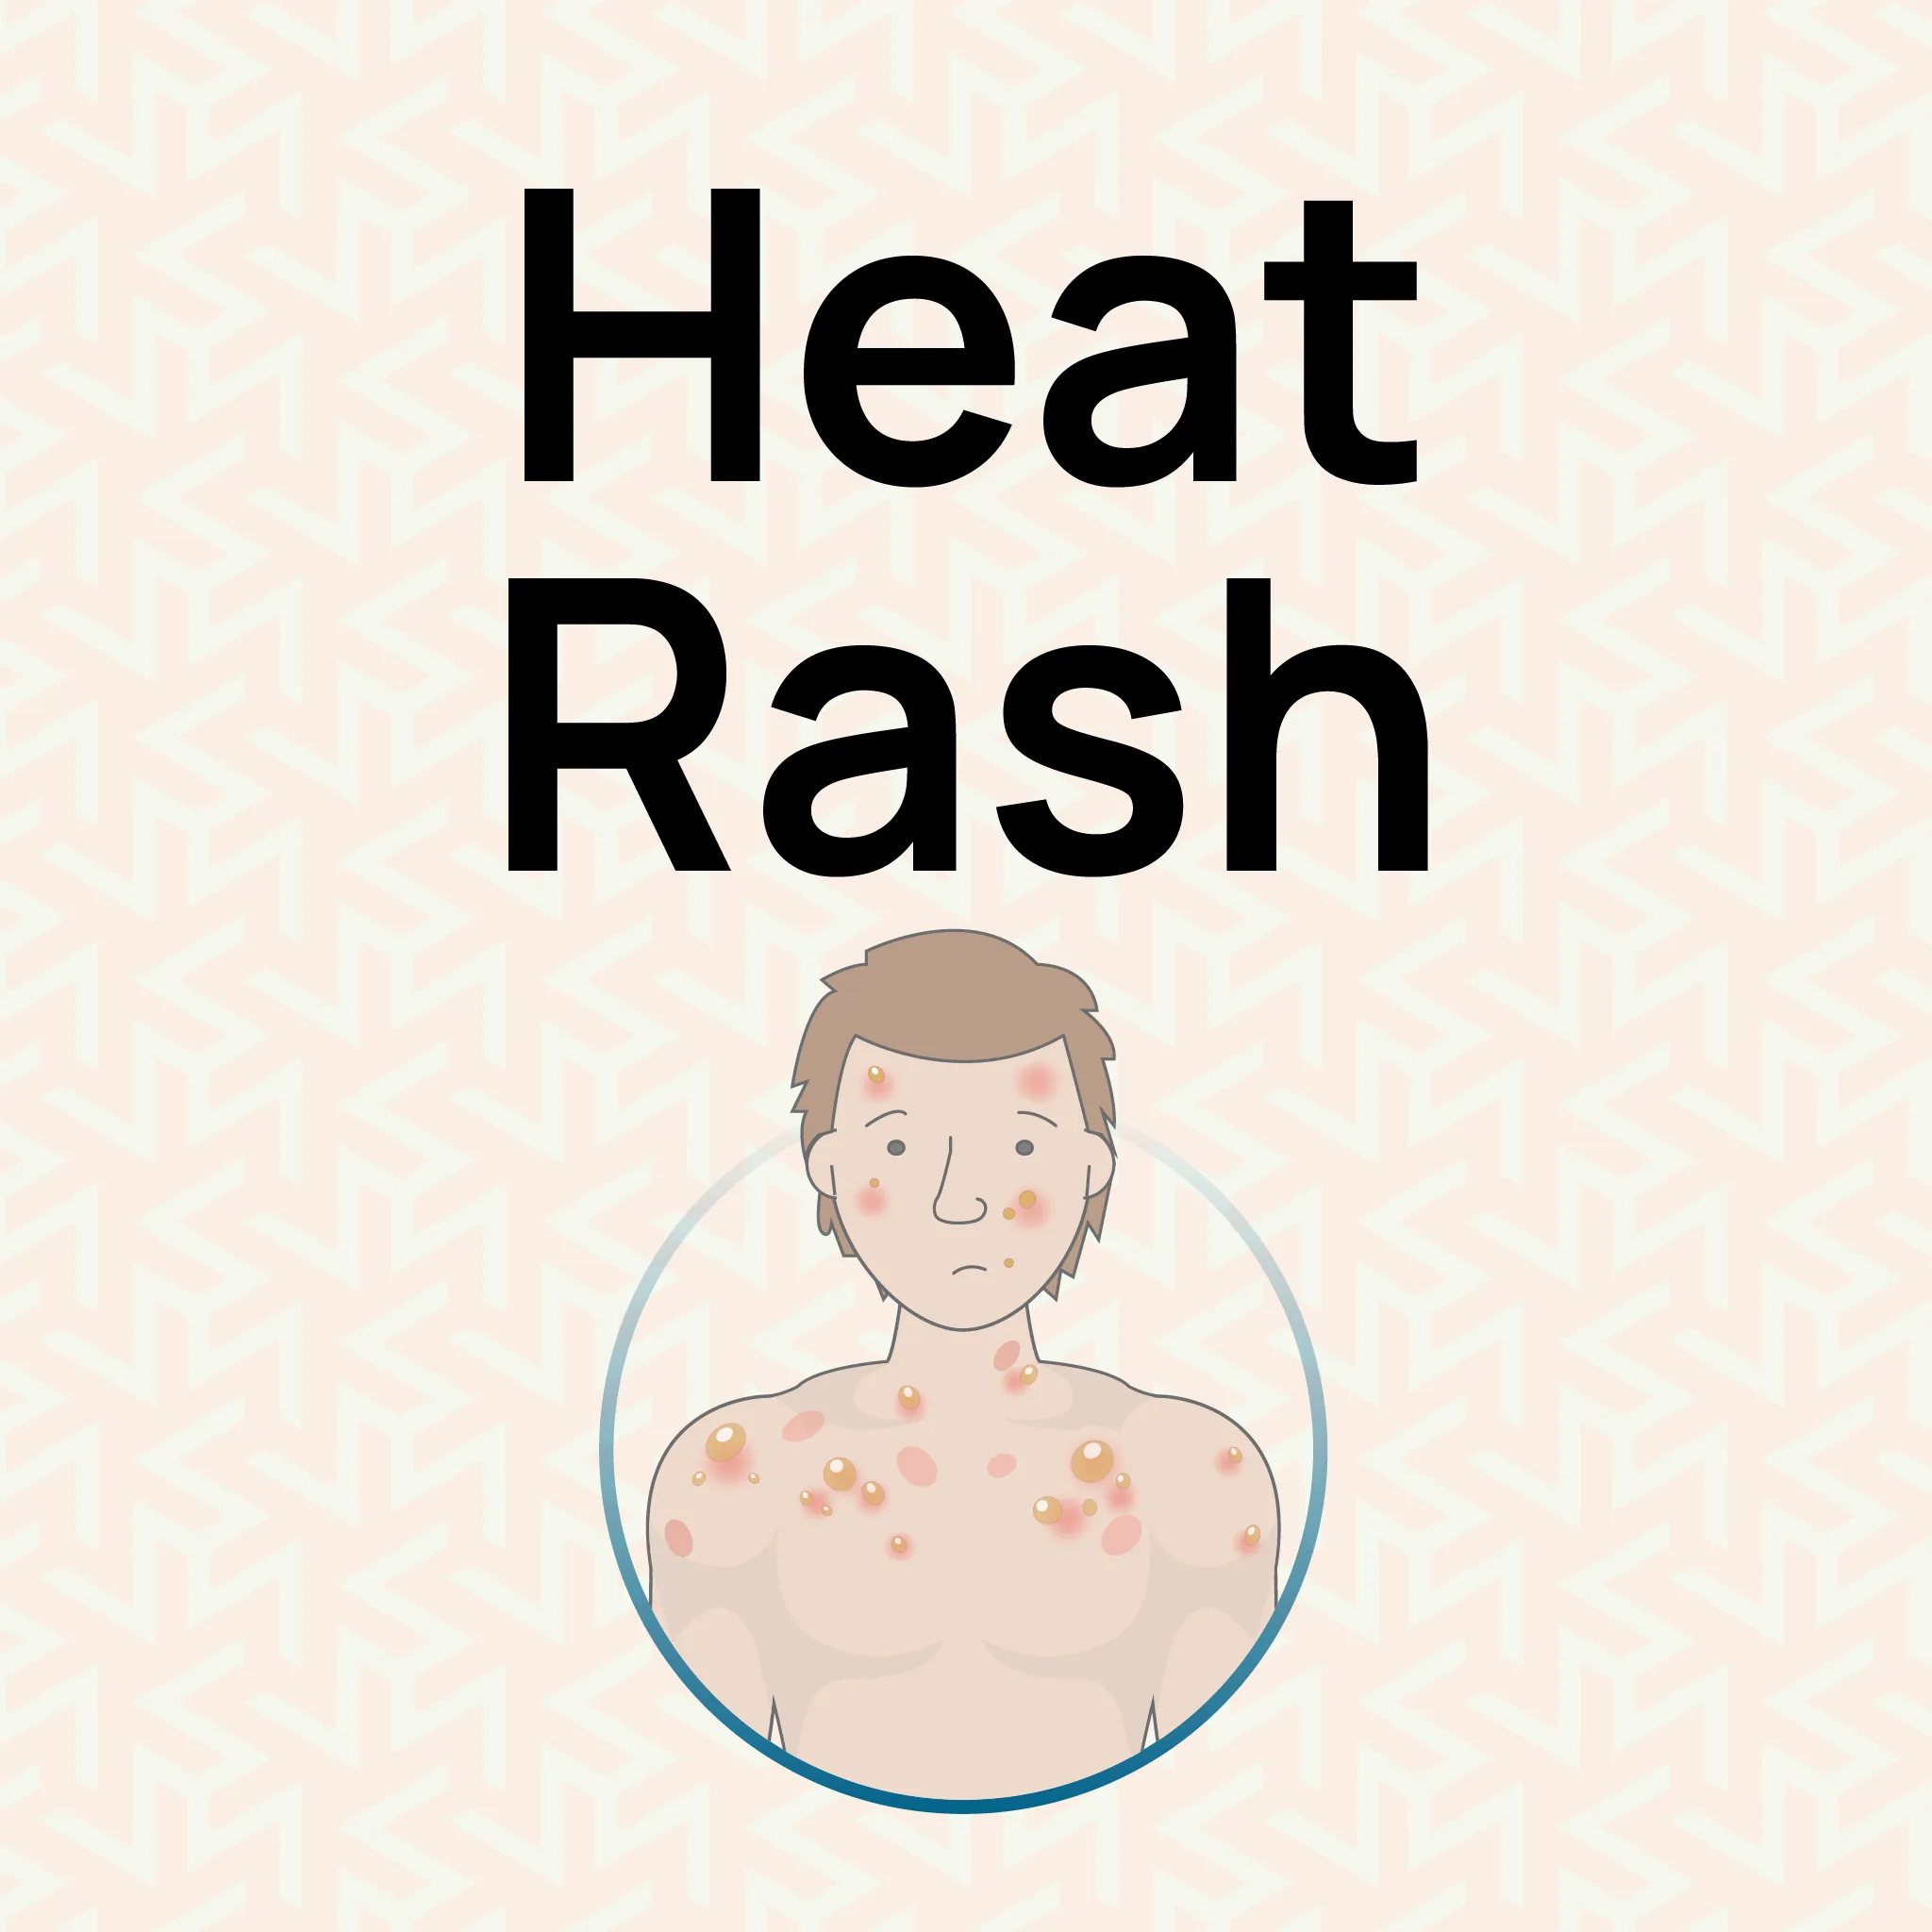
Heat Rash Symptoms, Causes and Treatment
The IOSH Code of Conduct serves as the backbone of ethical practice in the health and safety profession. It defines the standards every IOSH member must follow to maintain integrity, competence, respect, and service in their work. These principles ensure that safety professionals act responsibly, make fair decisions, and build public trust through their commitment to high standards.� Whether you�re a seasoned IOSH member or just beginning your safety career, understanding these principles helps you make sound professional decisions and uphold the highest standards. This article examines the key principles, rules, and ethical practices outlined in the IOSH Code of Conduct, helping UK safety professionals apply them effectively and strengthen their professional reputation within the field of occupational safety and health. What Is the IOSH Code of Conduct? The IOSH Code of Conduct is a set of professional and ethical standards developed by the Institution of Occupational Safety and Health (IOSH) � the UK�s leading body for health and safety professionals. It defines how safety professionals should act, make decisions, and maintain integrity in their roles. The Code guides members to work responsibly, stay competent, protect people�s health and safety, and uphold the reputation of the profession. The Code applies to all IOSH members, regardless of their grade or experience, and ensures that every professional acts responsibly towards employers, colleagues, and the public. It serves as a benchmark for ethical behaviour, guiding members in situations where legal, professional, or moral questions may arise. By adhering to the IOSH Code of Conduct, professionals strengthen public trust and demonstrate their ongoing commitment to excellence, accountability, and the highest standards of safety practice. Why the IOSH Code of Conduct Matters for Safety Professionals The IOSH Code of Conduct serves as the ethical foundation for all safety professionals. It defines how members should behave, make decisions, and uphold professional standards in their workplace. Here�s why it truly matters: Builds trust and integrity: The Code helps safety professionals act with honesty and fairness, earning respect from employers and colleagues. Encourages ethical decisions:� It guides members to make responsible choices that prioritise safety and wellbeing above all else. Ensures accountability:� Professionals are held responsible for their actions, promoting transparency in every aspect of their work. Maintains consistency:� It sets a uniform standard of conduct, ensuring safety practices remain reliable across all industries. Protects public interest:� By following the Code, professionals commit to safeguarding people�s health, safety, and environment. Enhances professional reputation:� Upholding the Code reflects a strong moral compass and reinforces credibility within the safety community. Ultimately, the IOSH Code of Conduct reinforces the responsibility safety professionals have toward people and workplaces. It ensures that every action they take reflects integrity, accountability, and a genuine dedication to safety. The Four Core Principles of the IOSH Code of Conduct The IOSH Code of Conduct is founded on four essential principles that capture the true essence of being an ethical health and safety professional. These principles serve as a guide for members to uphold integrity, professionalism, and accountability in every aspect of their work. Each principle reflects the standards that IOSH members are expected to follow in their daily practice. 1. Integrity Act with honesty and fairness in all professional dealings. IOSH members should never mislead others, misuse authority, or compromise their ethical standards. Key Points: Maintains transparency and honesty in every form of communication. Declare any conflicts of interest. Uphold the reputation of IOSH and the profession through integrity and trustworthiness. 2. Competence Competence refers to maintaining the knowledge and expertise necessary to perform safety duties effectively. Members must engage in lifelong learning to keep their skills up to date. Key Points: Participate in continuous professional development (CPD) to enhance your knowledge and expertise. Work only within your area of competence. Share insights and best practices responsibly with colleagues and clients. 3. Respect IOSH members must treat everyone with dignity, equality, and understanding. They should encourage inclusive and fair workplaces. Key Points: Promote diversity and inclusion by treating everyone fairly and without discrimination. Safeguard confidentiality in all professional interactions. Communicate professionally and courteously. 4. Service Service reflects an IOSH member�s duty to protect life and promote wellbeing. Members must deliver high-quality, responsible advice in the public interest. Key Points: Prioritise public safety above personal or corporate gain. Take full responsibility for your professional decisions and advice. Strive for excellence in all health and safety practices. Together, these four principles form the foundation of the IOSH Code of Conduct, guiding safety professionals to act ethically, competently, and responsibly. Gain a deeper understanding of the IOSH Code of Conduct Explore how the IOSH Code of Conduct shapes best practices in health and safety management. Whether you're new to the industry or a seasoned professional, understanding the principles of ethical safety practice is essential. IOSH Working Safely � Perfect for beginners and frontline staff to learn core safety responsibilities. IOSH Managing Safely � Designed for managers and supervisors to apply safety principles effectively. Strengthen your health and safety practices and make ethical decisions that promote a safer workplace. Start your journey today. Key Rules and Responsibilities Under the Code The IOSH Code of Conduct sets clear rules that guide members on how to maintain professionalism, integrity, and accountability in their daily roles. These responsibilities ensure that every IOSH member contributes to a culture of safety, transparency, and ethical practice within the workplace. Upholding Professional Standards IOSH members must always act in ways that protect and promote the reputation of both the Institution and the profession. This means demonstrating ethical behaviour, providing accurate advice, and maintaining the highest level of professionalism. Members must: Provide accurate, evidence-based safety advice. Represent IOSH with honesty and fairness. Avoid actions that could harm their professional reputation. Reporting Misconduct and Breaches Every IOSH member has a duty to report unethical or unsafe conduct. This ensures accountability and prevents harm to individuals or organisations. Members must: Report serious breaches of the Code or unsafe practices to IOSH. Cooperate in investigations or disciplinary processes. Support transparency and accountability within the profession. Maintaining Confidentiality and Integrity Members must respect the confidentiality of information obtained through their professional role. Information should only be disclosed when legally required or in the public interest. Members must: Safeguard confidential business or personal information. Avoid misusing data for personal gain. Protect client and employer trust at all times. Consequences of Violating the Code Failure to comply with the IOSH Code can result in disciplinary action, including suspension or termination of membership. This ensures accountability and maintains the profession's credibility. Possible actions include: Investigation by IOSH�s Professional Standards Committee. Formal warnings, suspension, or expulsion. Public disclosure of disciplinary outcomes. How to Apply the IOSH Code of Conduct and Ethical Practices in the Workplace Applying the IOSH Code of Conduct goes beyond understanding its principles � it�s about putting them into action every day. Ethical practice ensures that health and safety professionals make fair, responsible, and transparent decisions that protect people and build trust at work. Lead by example:� Demonstrate honesty, fairness, and respect in all safety interactions to set a positive tone for others. Promote a safety-first culture:� Encourage open discussions about risks, near misses, and improvements without fear of blame. Stay professionally competent:� Regularly update your skills through IOSH training, workshops, and CPD activities to ensure informed decision-making. Communicate transparently: Provide clear, factual safety information and avoid exaggerating or concealing details that could affect outcomes. Handle sensitive information responsibly:� Maintain confidentiality and use data only for legitimate safety purposes. Challenge unethical behaviour:� Speak up or report actions that breach professional or safety standards. Make balanced decisions:� Consider legal, ethical, and practical aspects before implementing any health and safety measures. Support and respect colleagues:� Foster teamwork, diversity, and inclusion while maintaining a respectful workplace environment. When safety professionals consistently follow the IOSH Code of Conduct, they set the foundation for a safer, more respectful, and ethically responsible workplace. Their actions inspire others to value integrity and professionalism. Conclusion In conclusion, the IOSH Code of Conduct serves as the foundation of professional ethics in health and safety practice. By understanding its four core principles�Integrity, Competence, Respect, and Service and following the key rules and responsibilities, IOSH members can make responsible decisions, protect the public, and uphold workplace safety standards across the UK. Applying these principles through ethical practice not only ensures compliance but also strengthens professional credibility, fosters trust, and promotes a culture of accountability in every organisation. Whether you�re an experienced practitioner or new to IOSH, embracing the Code helps you navigate complex situations with confidence and integrity, ultimately contributing to safer and more ethical workplaces. FAQs What is the IOSH Code of Conduct? The IOSH Code of Conduct is a set of ethical guidelines for safety professionals, outlining the standards of integrity, accountability, and professionalism expected in health and safety practice. Why is the IOSH Code of Conduct important for safety professionals? It ensures that safety practitioners act responsibly, maintain professional integrity, protect the well-being of others, and uphold public trust in workplace safety. Who must follow the IOSH Code of Conduct? All IOSH members and safety professionals are required to follow the Code of Conduct, regardless of their role, industry, or level of experience. How does the IOSH Code of Conduct improve workplace safety? By guiding ethical decision-making and professional behaviour, the Code fosters a culture of trust, responsibility, and continuous safety improvement in organisations. Can violating the IOSH Code of Conduct affect a professional�s career? Yes. Breaching the Code can damage credibility, lead to disciplinary action from IOSH, and negatively impact professional reputation and career growth.
Understanding First Aid Certificate Validity in the UK: Duration, Renewal Key Facts
Asbestos was once a go-to material for insulation, flooring, roofing, and fireproofing. But beneath its usefulness lies a serious health hazard. Although it has been banned from use in construction since 1999, many older homes and buildings still contain asbestos-based materials. If disturbed, these fibres can become airborne and pose life-threatening risks to anyone exposed. If you�re wondering how to test for asbestos safely in your property, this guide explains everything you need to know, from identifying potential asbestos materials to choosing between a self-sampling kit and professional testing. What is Asbestos and Why is it Dangerous Asbestos is a naturally occurring mineral made up of fine, durable fibres resistant to heat, fire, and chemicals. Because of these properties, it was widely used in construction and manufacturing throughout much of the 20th century. There are three main types of asbestos you might come across: Chrysotile (white asbestos): Found in ceilings, walls, roofs, and floors. Amosite (brown asbestos): Common in insulating boards, ceiling tiles, and thermal insulation. Crocidolite (blue asbestos): Typically used in pipe insulation and spray-on coatings. Asbestos-containing materials (ACMs) can still be found in many older buildings, especially those built before 2000. Common locations include Artex or textured coatings, floor tiles and adhesives, roofing sheets, pipe lagging, cement panels, and insulation boards. These materials were once popular because of their strength and resistance to heat, but they can pose a serious risk if disturbed during maintenance or renovation work. When these materials are damaged or disturbed, they release microscopic fibres that can be inhaled. Over time, this can lead to serious illnesses such as asbestosis, mesothelioma, and lung cancer, which often take decades to develop. Testing suspected materials is the only reliable way to know if asbestos is present and to protect your health and those around you. How to Tell If Something Is Asbestos Unfortunately, asbestos can�t be identified by sight alone. However, some clues might suggest its presence. Signs a Material Might Contain Asbestos The building was constructed or refurbished before 2000. You see grey-white fibrous material in insulation, boards, or sealants. Old vinyl floor tiles or adhesives have a dull or rigid texture. Textured ceiling coatings (Artex) appear rough and patterned. Corrugated roof panels look aged or brittle. Still, these are only indicators. Some asbestos-free materials look identical to those that contain asbestos. That�s why testing is essential. According to the Health and Safety Executive (HSE), asbestos identification must always be confirmed through laboratory analysis, rather than visual inspection. How to Check for Asbestos Before Testing Before jumping straight into sampling, you can conduct a non-intrusive check to determine whether testing is necessary. Here�s a simple checklist: Identify suspect materials: Focus on insulation, ceiling panels, roofing, and old pipework. Check the age of the building: If it was built or renovated before 2000, asbestos could be present. Avoid disturbing surfaces: Do not drill, scrape, sand, or break any materials you suspect may contain asbestos. Observe the condition: Damaged, crumbling, or flaking materials are at higher risk. Record locations: Note down any suspect areas for reference by a professional. If you�re unsure, it�s better to arrange a professional inspection or use a certified testing kit following strict safety guidelines. If you or your team work in environments where asbestos may be present, it�s essential to complete certified training like the Asbestos Awareness Course, which covers everything from identification and legal duties to emergency procedures. TIP: Never attempt to remove or break a sample on your own unless you fully understand the safety procedures. Even small amounts of asbestos dust can be hazardous if inhaled. How to Test for Asbestos Safely Once you�ve identified potential asbestos materials, there are two safe routes for testing: hiring a professional surveyor or using a home testing kit. Option 1: Hire a UKAS-Accredited Professional The most reliable and safest option is to hire an accredited asbestos surveyor or testing company. These professionals follow strict HSE and UKAS (United Kingdom Accreditation Service) standards. Here�s how the process works: Initial assessment: The surveyor inspects your property to locate potential asbestos-containing materials (ACMs). Sample collection: Using specialist tools and protective equipment, they safely remove small samples. Laboratory analysis: The samples are sent to a UKAS-accredited lab for testing under a microscope. Report and results: You�ll receive a detailed report outlining the type of asbestos (if present), location, condition, and recommended next steps. Professional testing not only ensures accuracy but also eliminates your risk of exposure. If asbestos is confirmed, the surveyor can guide you on whether to remove, encapsulate, or manage the material in place. You can find accredited asbestos surveyors and labs via the HSE directory or the UKAS website Option 2: Using a Home Asbestos Testing Kit For small, solid (non-crumbly) materials, a home asbestos testing kit can be a cost-effective option. These kits usually include protective gloves, sample bags, instructions, and a prepaid envelope for lab testing. When collecting a sample: Always wear a disposable mask, gloves, and coveralls. Lightly dampen the area to prevent dust release. Cut a small piece (no larger than a 50p coin), seal it securely, and send it to the lab. Avoid using kits for friable materials such as pipe lagging, insulation, or sprayed coatings, as these require professional handling. After Testing: Understanding Your Results Lab results will confirm whether asbestos fibres were detected and specify the type found (e.g., chrysotile or amosite). If the result is negative, you can proceed safely with your renovation or repair. If positive, you�ll need to decide how to manage it: Encapsulation: Sealing the surface to prevent fibres from escaping. Removal: Carried out by licensed asbestos contractors. Management: Monitoring and maintaining the material in a safe condition. Always ensure any removal or repair follows HSE-approved procedures and is performed by licensed professionals. Asbestos Exposure Test: Checking for Health Risks Testing a material for asbestos is not the same as testing for asbestos exposure. An asbestos exposure test focuses on whether you�ve been exposed to harmful fibres, especially if you suspect past contact during renovation or demolition. Types of Exposure Testing Air monitoring: Measures the concentration of asbestos fibres in the air. Medical assessment: Doctors may recommend a chest X-ray, CT scan, or lung function test. Blood or sputum tests: Used in some cases to monitor lung inflammation or exposure markers. When to Get Tested After the accidental disturbance of suspect materials. If you worked in construction or maintenance before asbestos bans. When renovating older properties without prior inspection. If you think you�ve been exposed, contact your GP for a medical review. Early detection and regular health monitoring are crucial. Boost Your Health & Safety Expertise with CITB Training Spotting asbestos is just one step toward creating a safer workplace. To effectively manage broader health and safety challenges and meet legal obligations, construction professionals need proper accredited training. Hurak�s CITB Site Safety Plus courses equip you with the essential skills to identify hazards, conduct risk assessments, and maintain safe and compliant worksites. Popular CITB-Accredited Courses: CITB Health and Safety Awareness (HSA): Ideal for beginners learning to identify common hazards, such as asbestos. CITB SMSTS � Site Management Safety Training Scheme: A must-have for site managers responsible for controlling asbestos and other health and safety risks. CITB SMSTS Refresher Course: Stay up to date with the latest safety legislation and industry best practices. CITB SSSTS � Site Supervisor Safety Training Scheme: Train supervisors to identify, manage, and minimise on-site hazards. CITB SSSTS Refresher Course: Renew your certification and keep your safety management skills sharp. Empower your team, stay compliant, and take the next step in your career with Hurak�s accredited CITB training programmes. Regulations and Legal Responsibilities Asbestos management is regulated under the Control of Asbestos Regulations 2012. These laws place responsibilities on employers, landlords, and property owners to prevent exposure. Identifying and recording asbestos-containing materials. Assessing the risk of fibre release. Keeping an up-to-date asbestos management plan. Ensuring only trained and licensed contractors handle asbestos. For workplaces, compliance with guidance is mandatory. Even in domestic settings, homeowners should follow the same safety principles to protect themselves and others. Cost of Asbestos Testing The cost of asbestos testing varies depending on the method used, the number of samples, and the size of the property. � � � � � � � � � Type of Test � � � � � � � Typical Cost (Approx.) Home Testing Kit � � � � � � � �30 � �60 per sample Professional Asbestos Survey � � � � � � � �200 � �400+ Full Management or Refurbishment Survey � � � � � � � �500+ for larger buildings Factors that affect cost: Number of samples required Travel distance and access difficulty Turnaround time (same-day results often cost more) While self-sampling kits are cheaper, professional testing offers peace of mind with certified results and legal documentation, which is essential if future proofing is required. Common Mistakes to Avoid When Testing for Asbestos Even minor missteps can lead to serious health risks. Avoid these common mistakes: Breaking or scraping materials to see what�s inside. Skipping PPE or using low-grade masks. Sending samples to uncertified labs. Disposing of waste incorrectly (asbestos waste must go to licensed facilities). Ignoring hidden materials, such as those behind tiles or under flooring. If there�s any uncertainty, it�s safest to stop work and involve a qualified asbestos expert. Conclusion Testing for asbestos isn�t just about compliance; it�s about protecting your health and preventing long-term harm. Whether you choose a self-sampling kit or a professional survey, make sure samples are handled safely and tested by accredited experts. By staying informed and proactive, you can keep your property and everyone in it safe from one of the world�s most silent hazards. FAQs How do you test for asbestos? You can test for asbestos by either hiring an accredited surveyor or using a certified testing kit. Professionals take samples and send them to a UKAS-accredited lab for confirmation. Can I test for asbestos myself? Yes, but only for small, non-friable materials like cement sheets or floor tiles. Always wear PPE and follow kit instructions carefully. Is asbestos testing safe to do at home? It can be safe if the material is intact and you avoid disturbing it. For damaged materials or insulation, hire a licensed professional specialising in asbestos removal. How long does asbestos testing take? Lab results usually take 24 to 72 hours, depending on the provider and delivery method. Where can I send samples for asbestos testing? Samples should always be sent to UKAS-accredited laboratories. Avoid cheap or uncertified online services, as they may not follow proper analysis standards.

Hyperventilation: Causes, Symptoms, and Effective Relief Techniques
Read the full article for more details.
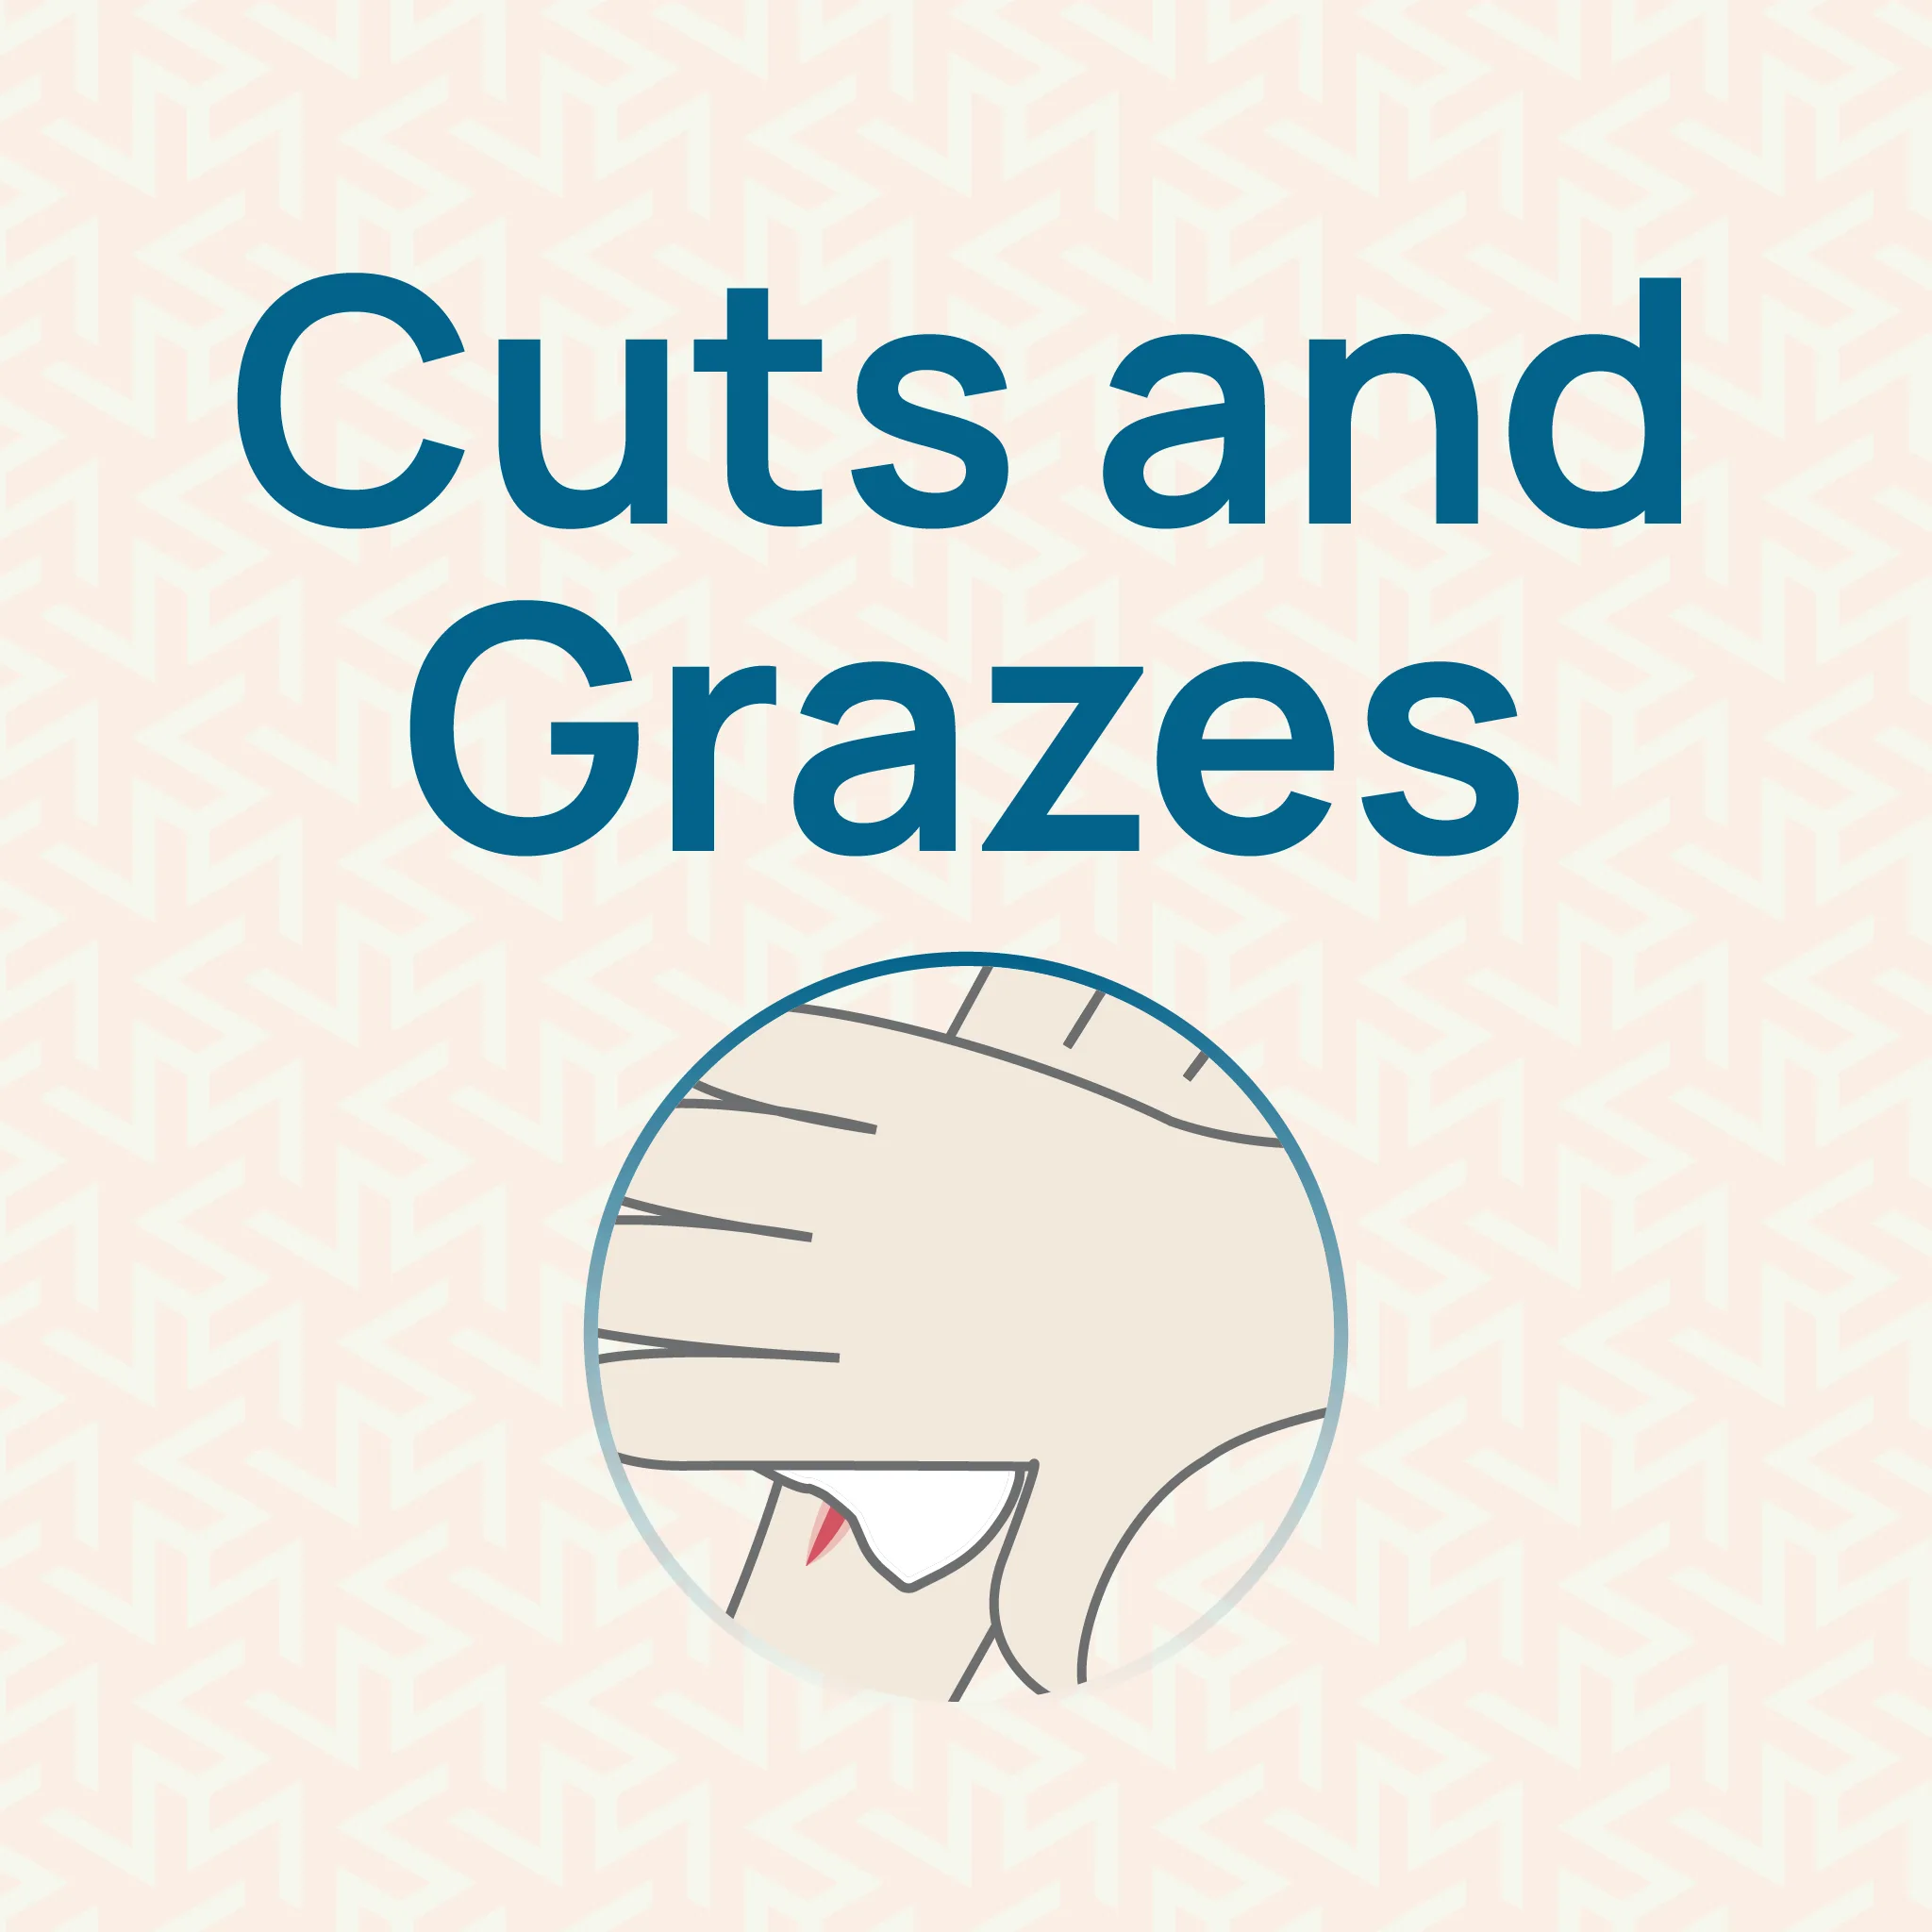
Cuts and Grazes First Aid: How to Clean, Treat and Heal Minor Wounds Effectively
Minor injuries like cuts and grazes are common in everyday life, whether it�s a slip, a scraped knee, or a kitchen accident. Knowing how to treat these wounds correctly is essential to prevent infection and promote faster healing.In this guide, you�ll discover straightforward first aid steps to safely clean, treat, and care for minor wounds, whether you�re helping yourself, a child, or someone else.What Are Cuts and Grazes?Cuts and grazes are two of the most common minor injuries. A cut is a break in the skin typically caused by something sharp like glass, a knife, or metal. It can range from shallow surface nicks to deeper wounds. A graze, on the other hand, happens when the outer layer of skin is scraped off, often due to friction, such as falling on a rough surface. Both types of injuries expose the skin to bacteria and dirt, thereby increasing the risk of infection if not properly cleaned and treated.�Understanding these differences helps you choose the correct first aid response and prevent the spread of infection.Injury Types:Laceration: Torn skin, often irregular.Incision: Clean, straight-edged wound.Graze (abrasion): Surface-level scrape.Puncture: Small entry point with depth.How to Clean a Cut or GrazeProper cleaning is the first and most crucial step in treating any cut or graze. It helps remove dirt, debris, and bacteria, reducing the risk of infection and supporting faster healing.Wash your HandsBefore touching the wound, wash your hands thoroughly with soap and water to prevent introducing bacteria. Don�t forget to check that your kit includes clean gauze and plasters.Stop the BleedingIf the wound is bleeding, gently apply pressure with a clean cloth or sterile pad for a few minutes until it stops.Rinse with Clean WaterGently run cool or lukewarm tap water over the wound to flush out dirt and debris.Clean Around the WoundUse a clean cloth or sterile gauze with mild soap to clean the skin around the cut or graze, not directly in it.Dry the Area GentlyPat the area dry with a clean towel or sterile gauze; avoid rubbing.Apply an AntisepticUse a mild antiseptic cream or spray if advised, especially if the wound is at risk of infection.Cover the WoundApply a sterile dressing to protect it from dirt and bacteria.Tip: Avoid using alcohol, hydrogen peroxide, or iodine directly in the wound, as they can irritate the skin and slow healing. Avoid touching the wound directly once it's cleaned. Change the dressing daily or if it becomes wet or dirty.Steps to Stop Bleeding and Apply First AidStopping the bleeding quickly and safely is crucial to minimise the risk of infection and facilitate proper healing. Bleeding is your body�s natural response to a cut, but it doesn�t need to last long. While most minor cuts and grazes stop bleeding on their own, some may need basic first aid intervention. Here�s what to do if they don�t:STEPACTIONPURPOSE1Apply pressureControls bleeding immediately2Elevate the limbReduces blood flow to the area3Wait 5�10 minsAllows clotting to begin4Clean the woundRemoves bacteria and debris5Apply dressingKeeps it protected and cleanIf the wound continues to bleed after applying pressure for 10 minutes or looks deep, it�s best to seek medical advice.Boost Your First Aid Confidence � Get Certified with HurakWant to be fully prepared to manage bleeding, dress wounds, and respond to everyday injuries with confidence?�Popular Courses You Might Find Useful:Emergency First Aid at Work (EFAW): Perfect for workplace responders and frontline staffPaediatric First Aid Course: Ideal for parents, childminders, and early years educatorsFirst Aid at Work (FAW): A comprehensive 3-day course for designated first aiders at workExplore Hurak�s range of First Aid Courses designed for individuals, teams, and workplaces. Whether you're a parent, carer, employee, or health and safety rep, there�s a course tailored for youHow to Treat and Heal Minor Wounds QuicklyTreating cuts and grazes properly not only speeds up recovery but also reduces the risk of infection or scarring. With a few simple steps, you can help your skin heal faster and more comfortably. Stick to these simple steps:Clean the Wound Thoroughly: Use clean water and mild soap to remove dirt and bacteria. This is the foundation of fast healing.Apply a Healing Ointment or Antiseptic: A thin layer of antiseptic cream or petroleum jelly helps keep the wound moist and protected, facilitating the formation of new skin cells more easily.Cover It Up: Use a dressing to keep the area clean and protected from friction or further injury.Change Dressings Daily: Replace the dressing at least once a day, or whenever it becomes wet or dirty, to prevent irritation or infection.Let It Breathe: Once the wound starts forming a scab and is no longer weeping, give it short periods of air exposure to support the natural healing process.Avoid Picking Scabs: As tempting as it is, picking at a scab delays healing and increases the risk of scarring.Eat a Nutrient-Rich Diet: Healing is also an internal process; foods rich in vitamin C, zinc, and protein support skin repair and regeneration.Signs of Infection You Shouldn�t IgnoreMost cuts and grazes heal without issue, but infection can delay healing and cause discomfort. Even minor cuts and scrapes can become infected if not properly cared for and treated. Spotting the early signs of infection is crucial for preventing complications and knowing when to seek medical attention.Common Signs a Wound May Be Infected:Redness spreading around the wound.Swelling that persists or worsens.Increased pain or tenderness around the area.Pus or yellowish discharge.Warmth in the skin surrounding the wound.A foul smell is coming from the wound.Fever or feeling unwell (in more serious cases).When to seek medical advice if:The wound doesn�t start healing after a few days.Signs of infection (redness, swelling, pus, and pain) are worsening.A dirty object, bite, or rusted metal caused the injury.You haven�t had a tetanus booster in the last 10 years.Tip: Don�t wait it out. When in doubt, it�s always best to get a medical opinion, especially if the wound is large, deep, or slow to heal.Healing Timeline: How Long Do Cuts and Grazes Take to Heal?The time it takes for a cut or graze to heal depends on its depth, location, and how well it's cared for. Most minor wounds heal quickly with basic first aid, but knowing what to expect can help you monitor progress and avoid complications.StageWhat HappensDay 1-2The cut may bleed at first, then a scab begins to form.Day 3-4The area might feel sore and look red. Scab thickens.Day 5-7The scab starts to dry and fall off. New skin forms.Week 2+Skin finishes healing. A faint scar might remain.Factors That Affect Healing Time:Wound depth: Superficial grazes heal quicker than deeper cuts.Location: Joints and hands may take longer due to movement.Infection: Even a minor infection can delay healing.Aftercare: Clean, moist wounds heal faster than dry or exposed ones.When to Seek Medical Help for Cuts and GrazesMost minor cuts and grazes can be safely treated at home, but some injuries require professional care, especially if there is a risk of infection or complications. See a doctor if :The wound is deep, large, or bleeding heavily.Bleeding doesn�t stop after applying pressure for 10 minutes.Dirt or debris is stuck in the wound and can�t be cleaned out.A rusty object, an animal bite, or a dirty surface caused the injury.You haven�t had a tetanus shot in the last 10 years.The area around the wound becomes redder, swollen, or painful.There is pus, a bad smell, or you develop a fever, signs of infection.The wound isn�t healing after 7 to 10 days.FAQCan I use antiseptic on every cut?Use mild antiseptics carefully and sparingly. Strong antiseptics can irritate healthy skin and may slow down the healing process.When should I get a tetanus booster?If the cut is deep, caused by rusty or dirty objects, and your last tetanus booster was more than 10 years ago, it�s time to get a booster.How often should I change the dressing?Change the dressing daily or sooner if it becomes wet, dirty, or loose to help prevent infection.Are grazes more likely to get infected than cuts?Yes, grazes can be more prone to infection because the skin is scraped away, allowing dirt and bacteria to enter. Clean grazes thoroughly and keep an eye on them.How can I help a wound heal faster?Keep the wound clean and covered. Use a non-medicated ointment to keep it hydrated. Avoid picking at scabs. Also, eat a diet rich in protein and vitamin C to support healing.ConclusionTaking proper care of cuts and grazes is essential to prevent infection and promote rapid healing. By knowing how to clean wounds, apply first aid, and recognise when to seek medical help, you can confidently manage these common injuries at home. Cuts and grazes are everyday injuries that most people will encounter. With the proper first aid knowledge, you can treat these wounds quickly and effectively, thereby reducing pain and promoting a faster recovery.�Always keep a basic first aid kit handy, follow clean and safe wound care steps, and don�t hesitate to get medical advice if needed. By taking these simple precautions, you can prevent complications and support your body�s natural healing process, allowing you to return to your daily routine with confidence.Take the Next Step: Get Certified in First Aid with HurakCuts and grazes are easy to handle, but are you ready for more serious emergencies? Gain the skills to respond confidently in any emergency; at home, at work, or in public.�Join our First Aid at Work (FAW), A comprehensive 3-day training designed for workplace first aiders and safety-conscious professionals.Be prepared. Be the one who knows what to do. Train with Hurak today.
Recognising Emergency Symptoms That Need an Ambulance
Emergencies can happen anytime, and knowing when to call an ambulance could save a life. This guide helps you recognise the key symptoms that require urgent medical attention and describes the process of calling 999. Whether you�re unsure about a situation or want to be prepared, this advice will give you the confidence to act quickly and appropriately.What Is the Emergency Number in the UK and How to CallIn the UK, the emergency number to call for an ambulance is 999. When you call this number, your call is connected to a trained operator who will ask you important questions to understand the situation. It�s important to stay calm, speak clearly, and provide accurate information about the location and the patient�s condition to ensure help arrives quickly.When to Call an Ambulance: Key Symptoms and SituationsKnowing when to call an ambulance is essential for getting urgent medical help when it really matters. If you or someone else experiences any of the following symptoms or situations, call 999 immediately:Severe chest pain or suspected heart attackDifficulty breathing or shortness of breathUncontrolled or heavy bleedingSudden loss of consciousness or unresponsivenessSigns of a stroke (face drooping, arm weakness, speech difficulties)Severe allergic reactions (anaphylaxis)Major injuries from accidents or trauma .main{ border:3px solid #0f7c90; border-radius:20px; position: relative; font-family:roboto; font-weight: 400; color: #000; } .main-two{ position: absolute; top:-25px; left:45px; background-color:white; } .img-div{ border-radius : 100%; padding:2px 7px; background-color:#0f7c90; margin-right:5px; width: 50px; height: 50px; } .img{ width:30px; object-fit:contain; height:auto; border-radius : 100%; } @media only screen and (max-width: 600px) { .heading{ font-size:20px; } .img{ width:20px; object-fit:contain; height:auto; border-radius : 100%; } .img-div{ width: 40px; height: 40px; } .main-two{ left:25px; } } Put Your First Aid Knowledge into Practice by enrolling in a course today! Our First Aid courses equip you to handle critical situations, including spinal injury management, and enhance workplace safety. Build confidence and expertise with Emergency First Aid at Work (EFAW) and Level 3 First Aid at Work meeting UK legal requirements. How to Call an Ambulance: Step-by-Step GuidanceWhen calling an ambulance, following a clear step-by-step process helps ensure you provide the right information quickly and get the best possible help. Use this guide to stay calm and confident during your emergency call.StepsWhat to doTips1Dial 999Stay calm and wait for the operator to answer2Say you need an ambulanceBe clear and direct3Provide your exact locationInclude street names, landmarks, or nearby buildings4Describe the emergency and symptomsBe honest and specific about what�s happening5Answer any questions from the operatorListen carefully and respond clearly6Follow the instructions given by the operatorThey may guide you on first aid or safety7Stay on the line until you are told you can hang upDon�t end the call prematurelyFirst Aid Actions to Take While Waiting for an AmbulanceWhen you�ve called an ambulance, your actions before help arrives can make a big difference. Here are some key first aid steps to take while waiting:Keep the person calm and comfortable, either seated or lying down.If unconscious but breathing, place them in the recovery position to open the airway.If not breathing, start CPR immediately to maintain blood circulation until help arrives.Apply gentle pressure on any wounds with a clean cloth or bandage to stop bleeding.Avoid moving someone with serious injuries unless it�s absolutely necessary.Monitor their breathing and responsiveness closely until the ambulance arrives.Do not give food or drink unless advised by a medical professional or the 999 operator. Knowing When an Ambulance Is Not NeededNot every medical situation requires calling an ambulance. Understanding when to seek alternative care can help ensure emergency services are available for those who need them most. You don�t need to call an ambulance if the condition is stable, non-life-threatening, or can be treated by a pharmacist, GP, or urgent care centre.Examples of situations where calling an ambulance isn�t necessary include:Minor cuts and bruises that can be treated at homeMild fevers or common coldsMinor sprains or strains without severe pain or swellingTaking someone to the hospital who can travel safely by car or taxiOngoing health conditions that are not worsening rapidlyIf you�re ever unsure, it�s better to call 111 for advice or speak to a healthcare professional before deciding.How to Be Prepared for Medical EmergenciesBeing prepared for emergencies can make all the difference when seconds count. Here are some essential steps to help you stay ready and confident in any situation:� ConclusionKnowing when and how to call an ambulance is crucial in emergencies. Acting quickly and providing accurate information can save lives. Remember to stay calm, follow the steps outlined, and take basic first aid actions while waiting for help. Being prepared with the right knowledge and skills gives you the confidence to respond effectively in any emergency situation. To build your skills further, consider enrolling in our First Aid Course at Work, designed to equip you with practical techniques for workplace emergencies and beyond.Frequently Asked QuestionsWhen should I call an ambulance?Call an ambulance if someone is seriously ill or injured and their condition is life-threatening. Common reasons include chest pain, difficulty breathing, severe bleeding, unconsciousness, or a suspected stroke. If you're unsure, it's safer to call 999.What is the emergency number in the UK?The main emergency number in the UK is 999. You can call for ambulance, police, or fire services. Another option is 112, which also connects you to emergency services and works throughout Europe.How do I call an ambulance in the UK?Dial 999 and ask for the ambulance service. Stay calm, clearly describe the situation, provide the exact location, and answer any questions the call handler asks. They may give you instructions to follow until help arrives.What are the most common reasons for calling an ambulance in the UK?Some of the most common reasons include chest pain (possible heart attack), breathing difficulties, strokes, serious accidents, allergic reactions, and unconsciousness. These are all considered medical emergencies.What should I do if I�m not sure whether to call an ambulance?If you�re unsure, call NHS 111 for advice. They can assess the situation and tell you whether an ambulance is needed, or guide you to another appropriate service.Explore Popular First Aid Courses at HurakLooking to boost your first aid skills?Explore our range of first aid courses and find the one that�s right for you.Popular First Aid Courses:Emergency First Aid at Work (1 Day): Learn CPR, choking, bleeding control, and emergency response for low-risk workplaces.First Aid at Work (3 Days): Full training for workplace injuries and illnesses; meets HSE standards for high-risk settings.Paediatric First Aid (2 Days): Covers child-related emergencies like choking, seizures, and allergic reactions.Basic First Aid Course: General awareness course covering minor injuries, burns, shock, and fainting.Advanced First Aid Training: Includes trauma care, oxygen use, and advanced secondary assessments.First Aid for Mental Health: Learn to identify and support mental health issues like stress, anxiety, and depression.
When Is an Accident Book Legally Required in the Workplace?
Understanding when an organisation is legally required to have an accident book is essential, not just for compliance, but also for creating a safer work environment. Businesses with 10 or more employees in the UK must keep an accident book to document injuries.�Even if your team is small, tracking any workplace injuries or incidents is essential for ensuring safety and complying with regulations. Having a clear record helps meet legal requirements and improve overall workplace safety and support your employees' well-being.Why Every Workplace Needs an Accident Book and How It HelpsAn accident book is an essential record that employers and employees use to document injuries, illnesses, or incidents at work. It ensures legal compliance, helps track safety trends, and is crucial in investigating how incidents occur.By identifying unsafe practices, the accident book aids in preventing future accidents and reducing workplace risks. Whether it�s a first aid accident book or a standard accident report book, keeping accurate records supports both safety and compliance.Accident Book Legal Requirements in the UK (SSCPR & RIDDOR)The accident book legal requirement in the UK is set out under SSCPR, and further reporting duties come under RIDDOR. If your organisation has 10 or more employees, the law requires you to keep an accident book under the Social Security (Claims and Payments) Regulations 1979 (SSCPR).�You also need to follow RIDDOR 2013 (Reporting of Injuries, Diseases, and Dangerous Occurrences Regulations), which means reporting certain serious incidents to the Health and Safety Executive (HSE).While both SSCPR and RIDDOR aim to protect employees and keep your workplace compliant, SSCPR focuses on record-keeping, and RIDDOR focuses on reporting specific types of incidents.Key Requirements for Employers to Keep an Accident BookEmployers must understand what should be recorded in an accident book to stay compliant and protect staff from future risks. Here�s a breakdown of the essential information you need to know about maintaining an accident book:RequirementsDetailsWho must keep an accident book?Employers with 10 or more employees working on the same premises and owners or occupiers of mines, quarries, or premises covered by the Factories Act 1961.What must be recorded?Any accident that causes personal injury to an employee must be recorded. The injured person or someone on their behalf can make the entry.How should the records be kept?The accident book must be in a format approved by the Secretary of State and readily accessible.How long should the records be kept?Once the accident book is complete, it must be preserved for at least 3 years from the date of the last entry.Essential Details to Record in an Accident BookThe injured party should fill in the accident details; however, under Regulation 25(3) of the SSCPR, someone acting on their behalf can also complete the record. The accident book should include the following information:Date and Time: The exact moment the incident occurred.Injured Person�s Name: The full name of the individual involved.Accident Description: A brief account of what happened.Injury Type: The specific nature of the injury sustained.Witnesses: Names and contact details of any individuals who witnessed the incident.Medical Treatment: Any medical care or treatment provided to the injured party.Further Actions: Any follow-up actions, such as investigations or safety measures. Physical vs. Digital: Which Accident Book Format is Required?Whether you keep a digital or physical accident book at work, it must be accessible and secure. While a physical book is often easier to access quickly, a digital version may pose challenges, such as login barriers or unfamiliarity with the system for the person reporting the incident. There's also a risk of losing or accidentally deleting digital records, which could compromise important information.Ultimately, the choice between a physical or digital format depends on your workplace�s needs and preferences, but it should always prioritise safety, accessibility, and efficiency.ConclusionAccident books are vital in maintaining workplace safety and ensuring legal compliance. Whether in physical or digital format, they must be accessible and accurately maintained. Coupled with first aid awareness, this simple tool can help protect employees, meet legal responsibilities, and support a safer working environment.Frequently Asked QuestionsWho is responsible for filling in the accident book?The injured employee or a witness usually fills in the accident book. Employers must ensure it�s accessible and properly maintained.How long do you have to put an accident in the accident book?Accidents should be recorded as soon as possible after they occur. Records must be kept for at least three years from the date of the last entry.�Where must first aid incidents be recorded?Employers should ensure that first aid incidents are recorded in the accident book as required.What should be recorded in an accident book?Key details include the incident's date, time, and location, names of those involved, injury details, and any treatment given.Explore Popular First Aid Courses at HurakLooking to boost your skills? Explore our range of first aid courses to find the right one for you.Here are some of our most popular first aid courses to help you stay prepared:Emergency First Aid at Work (1 Day): A one-day course covering essential life-saving skills, including CPR, choking, bleeding control, and managing emergencies. Ideal for low-risk workplaces.First Aid at Work (3 Days): A comprehensive three-day training that prepares you to respond to a wide range of injuries and illnesses in the workplace. Meets HSE requirements for high-risk environments.Basic First Aid Course: Perfect for general awareness. It covers basic skills like dealing with minor wounds, burns, shock, and fainting and is suitable for non-workplace settings.Advanced First Aid Training: Intended for those needing higher-level skills. Includes oxygen administration, advanced trauma management, and secondary assessments.First Aid for Mental Health: Focuses on identifying, understanding, and supporting individuals with mental health conditions. Covers stress, anxiety, depression, and early intervention strategies.
Understanding the Different Levels of First Aid Training
Whether you're an employer aiming to meet legal obligations, an HR professional managing workplace safety, or an individual looking to gain vital life-saving skills, understanding the different levels of first aid training is essential. With various course options available, each designed for specific environments and risk levels, it�s important to choose the right training that aligns with your responsibilities.This guide breaks down the most common first aid courses, what they cover, how long they�re valid, and who they�re best suited for, so you can make a confident and informed decision that supports both compliance and preparedness.Legal Requirements for First Aid Training in the WorkplaceFirst aid training is more than just a recommendation, and it�s a legal requirement in many workplaces. Under the Health and Safety (First-Aid) Regulations 1981, employers are required to provide adequate and appropriate first aid equipment, facilities, and trained personnel to ensure employees receive immediate care if injured or taken ill at work. The exact number of trained first aiders needed depends on the size and nature of your business. Beyond compliance, being skilled in first aid helps reduce workplace injuries and can even save lives.Different Levels of First Aid Training ExplainedWhile the Health and Safety Executive (HSE) does not formally assign �levels,� training providers commonly use these informal categories:�Level�CourseBest ForLevel 2Emergency First Aid at WorkLow-risk workplaces (e.g., offices)Level 3First Aid at WorkHigher-risk environments (e.g., factories, construction)RefresherAnnual First Aid RefresherAll workplaces (recommended annually)Let�s now take a closer look at the most common types of first aid training courses, what they cover, who they�re for, and how long the certifications last.Emergency First Aid at Work (EFAW)This entry-level Emergency First Aid at Work course focuses on essential skills like CPR, treating minor injuries, and responding to common incidents until help arrives. It�s ideal for low-risk environments such as offices, retail shops, or community centres. The training usually takes one day and is valid for three years.Upon completion, you�ll receive an Emergency First Aid at Work certificate. This certification meets the Health and Safety Executive (HSE) requirements for workplace first aiders and is fully recognised for compliance purposes.How long is the Emergency First Aid certificate valid?Your certificate remains valid for 3 years from the course completion date, as required by HSE. To stay certified, you�ll need to retake the course before it expires.Topics covered in this course:This course will equip you with practical skills and the confidence to act in emergencies. You�ll learn how to:Understand the responsibilities and duties of a designated first aiderApproach and assess emergency situations safely and effectivelyAdminister aid to an unconscious person (including those not breathing normally)Respond to choking incidents with appropriate techniquesControl bleeding and manage open woundsIdentify signs of shock and provide appropriate supportTreat minor injuries such as small cuts, bruises, or burns First Aid at Work (FAW)For workplaces with higher risks, the First Aid at Work course offers more in-depth training. It covers a wider range of conditions, including fractures, burns, cardiac emergencies, and medical conditions. This course is recommended for larger organisations, factories, or construction sites. It typically takes three days to complete and includes both theory and practical assessments.After finishing, you�ll receive a First Aid at Work certificate, qualifying you as a workplace first aider in medium to high-risk environments. This certification also complies with HSE guidelines.How long is the First Aid at Work certificate valid?Your certificate is valid for 3 years. To maintain your certification, you�ll need to take a requalification course before it expires.Topics covered in this course:Building on the Emergency First Aid content, this course trains you to:Assess the scene and manage complex incidents effectivelyProvide first aid to an unresponsive casualty and perform CPRUse an Automated External Defibrillator (AED) safely and confidentlyManage serious injuries and conditions such as heavy bleeding, burns, fractures, heart attacks, strokes, seizures, choking, and shock First Aid At Work Refresher (FAW Annual Refresher)The First Aid at Work Refresher course is designed for those who already hold a FAW certificate and want to maintain their skills and knowledge. This refresher training is recommended annually to ensure you stay confident and competent in handling workplace emergencies.This course revisits essential first aid techniques and updates you on any changes in procedures. It covers the key elements of the full FAW course but in a shorter format, making it ideal for individuals and organisations looking to refresh their first aid training without repeating the entire initial course.Upon successful completion, you�ll receive a First Aid at Work Refresher certificate, helping you remain compliant with workplace safety requirements.How long is the FAW Refresher certificate valid?While annual renewal is recommended, the refresher certificate supports maintaining your qualification until the full FAW certification expires after 3 years.Topics covered in this course:Review of scene assessment and managing incidentsFirst aid for unresponsive casualties and CPR practiceUsing an Automated External Defibrillator (AED)Managing serious injuries, including bleeding, burns, fractures, cardiac emergencies, strokes, seizures, choking, and shock Advanced and Specialist CoursesIf you need training tailored to specific groups or industries, there are specialised courses such as:Paediatric First Aid � Designed for those working with infants and children, like teachers and childcare professionals. This course covers a broad range of topics, from managing choking and seizures to treating burns, fractures, and allergic reactions. Successful learners receive a Highfield-accredited certificate valid for three years.Mental Health First Aid � Focuses on recognising and supporting individuals experiencing mental distress. You�ll learn to identify common mental health disorders, offer initial aid, and practice empathetic, non-judgmental listening. The certification lasts for three years.Industry-specific courses �Tailored for sectors such as hospitality, sports, and construction to meet the unique demands of those workplaces.How to Choose the Right First Aid Training CourseThe type of first aid training your workplace needs depends on several factors, including:The number of employeesWorkplace hazardsDifferent work environmentsAny special requirementsSmaller, low-risk workplaces may only need Emergency First Aid at Work training. At the same time, larger or higher-risk environments typically require a more comprehensive First Aid at Work course for nominated first aiders. Some workplaces may benefit from a mix of training levels or specialist courses, such as Paediatric First Aid and Mental Health First Aid, depending on their specific needs and risks. Assessing your unique situation helps ensure you have the right first aid provision in place.Consider the following when choosing your training:Low-risk, small workplaces: Emergency First Aid at Work (EFAW) is usually sufficient.Larger or higher-risk workplaces: First Aid at Work (FAW) is recommended for nominated first aiders.Mixed environments: A combination of EFAW and FAW courses may be necessary.Childcare or education settings: Paediatric First Aid is essential.Workplaces prioritising mental wellbeing: Mental Health First Aid helps support colleagues facing mental health challenges.Special environments: Activity-specific courses for outdoor or remote work may also be needed.ConclusionChoosing the right first aid training is a vital step in creating a safe and prepared workplace. Whether you work in a low-risk office or a high-risk industrial environment, there is a course designed to meet your specific needs, from the foundational Emergency First Aid at Work to specialised programs like Paediatric and Mental Health First Aid.Investing in proper first aid training not only ensures legal compliance but also equips you and your team with the confidence and skills to respond effectively during emergencies. Ready to get started? Explore our range of certified first aid courses today, and take the first step toward a safer workplace.Frequently Asked QuestionsWhat are the different levels of first aid training in the UK?First aid training in the UK is commonly divided into three levels: Emergency First Aid at Work (EFAW), First Aid at Work (FAW), and the Annual First Aid Refresher. EFAW is a basic one-day course for low-risk settings, while FAW is a more comprehensive three-day course for higher-risk environments. Though the HSE doesn�t formally assign levels, these classifications are widely recognised among training providers.How long is first aid training valid for?Most first aid qualifications, including both EFAW and FAW, are valid for three years. To maintain certification, you must retake the course before it expires. Taking an annual refresher course is strongly recommended to keep your skills sharp and compliant with workplace standards.Which level of first aid training should I choose?The right level of first aid training depends on your workplace�s size and risk level. EFAW is suitable for small, low-risk environments like offices, while FAW is better for high-risk settings such as factories or construction sites. Workplaces involving children or mental health support may require specialised courses like Paediatric or Mental Health First Aid.What�s the difference between Emergency First Aid at Work and First Aid at Work?The main difference is in depth and duration. Emergency First Aid at Work is a one-day course focused on essential skills, whereas First Aid at Work spans three days and includes more advanced topics like fractures, cardiac events, and serious trauma. Your workplace risk assessment will help determine which is appropriate.Can I take a refresher instead of the full course?�If your current certificate is still valid, you can take an Annual First Aid Refresher to stay updated or a requalification course to extend your certification. However, if your certificate has expired, you�ll need to complete the full training again to remain qualified.
Understanding What to Record and Report in an Accident Form at Work
Accurately reporting workplace accidents is essential, not just to meet legal requirements, but to help maintain a safe working environment. In the UK, under RIDDOR 2013 (Reporting of Injuries, Diseases and Dangerous Occurrences Regulations), employers are required to report certain work-related injuries, illnesses, and dangerous occurrences. Accident forms play a key role in this process, helping to document incidents, identify risks, and prevent future harm.In this article, we�ll cover the key points about accident forms, their purpose, when they�re needed, and how they contribute to overall workplace safety.The Importance of Accident Forms in Workplace SafetyAn accident form is a crucial document used to report incidents that occur in the workplace. It serves as a detailed record of what happened, helping to ensure the event is documented for legal purposes. In cases where injuries or damages are involved, the form can act as evidence in court during legal proceedings.By accurately documenting incidents, employers can identify potential hazards, address risks early, and take proactive steps to reduce accidents in the future. This makes accident forms an integral part of any workplace safety strategy. .main{ border:3px solid #0f7c90; border-radius:20px; position: relative; font-family:roboto; font-weight: 400; color: #000; } .main-two{ position: absolute; top:-25px; left:45px; background-color:white; } .img-div{ border-radius : 100%; padding:2px 7px; background-color:#0f7c90; margin-right:5px; width: 50px; height: 50px; } .img{ width:30px; object-fit:contain; height:auto; border-radius : 100%; } @media only screen and (max-width: 600px) { .heading{ font-size:20px; } .img{ width:20px; object-fit:contain; height:auto; border-radius : 100%; } .img-div{ width: 40px; height: 40px; } .main-two{ left:25px; } } Put Your First Aid Knowledge into Practice by enrolling in a course today! Our First Aid courses equip you to handle critical situations and enhance workplace safety. Build confidence and expertise with Emergency First Aid at Work (EFAW) and Level 3 First Aid at Work meeting UK legal requirements. Key Information to Include on an Accident Report FormThe chart below outlines key information you should include in a workplace accident report form, which aligns with RIDDOR guidelines.SectionDetails to RecordInjured Person�s DetailsName, job title, department, contact informationDate & TimeExact date and time the accident occurredLocation of IncidentSpecific area or site within the workplaceIncident DescriptionClear explanation of what happened and howInjury DetailsType of injury, body part affected, severityImmediate Action TakenFirst aid given, emergency response, by whom and whenWitness InformationNames and contact details of any witnessesReported ByName, job role of the person completing the form, and date completedFollow-Up ActionsPreventive measures taken, referrals, or investigation stepsSignaturesFrom the injured person (if possible), the reporter, and a manager/supervisorTypes of Workplace Incidents That Require an Accident ReportUnder the Reporting of Injuries, Diseases and Dangerous Occurrences Regulations (RIDDOR), employers and those responsible for workspaces are expected to report specific incidents to the Health and Safety Executive (HSE). These include:Fatalities and Major Injuries: In case of serious injuries, such as fractures or amputations, these should be reported as soon as possible, either online or by phone.Over-Seven-Day Injuries: If an employee is unable to work for more than seven days, the incident should be reported within 15 days using the HSE�s online form.Occupational Diseases: If an employee is diagnosed with conditions like asthma or carpal tunnel syndrome related to their work, these should be reported within 10 days using the appropriate RIDDOR form.Dangerous Occurrences: In the event of a near miss or equipment failure that could have caused serious harm, it�s essential to report it promptly through the HSE system.Gas Incidents: If there are any gas-related issues, such as leaks, injuries, or unsafe fittings, these should be reported right away. Gas engineers and employers have designated online forms to use for these incidents. Accident Reporting: A Step-by-Step GuideWhen an accident occurs, responding quickly and correctly is essential. Here are the key steps to follow:Ensure safety: First, ensure that the area is safe to prevent further harm.Administer first aid: Provide immediate care to the injured person.Record first aid: If treatment was given, fill out a first aid report form.Notify management: Inform a supervisor or manager as soon as possible.Complete the accident form: Document the incident with all relevant details.Report under RIDDOR: Visit the HSE's online form to submit details of any work-related injuries or incidents and complete the accident report.Preserve the scene: If necessary, secure the area for investigation.ConclusionAccident reporting isn�t just about meeting legal obligations; it is vital in identifying risks, preventing future incidents, and promoting a safer workplace for everyone. Using accident forms helps capture essential details and supports continuous improvement in workplace safety.Frequently Asked QuestionsWhat must be recorded on an accident report form?Date, time, location, people involved, injury details, and witnesses.What is the accident reporting procedure in the workplace?Notify a supervisor, complete an accident form, and report under RIDDOR if required.In the event of an accident, what should be completed?An accident form or a first aid report form.What is a first aid report form used for?To record the treatment given and who provided it.Explore Our Popular First Aid CoursesLooking to boost your skills? Explore our range of first aid courses to find the right one for you.Here are some of our most popular first aid courses to help you stay prepared:Emergency First Aid at Work (1 Day): A one-day course covering vital skills like CPR, choking, bleeding control, and managing common emergencies. Ideal for low-risk workplaces.First Aid at Work (3 Days): A comprehensive three-day course that prepares you to respond to a wide range of injuries and illnesses. Meets HSE standards for high-risk environments.Paediatric First Aid (2 Days): Designed for those working with infants and children. Covers child-specific emergencies such as seizures, choking, and allergic reactions.Basic First Aid Course: Perfect for low-risk environments like offices, shops, and restaurants. This course is also ideal for those preferring online training. It teaches key first aid skills and builds confidence to handle everyday emergencies safely and effectively.Advanced First Aid Training: For those who need higher-level skills. Covers oxygen use, advanced trauma care, and secondary assessments for more complex situations.First Aid for Mental Health: Focuses on recognising and supporting people with mental health conditions like stress, anxiety, and depression, with an emphasis on early intervention.

5 Essential Types of Bandages Used in First Aid
Injuries can happen at any moment, and knowing how to treat them effectively is essential. Bandages are a crucial part of any first aid kit, designed to protect wounds, support injured areas, and encourage healing.Whether you're managing a sprain, cut, or other injury, choosing the right bandage is key to providing proper care. With so many different types of bandages available, it�s important to understand their unique purposes.In this article, we�ll explore the five most important types of bandages and how to use them to provide effective first aid.Exploring Different Types of Bandages and Their Practical UsesNot all bandages do the same job. Knowing which one to grab is a crucial step in any first-aid emergency. Here�s a look at the different types and when to use each.Roller bandagesRoller bandages are flexible and commonly used to secure dressings, support joints, or apply pressure. They�re ideal for covering large areas and are easy to wrap around limbs.When to use:To hold a dressing in place.To provide support for a sprain or strain.To apply pressure to control bleeding.To cover large wound areas on arms or legs.Triangular bandagesTriangular bandages are adaptable cloths used to support, cover, or immobilise injuries. Their shape makes them especially useful for upper limb injuries.When to use:To create an arm or shoulder slingTo immobilise a fractured limbTo secure a dressing on the head or scalpAs a temporary wrap for splintingTubular bandagesTubular bandages are slip-on coverings designed for fingers, toes, and limbs. They offer light compression and protect minor injuries.When to use:To cover cuts or abrasions on fingers or toesTo protect dressings on minor woundsTo provide gentle compression for swellingTo secure padding on elbows, knees, or other jointsCrepe bandagesCrepe bandages are elastic wraps that provide compression and support for joint or muscle injuries. They help reduce swelling and stabilise affected areas.When to use:To support sprains or strainsTo reduce swelling in sprained areasTo keep wound dressings in placeFor compression in soft tissue injuriesCohesive bandagesCohesive bandages stick to themselves, not the skin, making them ideal for tricky areas. They offer flexible support and compression without the need for clips or tape.When to use:To support sprains and strainsTo wrap joints like wrists, knees, or fingersTo secure dressings on moving areasFor compression without adhesive on the skinComparison of Bandage Types and Their UsesHere�s a quick comparison of the five bandage types covered above, summarising their typical uses.Types of bandagesUsesRoller BandagesUsed for securing dressings, providing support, and stopping bleeding.Triangular BandagesUsed to create slings, immobilise limbs, or cover wounds.Tubular BandagesUsed to cover fingers, toes, and minor injuries for light compression.Crepe BandagesUsed for compression, support, and reducing swelling in sprains and strains.Cohesive BandagesUsed for compression and support, adheres to itself, ideal for joints. .main{ border:3px solid #0f7c90; border-radius:20px; position: relative; font-family:roboto; font-weight: 400; color: #000; } .main-two{ position: absolute; top:-25px; left:45px; background-color:white; } .img-div{ border-radius : 100%; padding:2px 7px; background-color:#0f7c90; margin-right:5px; width: 50px; height: 50px; } .img{ width:30px; object-fit:contain; height:auto; border-radius : 100%; } @media only screen and (max-width: 600px) { .heading{ font-size:20px; } .img{ width:20px; object-fit:contain; height:auto; border-radius : 100%; } .img-div{ width: 40px; height: 40px; } .main-two{ left:25px; } } Put Your First Aid Knowledge into Practice by enrolling in a course today! Our First Aid courses equip you to handle critical situations and enhance workplace safety. Build confidence and expertise with Emergency First Aid at Work (EFAW) and Level 3 First Aid at Work meeting UK legal requirements. How to Apply Different Types of BandagesEach type of bandage has its own special use, and applying them the right way makes all the difference in providing effective care. Whether you're tending to a small cut or helping someone with a sprain, knowing the best way to use each bandage will help things heal properly. To make sure you're applying each bandage correctly, refer to the guide below.Bandage TypeQuick Application GuideRollerAnchor at the far end; wrap toward the body, overlapping each layer by half its width; secure and check circulation.TriangularFold to the correct width for a sling; place under the limb; tie over the shoulder; tuck or pin ends out of the way.TubularSlide over the injured area (use an applicator if available); smooth out any wrinkles for a snug fit.CrepeWrap in a spiral or figure-eight pattern; overlap each layer by one-third of its width; secure and verify circulation.CohesiveTear to the needed length; wrap so it sticks to itself; press the end down; avoid wrapping too tightly. Quick-Reference: 5 Simple Steps to Apply a BandageThese five steps will help you bandage any minor injury quickly and confidently.Clean and dry the wound: Wash your hands, then gently clean the wound with water or a sterile saline solution. Pat the area dry with a clean gauze or cloth.Place a sterile dressing: Place a sterile dressing or pad over the wound without touching the side that will contact the skin. Smooth it down so it lies flat.Choose the right bandage: Select the appropriate bandage type (roller, crepe, cohesive, etc.) based on the injury location and required support or compression.Wrap from the lower end: Anchor your bandage at the point farthest from the heart, then wrap toward the body with even tension, overlapping each turn by about one-third.Secure and check circulation: Fasten the end of the bandage (with clips, tape, or by self-adhesion) and then check that the fingers or toes beyond the bandage are warm and pink and have a normal sensation.ConclusionUnderstanding how and when to use different bandages is a key part of effective first aid. Recognising their specific uses and applying them correctly can make all the difference in an emergency. To build your confidence and gain hands-on experience, consider enrolling in one of our First Aid Courses, a valuable step towards being fully prepared when it matters most.Frequently Asked QuestionsWhat are the 5 types of bandages in first aid?Roller, triangular, tubular, crepe, and cohesive bandages.When should I use each type of bandage?Use a roller for limbs, a triangular for slings, tubular for fingers, crepe for sprains, and cohesive for secure wrapping.Can I learn bandaging in a first aid course?Yes, first aid courses teach how to use and apply bandages correctly.Explore Popular First Aid Courses at HurakLooking to boost your skills? Explore our range of first aid courses to find the right one for you.Here are some of our most popular first aid courses to help you stay prepared:Emergency First Aid at Work (1 Day): Get equipped with essential life-saving skills in just one day. This course covers CPR, choking, bleeding control, and how to manage various workplace emergencies, ideal for low-risk environments.First Aid at Work (3 Days): A thorough three-day course designed to help you handle a wide range of injuries and illnesses in the workplace. Fully compliant with HSE requirements and perfect for high-risk settings.Paediatric First Aid (2 Days): Tailored for anyone working with babies and young children. Learn how to respond to emergencies like choking, febrile seizures, allergic reactions, and more in a childcare context.Basic First Aid Course: Great for general awareness outside the workplace. Learn how to treat minor injuries, burns, fainting, shock, and other common incidents.Advanced First Aid Training: For those needing a higher level of care. This course covers oxygen therapy, advanced trauma response, and detailed secondary assessments.First Aid for Mental Health: Learn how to identify and support individuals facing mental health challenges. Topics include stress, anxiety, depression, and practical early intervention techniques.