A First Aider�s Guide to Spinal Injuries
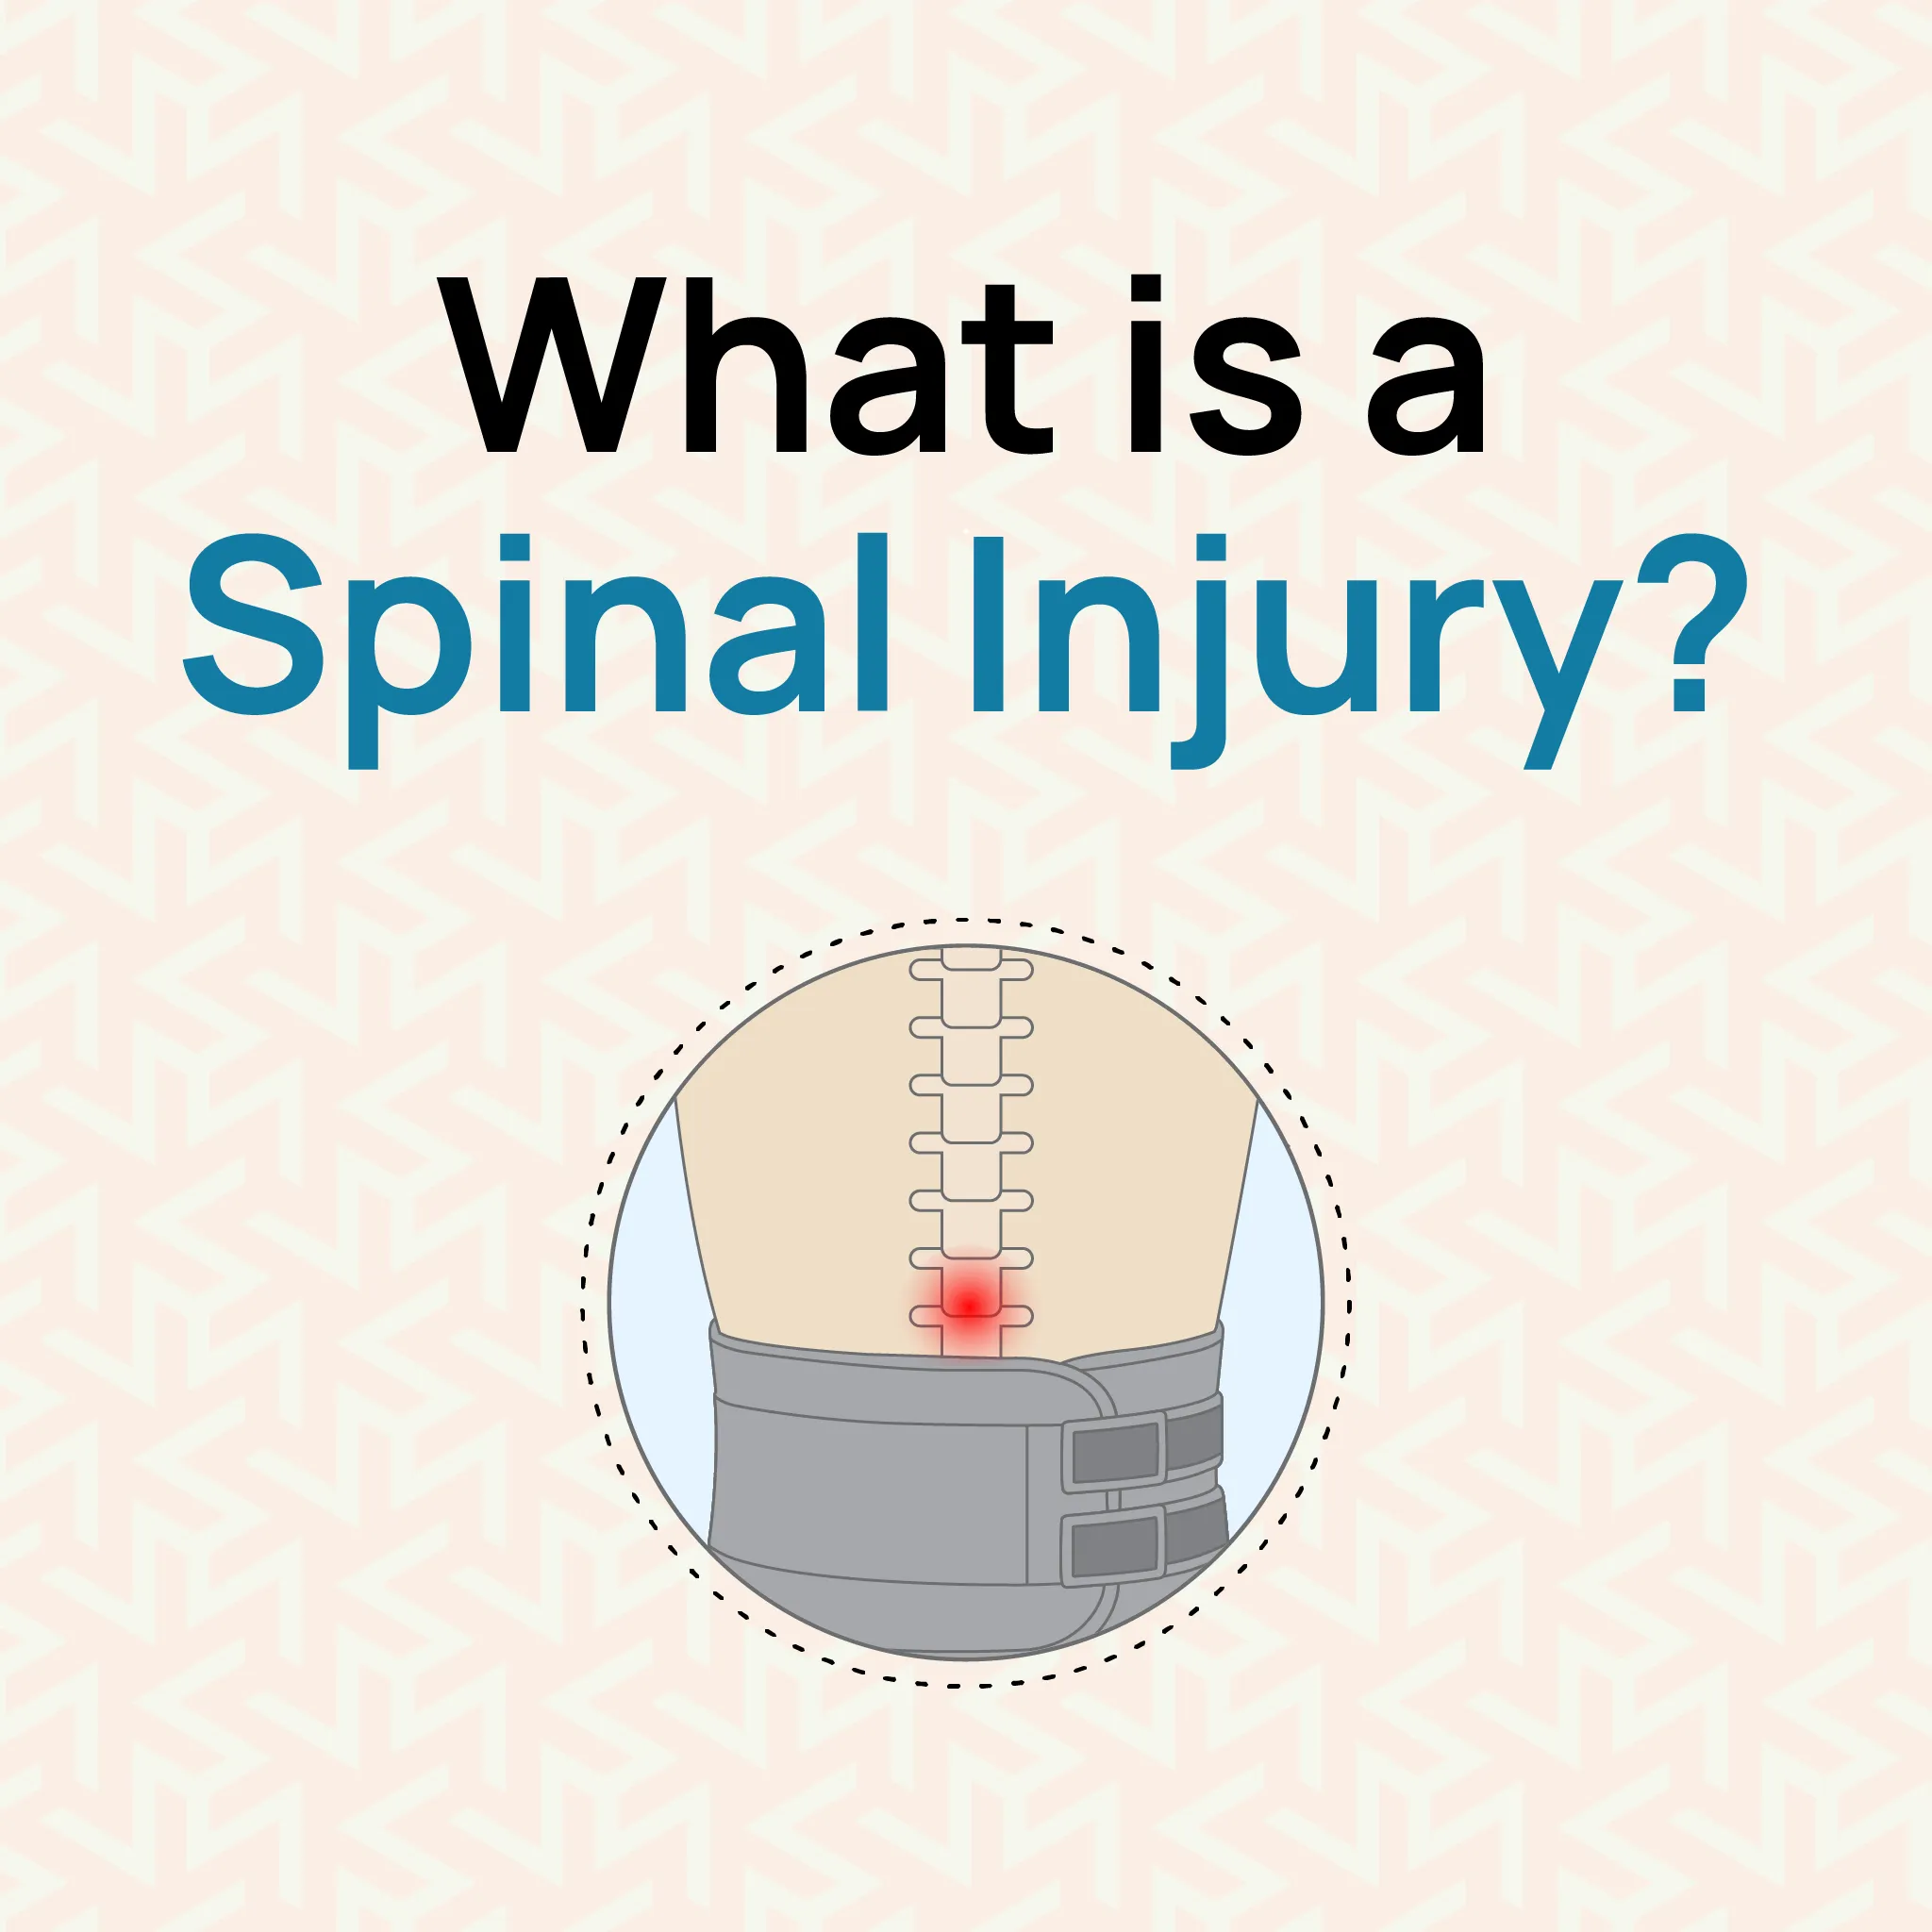
Spinal injuries can be life-threatening, so knowing how to act quickly and correctly in an emergency is vital. Whether you�re at home, at work, or outdoors, this guide will walk you through the key first aid steps and how to spot the signs of a spinal injury to help prevent further damage.What is a Spinal Injury?Spinal injuries happen when the spine or spinal cord is damaged, and they may lead to serious issues like paralysis. Because these injuries often happen without warning and can cause lasting disability, it�s vital to act quickly and correctly to prevent further harm. In the event of a spinal injury, understanding the importance of first aid training could mean the difference between recovery and permanent disability, or even life and death.Recognising the Symptoms of a Spinal InjuryUnderstanding what to look for in a potential spinal injury can help you respond more effectively. Below are some of the most common symptoms to be aware of in such situations.Neck or back pain or tenderness (especially in the spinal region).Difficulty moving limbs or inability to move.Numbness or loss of sensation in the arms, legs, or other body parts.Weakness or loss of coordination in the limbs.Paralysis (partial or complete, depending on the severity of the injury).Loss of bowel or bladder control.Breathing difficulties or trouble with respiration.Sharp or stinging pain in the neck or back.Muscle spasms in the back or limbs.Loss of consciousness or altered mental state (due to shock or head injury).Loss of sensation in the limbs.Deformity or abnormal positioning of the head, neck, or back.Unconsciousness or drowsiness.Common Causes of Spinal InjurySpinal injuries often result from sudden, forceful events that impact the spine or the structure surrounding the spine. The most common causes include:Falls: Especially from height, down stairs, or falling awkwardly during everyday activities. Older adults and people working at heights are particularly vulnerable.Road Traffic Accidents: High-speed collisions or sudden deceleration in a vehicle can cause severe spinal trauma.Motorcycle Accidents: Being thrown off or falling from a motorcycle frequently leads to back and spinal injuries, especially without proper protection.Sports Injuries: Contact and high-impact sports like rugby, diving, or horse riding can stress the spine significantly.Falling Objects: A heavy object hitting the back, every day in construction and warehouse settings, can result in spinal fractures or compression injuries. .main{ border:3px solid #0f7c90; border-radius:20px; position: relative; font-family:roboto; font-weight: 400; color: #000; } .main-two{ position: absolute; top:-25px; left:45px; background-color:white; } .img-div{ border-radius : 100%; padding:2px 7px; background-color:#0f7c90; margin-right:5px; width: 50px; height: 50px; } .img{ width:30px; object-fit:contain; height:auto; border-radius : 100%; } @media only screen and (max-width: 600px) { .heading{ font-size:20px; } .img{ width:20px; object-fit:contain; height:auto; border-radius : 100%; } .img-div{ width: 40px; height: 40px; } .main-two{ left:25px; } } Put Your First Aid Knowledge into Practice by enrolling in a course today! Our First Aid courses equip you to handle critical situations, including spinal injury management, and enhance workplace safety. Build confidence and expertise with Emergency First Aid at Work (EFAW) and Level 3 First Aid at Work meeting UK legal requirements. Step-by-Step Guide: How to Give First Aid for a Suspected Spinal InjuryIf you suspect someone has a spinal injury, giving the right first aid can make a big difference. Follow these step-by-step instructions to protect their spine and keep them safe until emergency help arrives.StepsActionDetails1Reassure and keep still.Tell the casualty not to move unless there�s immediate danger. Call 999 or 112, or ask someone else to call.2Support the head and neck.Kneel behind their head. Hold both sides of the head with fingers spread (don�t cover ears). Keep head, neck, and spine aligned.3Use rolled blankets for supportAsk a helper to place rolled blankets/towels on either side of the head to keep it steady in a neutral position.4Monitor breathing and responsivenessKeep checking their breathing and level of response while waiting for emergency services.5Open the airway with the jaw thrustPlace fingertips at the jaw angles and gently lift the jaw to open the airway; do not tilt the neck.6Check breathing for 10 secondsLook, listen, and feel for breathing by placing your ear near their mouth and looking down their body.7If breathingContinue supporting the head and monitor their breathing and response until help arrives.8If not breathingConfirm emergency call, start CPR immediately (if trained), and ask for a defibrillator (AED) if available.Recovery Position: When It�s the Only OptionIn most cases of suspected spinal injury, the casualty should not be moved to avoid worsening the injury. However, if they�re unresponsive and not breathing normally, and you can�t maintain an open airway, you may need to place them in the recovery position. This involves gently rolling the person onto their side, keeping the head, neck, and spine aligned as much as possible, with the head tilted slightly to keep the airway open. In such emergencies, ensuring the casualty is breathing takes priority over spinal stability. Simple Safety Measures to Avoid Spinal InjuryPreventing spinal injuries is about being mindful in everyday activities and making safe choices. Here are some simple steps you can take to protect your spine:Wear your seatbelt: Always buckle up, whether driving or riding in the car. It�s your first line of defence in a crash.Lift smart: When lifting heavy objects, bend your knees instead of your back. Keep the object close to your body and avoid twisting as you stand.Make your home fall-proof: Secure loose rugs, install handrails on stairs, and use non-slip mats in bathrooms to reduce the risk of falls.Stay active: Regular exercise helps strengthen your core muscles, supporting your spine. Even simple activities like walking or swimming will help keep your back healthy.Suit up for sports: Wear protective gear when playing or participating in recreational activities. Helmets and pads are essential in preventing serious injury.Think before you dive: Always check the water depth before diving. Avoid diving into shallow water to prevent spinal injuries.Keep kids safe: Ensure children use the appropriate car seats for their size and age, and always supervise them during rough play or at the playground.Not sure where to start? This infographic summarises the top four ways to protect your spine daily. ConclusionKnowing the signs of a spinal injury and how to respond quickly can help prevent serious harm. First aid training gives you the confidence to act fast in emergencies, and that can save lives. Simple everyday habits like wearing a seatbelt, lifting safely, and staying active all help protect your spine. A little care now can make a big difference later.Frequently Asked QuestionsWhat is the recovery position?The recovery position keeps the airway clear in someone who is unconscious but breathing. It involves gently rolling them onto their side with their head tilted back. If a spinal injury is suspected, only use it if absolutely necessary, such as if they�re vomiting or having trouble breathing. You�ll learn how to respond safely in situations like this in our First Aid at Work course.What should you not do if someone has a spinal injury?Don�t move them unless there�s an immediate danger. Avoid twisting their spine, removing helmets, or allowing them to sit up, stand, or walk, these actions could cause further harm.What are the signs of a spinal injury?Watch for neck or back pain, numbness, tingling, weakness, or difficulty moving limbs. Loss of sensation or control in the arms or legs can also be a sign. Always treat these symptoms seriously.What should you know about spinal injury first aid?Keep the person still, support their head and neck, and call 999. Only move them if they�re in danger or their airway is blocked. Reassure them and monitor their breathing until help arrives.Explore Popular First Aid Courses at HurakLooking to boost your skills? Explore our range of first aid courses to find the right one for you.Here are some of our most popular first aid courses to help you stay prepared:Emergency First Aid at Work (1 Day): A one-day course covering essential life-saving skills, including CPR, choking, bleeding control, and managing emergencies. Ideal for low-risk workplaces.First Aid at Work (3 Days): A comprehensive three-day training that prepares you to respond to a wide range of injuries and illnesses in the workplace. Meets HSE requirements for high-risk environments.Paediatric First Aid (2 Days): Designed for those working with infants and children. Covers child-specific emergencies like choking, febrile seizures, allergic reactions, and more.Basic First Aid Course: Perfect for general awareness. It covers basic skills like dealing with minor wounds, burns, shock, and fainting and is suitable for non-workplace settings.Advanced First Aid Training: Intended for those needing higher-level skills. Includes oxygen administration, advanced trauma management, and secondary assessments.First Aid for Mental Health: Focuses on identifying, understanding, and supporting individuals with mental health conditions. Covers stress, anxiety, depression, and early intervention strategies.
Dealing with animal bites: emergency first aid guide
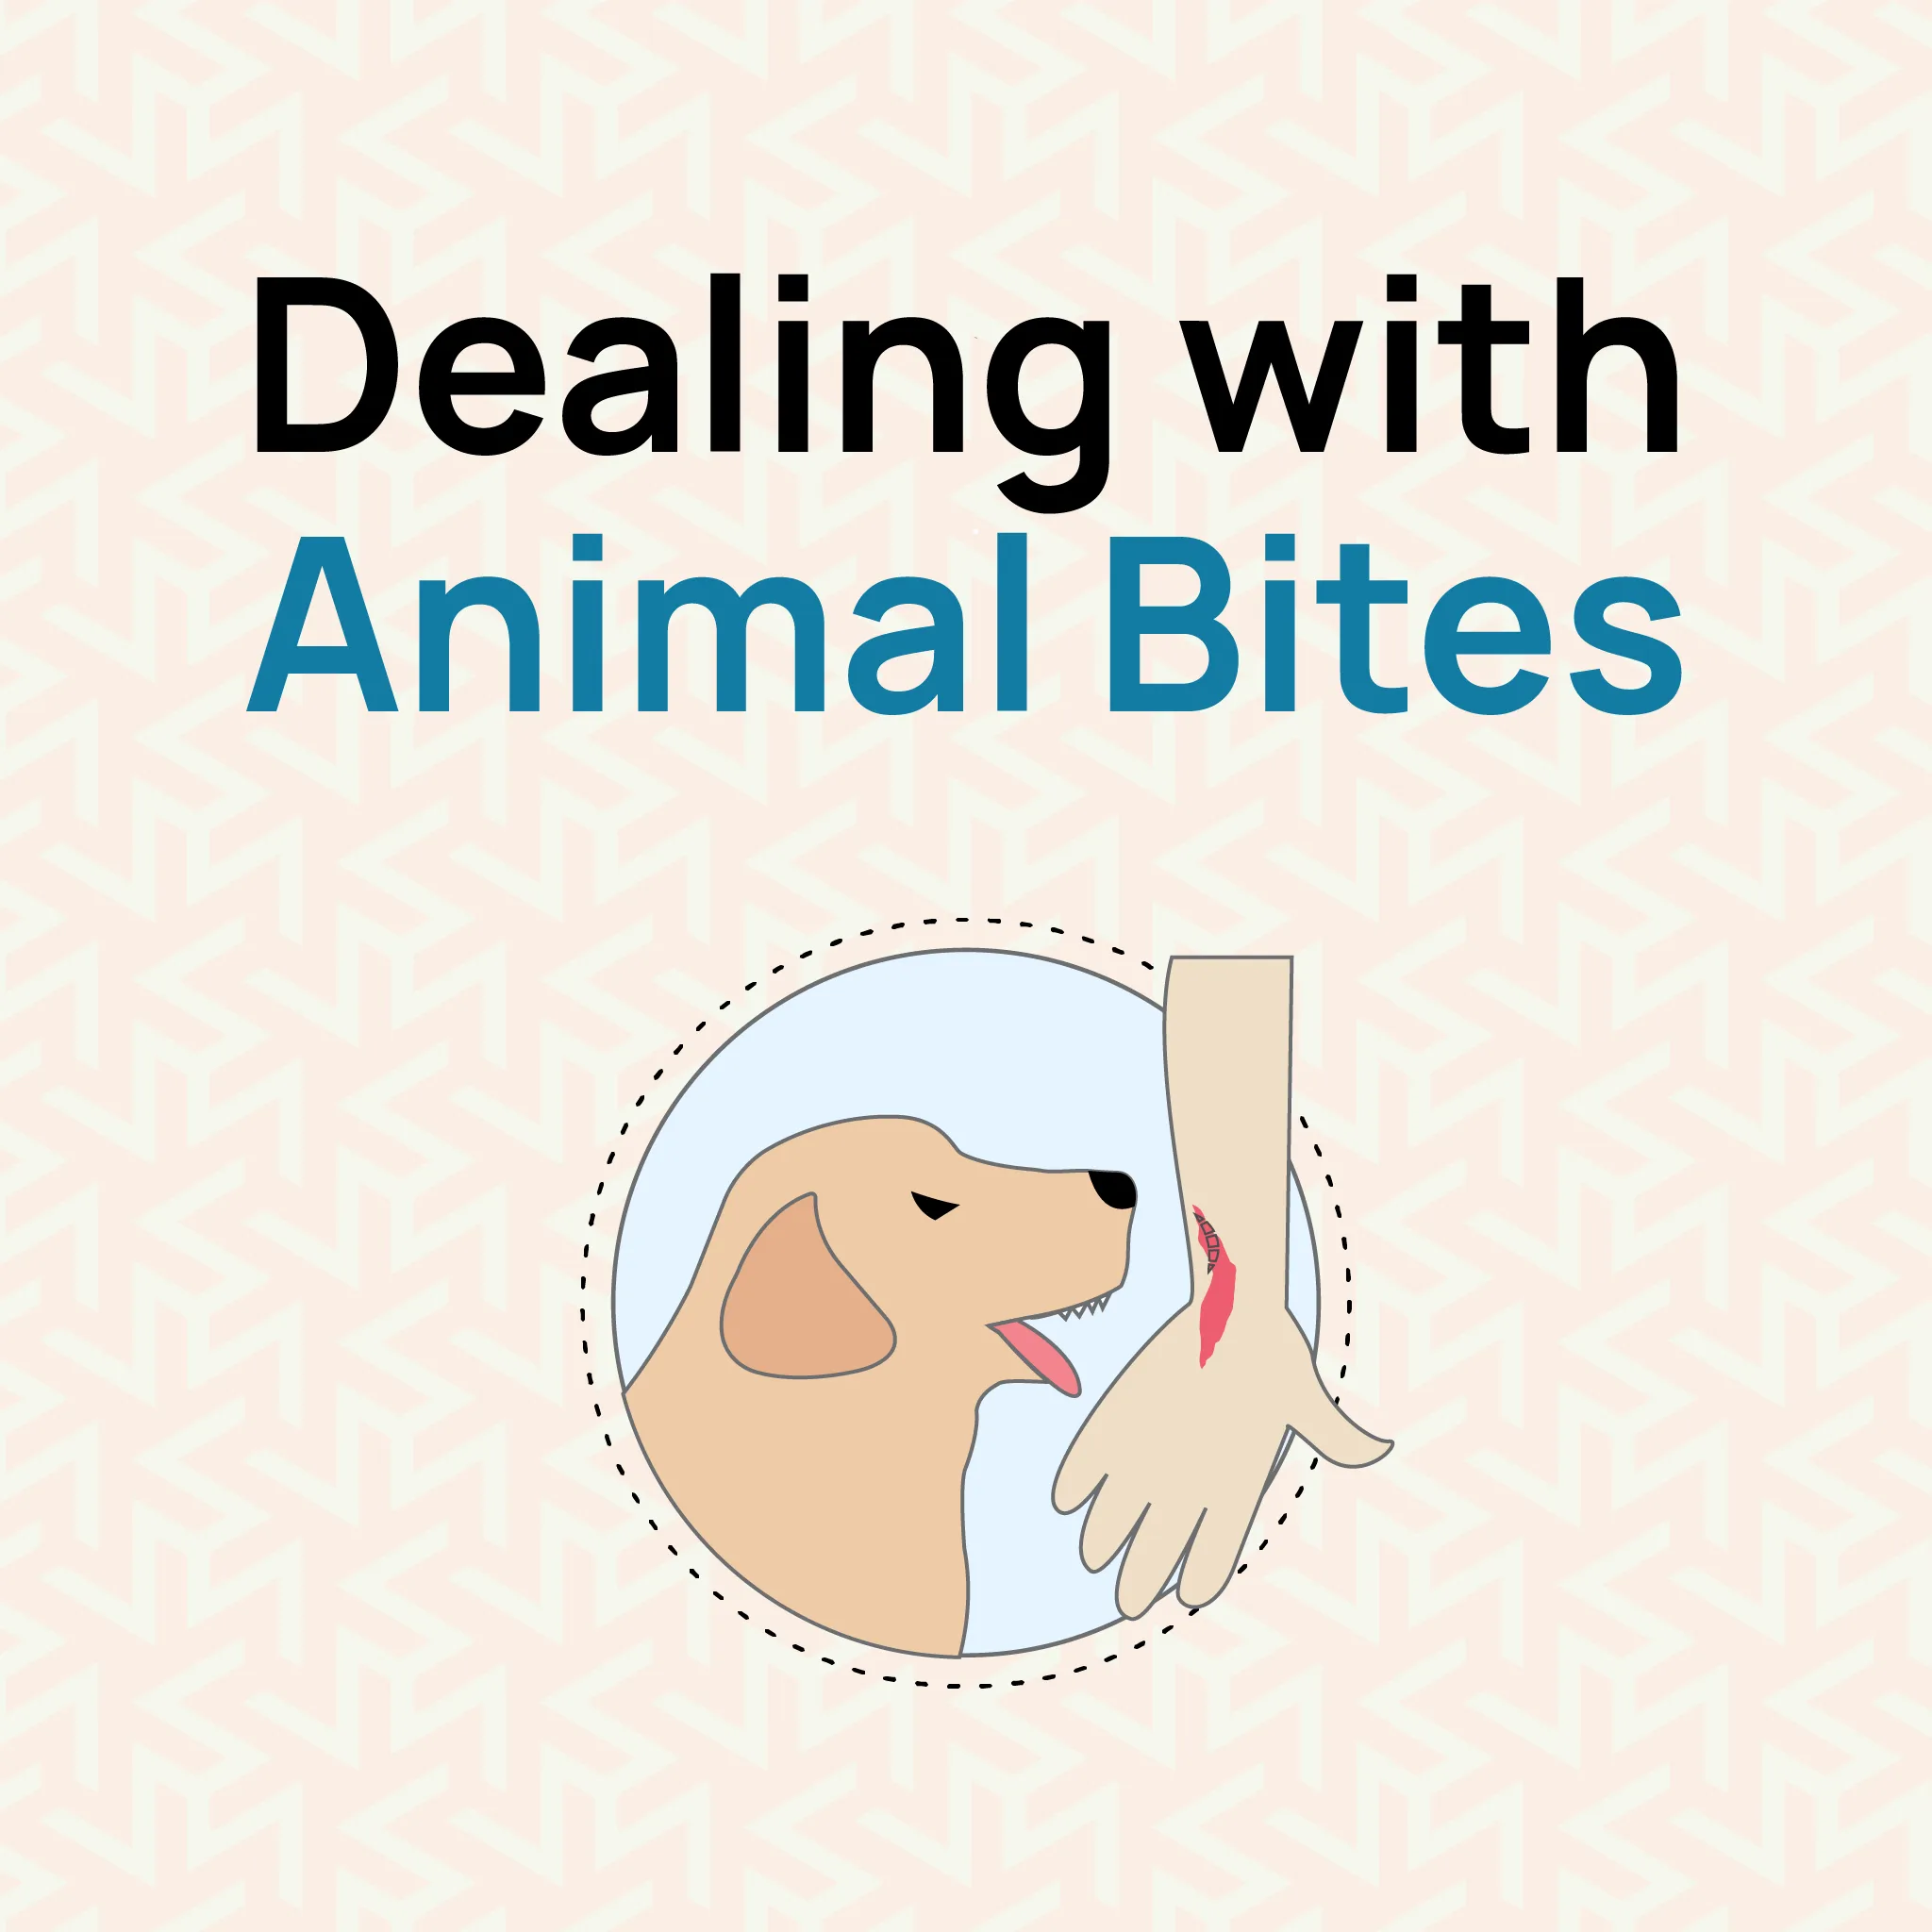
Animal bites, ranging from minor scratches to severe wounds, are common injuries. Whether caused by pets or wild animals, quick and proper first aid treatment is crucial to prevent infections and complications.Why Immediate First Aid for Animal Bites is ImportantAnimal bites can range from mild to severe, and if not treated promptly, they may lead to infections, particularly in the case of dog or rodent bites. In rare situations, this can result in complications like hydrophobia. Acting quickly with the right first aid response can significantly reduce the risk of infection. Having the appropriate skills through an Emergency First Aid at Work course can make a real difference in managing such incidents until professional help is available.Animal Bite Symptoms You Shouldn�t IgnorePuncture wounds, cuts or scratches.Bleeding that may be heavy or persistent.Swelling, redness, or warmth around the bite.Severe pain at the site.Pus or drainage.Fever or flu-like symptoms.Immediate Steps to Treat an Animal BiteIf you or someone else is bitten, follow the quick steps:Clean the wound: Rinse thoroughly with soap and running water to remove bacteria.Stop the bleeding: Apply gentle pressure with a clean cloth or bandage.Cover the bite: Use a sterile dressing to protect the area.Seek medical help: Get checked, especially if the wound is deep, swollen, or shows signs of infection.Quick Guide: Steps to Take After an Animal BiteExplore our First Aid courses to learn practical, hands-on techniques for treating injuries, including animal bites. Whether you're at work, home, or outdoors, the proper training could make all the difference.Different Types of Animal BitesAnimal bites, whether from pets or wild animals, can vary in severity and pose different risks. It's crucial to understand the type of bite and how to respond appropriately to avoid complications like infections or diseases. In this guide, we�ll explore the different types of animal bites, their associated risks, and the first aid steps needed to treat them effectively. For more on managing bleeding, check out our First Aid for Severe Bleeding - Treatment and Tips, and learn how to dress a wound for effective care appropriately.Types�Key factorsFirst Aid TipsDog bites�Common and often severe due to the strength of a dog�s jaws.Clean the wound, apply pressure, and seek medical attention.Cat bitesMore likely to cause infections.Clean immediately, apply antiseptic and seek and monitor for infection.Rodent bitesUsually small, associated with rabies.Clean thoroughly, and seek medical advice for rabies prevention.Wild animal bitesHigh risk of rabies and other infections.Seek emergency medical help immediately.Simple Ways to Prevent Animal BitesBy following a few practical habits and safety tips, you can significantly reduce the risk of getting bitten, whether you're at home, outdoors, or at work.Stay calm around animals: Sudden moves can scare them and trigger a bite.Don�t pet animals you don�t know: Even cute pets can react unpredictably if they feel threatened.Teach kids to be gentle and respectful with animals: It�s one of the best ways to keep them safe.Keep your pets healthy and vaccinated: A well-cared-for pet is less likely to bite.Wear gloves when handling animals at work: It�s a simple step that can protect you from scratches and bites. ConclusionAnimal bites can pose serious risks, potentially leading to infections or more severe complications. Understanding proper first aid techniques and acting quickly can significantly reduce these risks and help prevent further harm. Whether it's a pet or a wild animal, knowing what to do in the event of a bite can make all the difference. By gaining the right skills through first aid courses, you can be better prepared to handle such emergencies safely and effectively.Frequently Asked QuestionsWhat antibiotics should I take for animal bites?Doctors commonly use antibiotics for animal bites to prevent or treat infection. Always consult a healthcare professional for the correct antibiotic and dosage.Are tetanus and animal bites the same thing?No, tetanus and animal bites are not the same thing. Tetanus is a severe infection caused by a specific bacterium, often entering the body through deep wounds from animal bites. Animal bites are injuries which increase the risk of tetanus if the wound is deep or contaminated.What are the worst animal bites?The most dangerous animal bites include dog bites, cat bites, and wild animal bites, especially from bats, raccoons, and snakes.Explore Our Other First Aid CoursesAt Hurak, we offer a comprehensive range of first aid courses tailored to various needs and environments. Whether you're looking to expand your skills or renew your certification, we have options to suit you:First Aid at Work (3 Days): A comprehensive course for high-risk environments, including construction and healthcare.Paediatric First Aid (2 Days): Focused on emergency situations involving infants and children.Mental Health First Aid: Equips you to support individuals experiencing mental health issues.First Aid at Work Requalification (FAWR): A two-day refresher course for those needing to renew their First Aid at Work certificate.
Wasp Sting Treatment
Outdoor celebrations and activities like relaxing on your patio can quickly be disrupted if there are wasps around because these stingers are not only a hassle to deal with and can pose a major threat to someone who has wasp allergies or to people with sensitive skin conditions and weaker immune responses. Our aim is to provide the necessary information alongside practical tools for protecting you from wasps so you can safely use your outdoor spaces for your summer barbeques and picnics.How to Identify Wasps and Understand Their BehaviorPaper WaspsPaper wasps form an umbrella-shaped nest commonly found under eaves, decks, or in sheltered spaces, these wasps tend to be less aggressive as opposed to yellow jackets or hornets. However, if they sense danger they will sting immediately. It's best not to provoke them. These wasps are fascinating to look at, but best left alone if you encounter them.Understanding the behavior of these wasps is key to effective control. They are usually attracted to food sources, especially sweets and proteins, and they have the tendency to become territorial, and aggressive if their nest is threatened.Prevention is Key: Keeping Wasps AwayThe ideal way to deal with wasps is to prevent them from becoming a problem in the first place. Here are some measures you can take to ensure you do not encounter wasps:Food Management: Keep food covered, especially when eating outdoors. Clean up spills and crumbs promptly, and ensure garbage cans are tightly sealed. You don�t want your BBQ to turn into a buffet for wasps!Yard Maintenance: Eliminate potential nesting sites by trimming bushes, filling holes in the ground, and removing fallen fruit. A well-kept yard is less inviting to wasps.Sealing Entry Points: Inspect your home for cracks and openings; seal them to prevent wasps from building nests inside walls or attics. Check your eaves and vents � they can be prime real estate for wasps!Landscaping Tips: While not a foolproof solution, some people believe certain plants like citronella or mint may deter wasps. A bit of trial and error can go a long way in keeping your outdoor spaces enjoyable.When to Call a Professional: Expert Help is EssentialFor larger nests or those nests that are not easy to reach like the ones built in elevated spots, it's crucial to call a professional pest control service. They have the expertise and right equipment needed to handle wasps safely and effectively. If you have allergies or experience repeated infestations, seeking professional help is even more essential to ensure safety.Symptoms of a Wasp StingSharp pain and burningRedness and swellingItching and irritationSmall bump with a white centerSevere allergic reactionFirst Aid for Wasp Stings: Immediate Actions to TakeWasp stings can occur unexpectedly. Here are the recommended immediate actions:Immediate StepsIf the stinger is visible, do not pinch it, pinching it will release more venom try scraping it away with a credit card or other flat object. Wash the area where you were stung with soap and clean water, then apply a cold compress to alleviate swelling.Pain ReliefOver-the-counter pain relievers and antihistamines may help manage pain and itching. Keeping a first aid kit handy is always a good idea for summer activities.Allergic ReactionsSeek immediate medical attention if you experience signs of a severe allergic reaction (anaphylaxis), such as shortness of breath, hives, swollen face, or dizziness. Time is of the essence in these situations. .main{ border:3px solid #0f7c90; border-radius:20px; position: relative; font-family:roboto; font-weight: 400; color: #000; } .main-two{ position: absolute; top:-25px; left:45px; background-color:white; } .img-div{ border-radius : 100%; padding:2px 7px; background-color:#0f7c90; margin-right:5px; width: 50px; height: 50px; } .img{ width:30px; object-fit:contain; height:auto; border-radius : 100%; } @media only screen and (max-width: 600px) { .heading{ font-size:20px; } .img{ width:20px; object-fit:contain; height:auto; border-radius : 100%; } .img-div{ width: 40px; height: 40px; } .main-two{ left:25px; } } Want to learn more about Wasp Sting Treatment? Our First Aid courses offer complete training to help you handle critical situations. Whether you want to improve your skills or workplace safety, these courses help build confidence and expertise. View our Emergency First Aid at Work (EFAW) and Level 3 First Aid at Work courses. These courses meet the UK legal requirements and help you keep people safe. Debunking Myths about Wasps: Separating Fact from FictionMany misconceptions exist regarding wasps. For instance, while they seem attracted to sweet scents, it's usually food that is decaying that draws them in. Additionally, swatting away at a wasp is a recipe for danger. It will provoke a sting. The solution is to calmly move away. It's always best to remain calm when surrounded by wasps.What to Do If Complications OccurIn rare cases, wasp stings can lead to severe complications, including:Multiple organ failureNeurological symptoms, such as seizuresCardiovascular symptoms, including palpitations and arrhythmiasIf any of these symptoms occur right after an encounter with a wasp, seek immediate medical assistance.First Aid Kit that Caters to Insect BitesFor those who enjoy outdoor activities, having a first aid kit that includes items to help and prevent insect bites is imperative. Your first aid kit should include an EpiPen, ointments for pain relief, allergy medication, and a cold pack for swelling.ConclusionUnderstanding wasp behaviour is key along with knowing exactly when to call for professional help, you can effectively manage wasp-related issues and enjoy outdoor spaces without concern. Wasp stings can pose a serious threat, especially if you have allergies or other conditions like autoimmune diseases. It is crucial to keep an eye on symptoms and seek immediate medical help if they don�t dissipate after first aid. Also, it's wise for those with asthma or allergies to always carry an EpiPen. Enjoy the summer sun while staying vigilant!
First Aid for Drowning: Step-by-Step Guide to Save a Life
Drowning emergencies happen fast, often without any warning. Knowing what to do in those critical moments could mean the difference between life and death. Whether you�re hanging out at the pool, the beach, or even a lake, it�s important to stay calm, act quickly, and follow these drowning first aid steps..How to Spot a Drowning EmergencyDrowning doesn�t look like what you see in the movies. It�s usually silent and subtle, while in most cases a person maybe calling out for help or splashing in a state of panic, there have been cases where the person may not even be able to call for help. Here are the common signs to watch for:Head low in the water, with their mouth open or tilted backGasping or struggling to breatheWeak or no movement-sometimes they just float motionlessTrying to �climb� in the water but not making any progressIf you see any of these signs, don�t wait-take action immediately.Step 1: Keep Yourself SafeBefore diving in, make sure you�re not putting yourself in danger. If the water looks rough or risky, use a flotation device or a long pole to reach them. Enter the water only if you�re sure you can safely bring them back.Step 2: Get the Person Out of the WaterIf it�s safe, remove the person from the water as quickly as possible. Time is critical when someone isn�t breathing. Lay them flat on their back on a solid surface and clear their airway.Step 3: Check for Breathing and PulseBreathing: Place your ear close to their mouth and nose to listen for breath sounds. Watch their chest for movement.Pulse: Check for a pulse by placing two fingers on their neck, just under the jawline.If a person rescued from drowning is not breathing, you�ll need to act fast.Step 4: Give 5 Rescue Breaths FirstCall emergency services (999 UK, 112 Europe, 911 US) before taking action.For drowning victims, oxygen is often the biggest issue. Unlike other emergencies, drowning first aid starts with 5 rescue breaths before moving to chest compressions:Tilt their head back slightly to open their airway.Pinch their nose shut and cover their mouth with yours to form a seal.Blow in gently�just enough to make the chest rise. Repeat 5 times.This is an important step because it helps bring much-needed oxygen to their lungs.Step 5: Start CPR if There�s Still No BreathingIn case the individual does not reply after the 5 rescue breaths, then proceed with the following CPR steps:Start chest compressions:Place one hand over the other in the middle of their chest.Push hard and fast (about 2 inches deep) at a rate of 100�120 compressions per minute.Alternate 30 chest compressions with 2 rescue breaths.Keep on going until the individual begins to breathe or the emergency services arrive.This combination of rescue breaths and compressions is essential for CPR in drowning emergencies.Step 6: Prevent Hypothermia and Monitor CloselyIf they regain consciousness, lay them on their side (recovery position) to keep their airway open, especially if they might vomit.If they are cold, wrap them with a towel or blanket to avoid hypothermia, but do not overheat.Stay with them until medical help arrives.Step 7: Always Get Medical HelpEven if the person seems fine afterward, take them to the hospital. Drowning victims can develop secondary drowning, where fluid builds up in the lungs hours later. This condition can be life-threatening if not treated quickly. .main{ border:3px solid #0f7c90; border-radius:20px; position: relative; font-family:roboto; font-weight: 400; color: #000; } .main-two{ position: absolute; top:-25px; left:45px; background-color:white; } .img-div{ border-radius : 100%; padding:2px 7px; background-color:#0f7c90; margin-right:5px; width: 50px; height: 50px; } .img{ width:30px; object-fit:contain; height:auto; border-radius : 100%; } @media only screen and (max-width: 600px) { .heading{ font-size:20px; } .img{ width:20px; object-fit:contain; height:auto; border-radius : 100%; } .img-div{ width: 40px; height: 40px; } .main-two{ left:25px; } } Want to learn more about First Aid for drowning? Our First Aid courses offer complete training to help you handle critical situations. These courses can be helpful whether you would like to get better in your skills or in the workplace. View our Emergency First Aid at Work (EFAW) and Level 3 First Aid at Work courses. These courses meet the UK legal requirements and help you keep people safe. Why 5 Rescue Breaths for Drowning MatterIn the cases of drowning, the lungs are not always filled with water; however, the airway might be blocked, and the body lacks oxygen (hypoxia). That�s why giving 5 rescue breaths before starting chest compressions can make a huge difference�it helps oxygenate the body, increasing the chances of survival.How to Prevent Drowning EmergenciesAlways supervise: Never leave children alone near water�not even for a few seconds.Learn to swim: Take swimming lessons or refresh your skills if it�s been a while.Use life jackets: They are necessary when boating or swimming in open water.Avoid alcohol near water: Alcohol disrupts judgment and balance, which increases the risk of drowning.Learn CPR: Knowing how to give CPR for drowning can save lives when every second counts.Nobody would ever wish to be in a drowning situation, but being prepared is key. In case an individual who has been rescued after drowning is not breathing, administer 5 rescue breaths before starting CPR. Stay calm, act quickly, and never skip medical attention, even if the person seems okay.
Electric Shock: Symptoms, First Aid & Prevention Tips
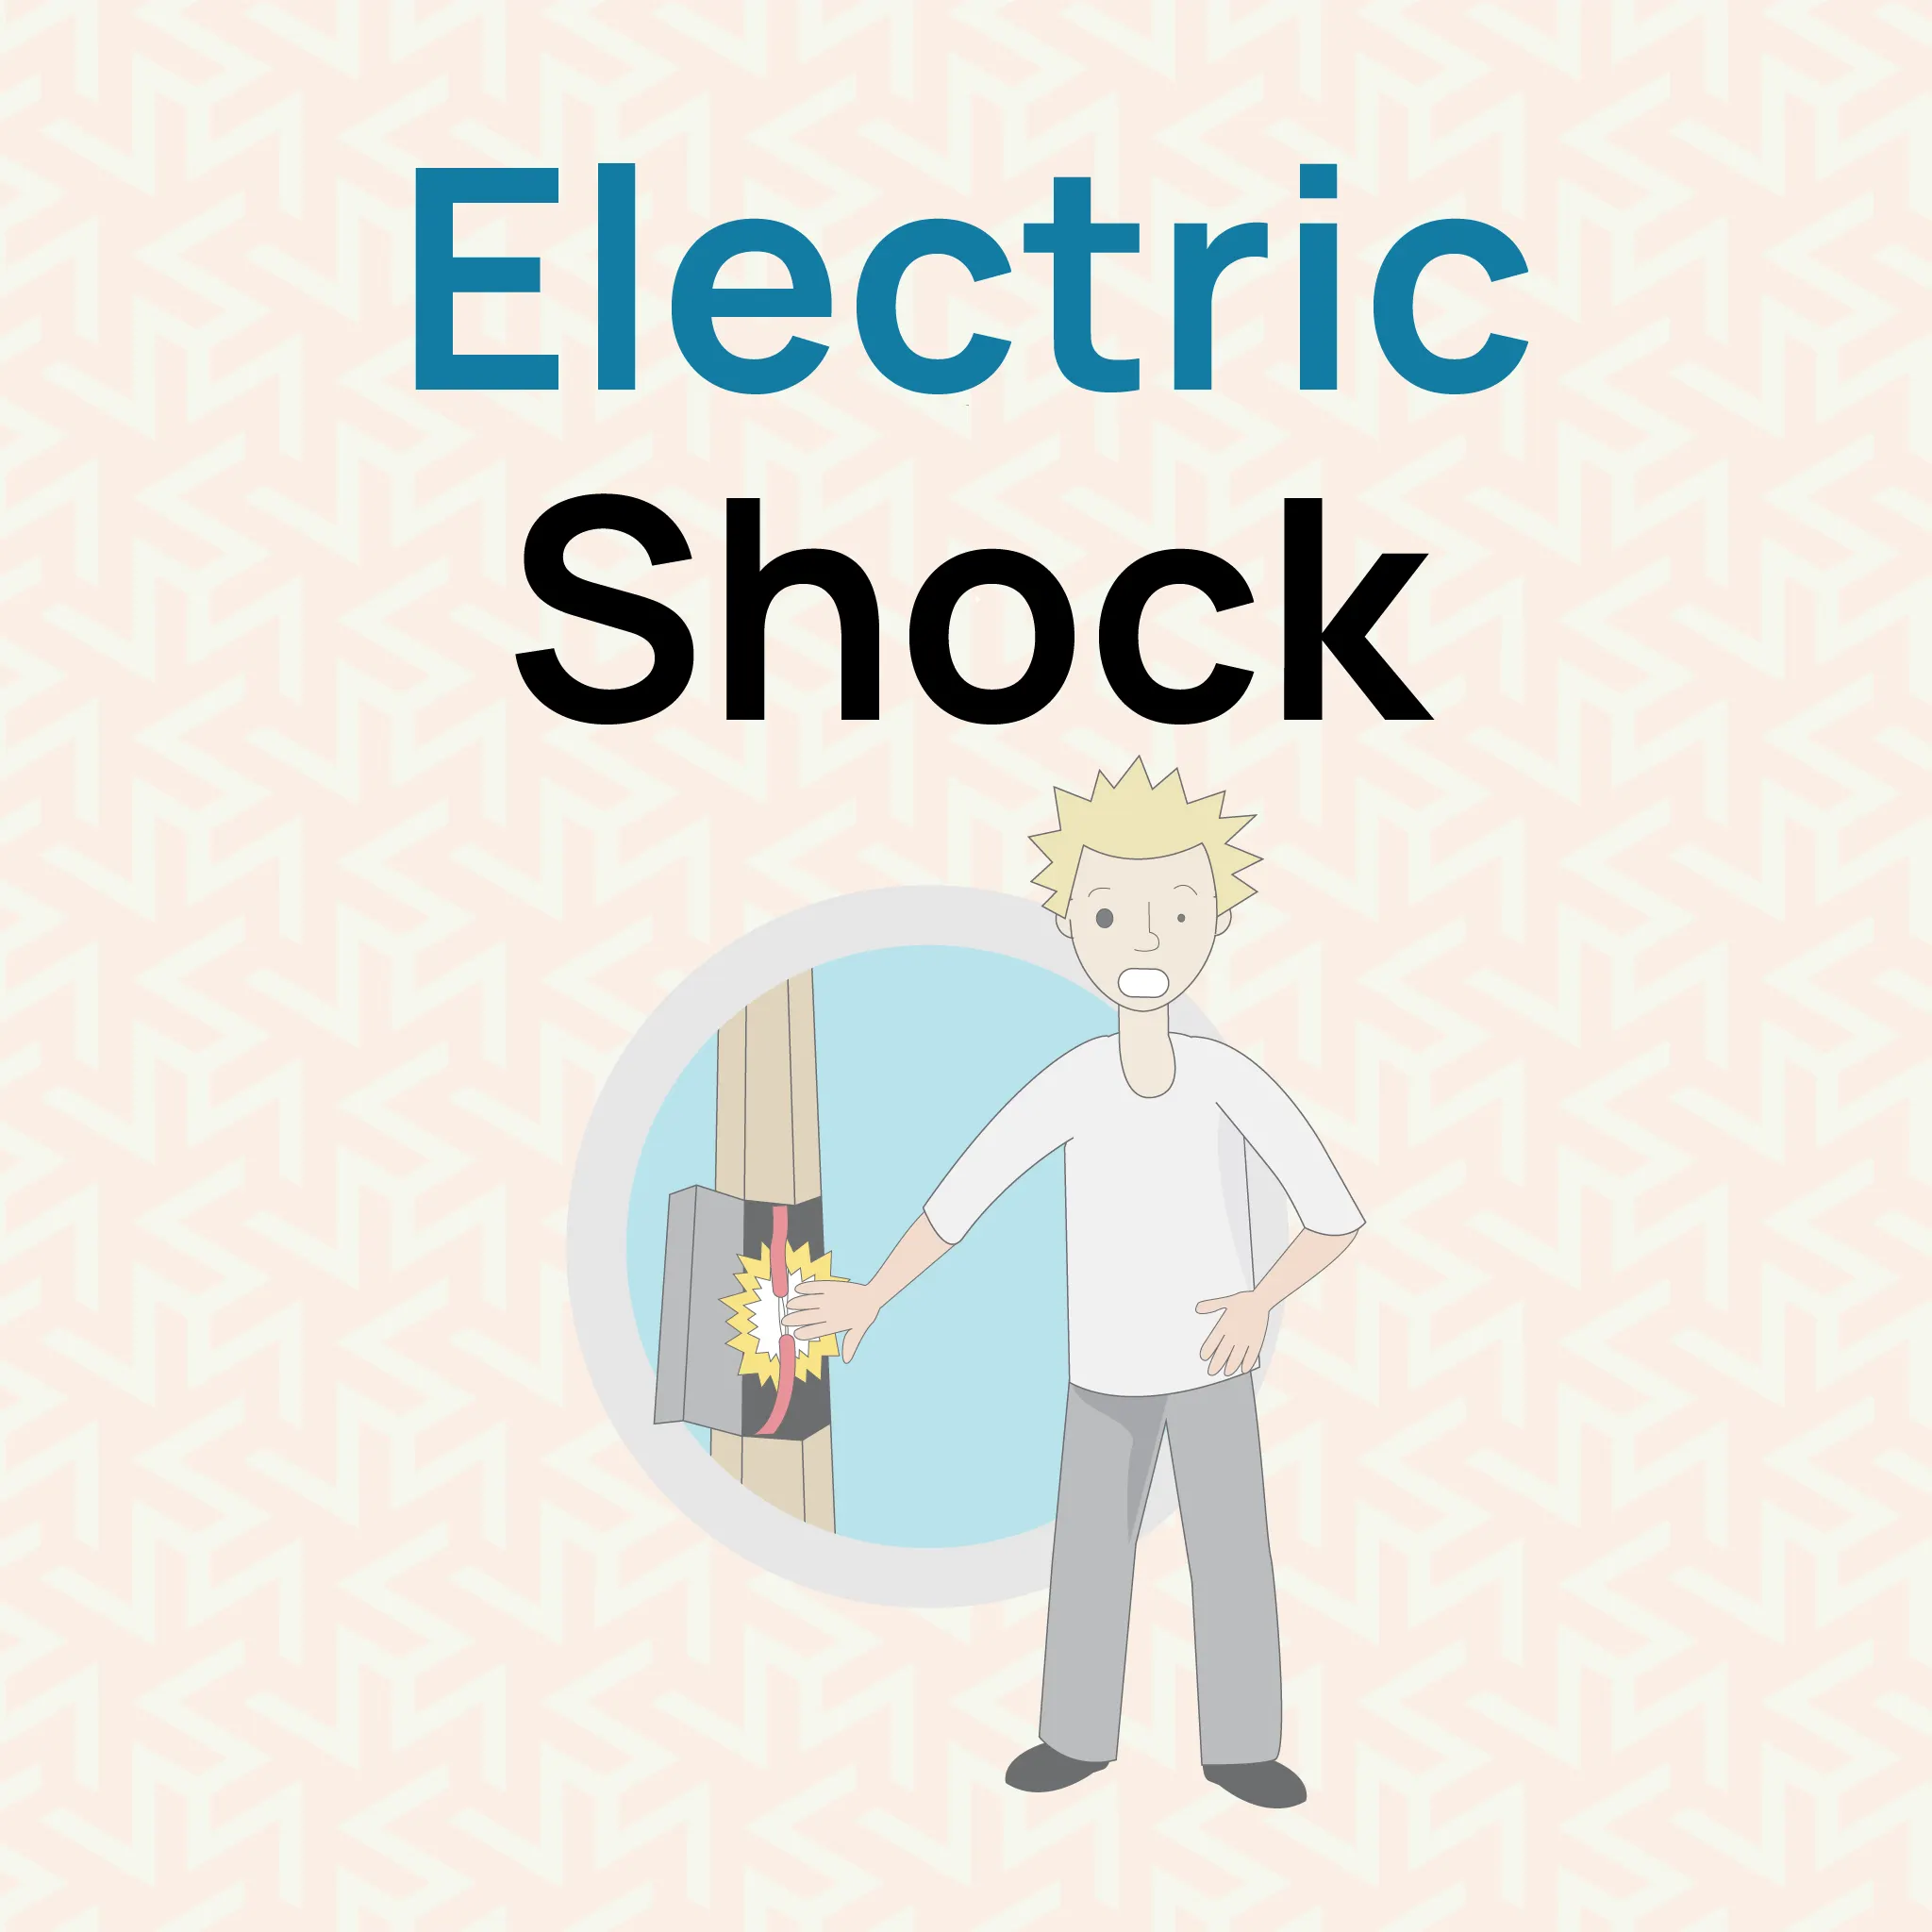
Electricity is everywhere from the plugs in your walls to the power lines above. And while it�s a modern convenience, it can also be dangerous if you�re not careful. Here�s a breakdown of what electric shock is, how it can affect you, and what to do if it happens.What Is Electric Shock?Electric shock happens when electricity touches or travels through your body. It can be mild, like when you accidentally touch a faulty plug, or serious, like contact with a downed power line. Fatal electric shocks are called electrocutions.The danger level depends on the voltage. Higher voltage means more electricity and greater risk. But don�t underestimate low-voltage shocks- these can still cause internal injuries that aren�t obvious right away. If you or someone else experiences an electric shock, always seek medical attention, no matter how minor it seems.Important Safety Tip: If someone is shocked, don�t touch them if they�re still in contact with electricity. Call 911 and, if it�s safe, turn off the power source first.How Often Do Electric Shocks Happen?Believe it or not, electric shocks are fairly common. Every year, about 30,000 non-fatal electric injuries happen in the U.S. Around 20% of these involve kids, often from chewing cords or sticking objects into outlets.Tragically, around 1,000 people die from electric shock every year in the U.S., with about 400 of those deaths linked to high-voltage sources. And while rare, lightning strikes cause between 50 and 300 deaths annually.Symptoms of Electric ShockElectric shocks don�t always leave visible signs. Some symptoms you may notice include:Loss of consciousness.Tingling or numbness.Muscle spasms.Weak or irregular heartbeat.Burns, especially where the electricity entered or exited.Breathing problems.Chest or abdominal pain.Seizures or headaches.Vision or hearing issues.Children, in particular, may show burned lips if they chew on electrical cords. Even if someone seems fine, they could have internal injuries, so it�s critical to see a doctor.What Causes Electric Shock?Electric shocks can be caused by many things, including:Old or damaged electrical cords.Wet outlets or appliances.Cutting into live electrical wires.Faulty appliances.Fallen power lines.Lightning strikes (though these are less common).Potential Complications of Electric ShockElectric shock injuries can range from mild to life-threatening. Some complications include:Infections (the most common reason for deaths after electric injuries).Irregular heartbeat or cardiac arrest.Respiratory failure, where breathing stops.Burns and trauma from being thrown during the shock.Memory loss or personality changes.Mental health issues, such as anxiety or depression.How Do Doctors Treat Electric Shock?When you arrive at the hospital, medical teams will check for damage to your heart, muscles, bones, or brain. They may run tests like:EKG (Electrocardiogram): Monitors your heart.Blood Tests/Urinalysis: Checks for muscle damage.Imaging (X-rays, CT scans, or MRI screening): Looks for broken bones or other injuries.Depending on your injuries, treatment may include:Pain medication.IV fluids.Burn treatments (ointments or skin grafts for more serious burns). .main{ border:3px solid #0f7c90; border-radius:20px; position: relative; font-family:roboto; font-weight: 400; color: #000; } .main-two{ position: absolute; top:-25px; left:45px; background-color:white; } .img-div{ border-radius : 100%; padding:2px 7px; background-color:#0f7c90; margin-right:5px; width: 50px; height: 50px; } .img{ width:30px; object-fit:contain; height:auto; border-radius : 100%; } @media only screen and (max-width: 600px) { .heading{ font-size:20px; } .img{ width:20px; object-fit:contain; height:auto; border-radius : 100%; } .img-div{ width: 40px; height: 40px; } .main-two{ left:25px; } } Want to learn more about Electric Shocks? Our First Aid courses offer complete training to help you handle critical situations. Whether you want to improve your skills or workplace safety, these courses help build confidence and expertise. View our Emergency First Aid at Work (EFAW) and Level 3 First Aid at Work courses. These courses meet the UK legal requirements and help you keep people safe. Can Electric Shock Be Prevented?Yes! You can reduce the risk of electric shock by following these safety tips:Ensure all electrical work is handled by a certified professional.Install safety switches and test them regularly.Keep appliances away from water.Don�t use cords that are damaged or frayed.Follow safety instructions for power tools.Use protective gear (like rubber gloves) if working with electricity.What�s the Outlook for Electric Shock Injuries?The severity of electric shock injuries varies, but high-voltage shocks are more likely to cause serious complications. Even low-voltage shocks can be life-threatening, depending on the situation.Survival chances are lower if someone:Has a cardiac arrest during the shock.Suffers from extensive burns.Develops an infection.Even with successful treatment, some people may face long-term issues like anxiety, depression, or other mental health challenges.When Should You See a Doctor?Minor shocks with no burns: Visit a doctor within 48 hours.Shocks with burns: Head to the emergency room.High-voltage shocks: Call 911 or go to the ER immediately.Frequently Asked QuestionsWhat�s the difference between shock and electrocution?Shock means injury from electricity.Electrocution is fatal.Can a shock from a household plug kill you?It�s rare, but possible. Standard U.S. outlets (120 volts) usually aren�t fatal, but deaths have been reported with voltages as low as 42 volts.Can a shock kill you later?Yes. Complications like infections or heart problems can develop after the shock. Quick medical care can reduce these risks.Understanding the risks and symptoms of electric shock could save your life or someone else�s. Always prioritize safety and seek medical help when needed.
Spider Bite First Aid: Spot It, Treat It, Stay Safe!
Spider Bite First Aid: What to Do When BittenSpider bites are common, and while most are harmless, some can cause serious health issues. Knowing how to treat a spider bite properly minimises discomfort and prevents complications. This blog post will guide you through the essential first-aid steps for spider bites.Identifying a Spider BiteSpider bites often appear as tiny, red marks on the skin, similar to other insect bites. However, some spider bites may have distinct characteristics, depending on the nature of the venom. These distinct characteristics can present themselves as:Pain: The bite area may be painful, ranging from mild to severe.Swelling: The bite site may swell and become inflamed.Redness: The skin around the bite soon turns reddish.Itching: The area might feel itchy.Blistering: While some spider bites (like a brown recluse) can cause blisters or necrotic tissue, not all do.Muscle cramps or spasms: In extreme cases a person may suffer from muscle spasms.Nausea and vomiting: Another example of a severe case is that a person may feel nauseated after being bitten by a spider.Fever: some people might end up with a fever followed by a spider bite.First Aid for Spider BitesIf you suspect you've been bitten by a spider, follow these first-aid steps:Clean the wound: Wash the bite area with mild soap and water to prevent infection.Apply a cold compress: Apply a cold compress or ice pack to the bite for 15 minutes at a time, several times a day, to reduce swelling and pain.Elevate the affected area: If possible, elevate the bitten limb to help reduce swelling.Take over-the-counter pain medication: If you're experiencing pain, take an over-the-counter pain reliever like acetaminophen or ibuprofen.Monitor for signs of infection: Watch for signs of infection, such as increased redness, swelling, pain, or pus. If you notice any of these signs, seek medical attention immediately.If the signs worsen- seek immediate help, if the person is having difficulty breathing or has chest pain then it is imperative that you take immediate action. .main{ border:3px solid #0f7c90; border-radius:20px; position: relative; font-family:roboto; font-weight: 400; color: #000; } .main-two{ position: absolute; top:-25px; left:45px; background-color:white; } .img-div{ border-radius : 100%; padding:2px 7px; background-color:#0f7c90; margin-right:5px; width: 50px; height: 50px; } .img{ width:30px; object-fit:contain; height:auto; border-radius : 100%; } @media only screen and (max-width: 600px) { .heading{ font-size:20px; } .img{ width:20px; object-fit:contain; height:auto; border-radius : 100%; } .img-div{ width: 40px; height: 40px; } .main-two{ left:25px; } } Want to learn more about spider bites and how to treat them? Our First Aid courses offer complete training to help you handle critical situations. Whether you want to improve your skills or workplace safety, these courses help build confidence and expertise. View our Emergency First Aid at Work (EFAW) and Level 3 First Aid at Work courses. These courses meet the UK legal requirements and help you keep people safe. When to Seek Medical AttentionWhile most spider bites can be treated at home, it's essential to seek medical attention if you experience any of the following:Severe pain: If the pain is intense or worsening, seek medical help immediately.Muscle cramps or spasms: Muscle cramps or spasms can indicate a severe reaction to the venom and require medical treatment.Difficulty breathing: If you experience difficulty breathing, wheezing, or chest tightness, seek emergency medical attention immediately.Nausea and vomiting: Persistent nausea and vomiting can also indicate a severe reaction and require medical treatment.Signs of infection: If the bite shows signs of infection, such as increased redness, swelling, pain, or pus, seek medical attention promptly.Bite from a known dangerous spider: If you know you were bitten by a potentially dangerous spider, such as a black widow or brown recluse, seek medical attention immediately, even if you don't have any symptoms.Preventing Spider BitesWhile it's impossible to prevent all spider bites, you can take steps to reduce your risk:Wear protective clothing: When working in areas where spiders may be present, wear long sleeves, pants, and gloves.Inspect clothing and gear: Shake out clothing, shoes, and gear before wearing or using them, especially if they've been stored in a garage or shed.Be cautious in dark or undisturbed areas: Spiders often prefer dark, secluded spaces. Be cautious when working in such areas, like attics, basements, and crawl spaces.Keep your home clean: Regularly clean and declutter your home to reduce spider habitats.Seal cracks and openings: Seal cracks and openings in your home's foundation and walls to prevent spiders from entering.ConclusionSpider bites are common, but most turn out to be harmless and can be treated at home with basic first aid. However, knowing when to seek medical attention is imperative, as some spider venomous spiders can cause severe reactions. By carefully following the tips in this article, you can be prepared to handle any spider bites effectively and prevent or reduce any potential complications.
Slapped Cheek Syndrome in Adults: Symptoms, Treatment, and More
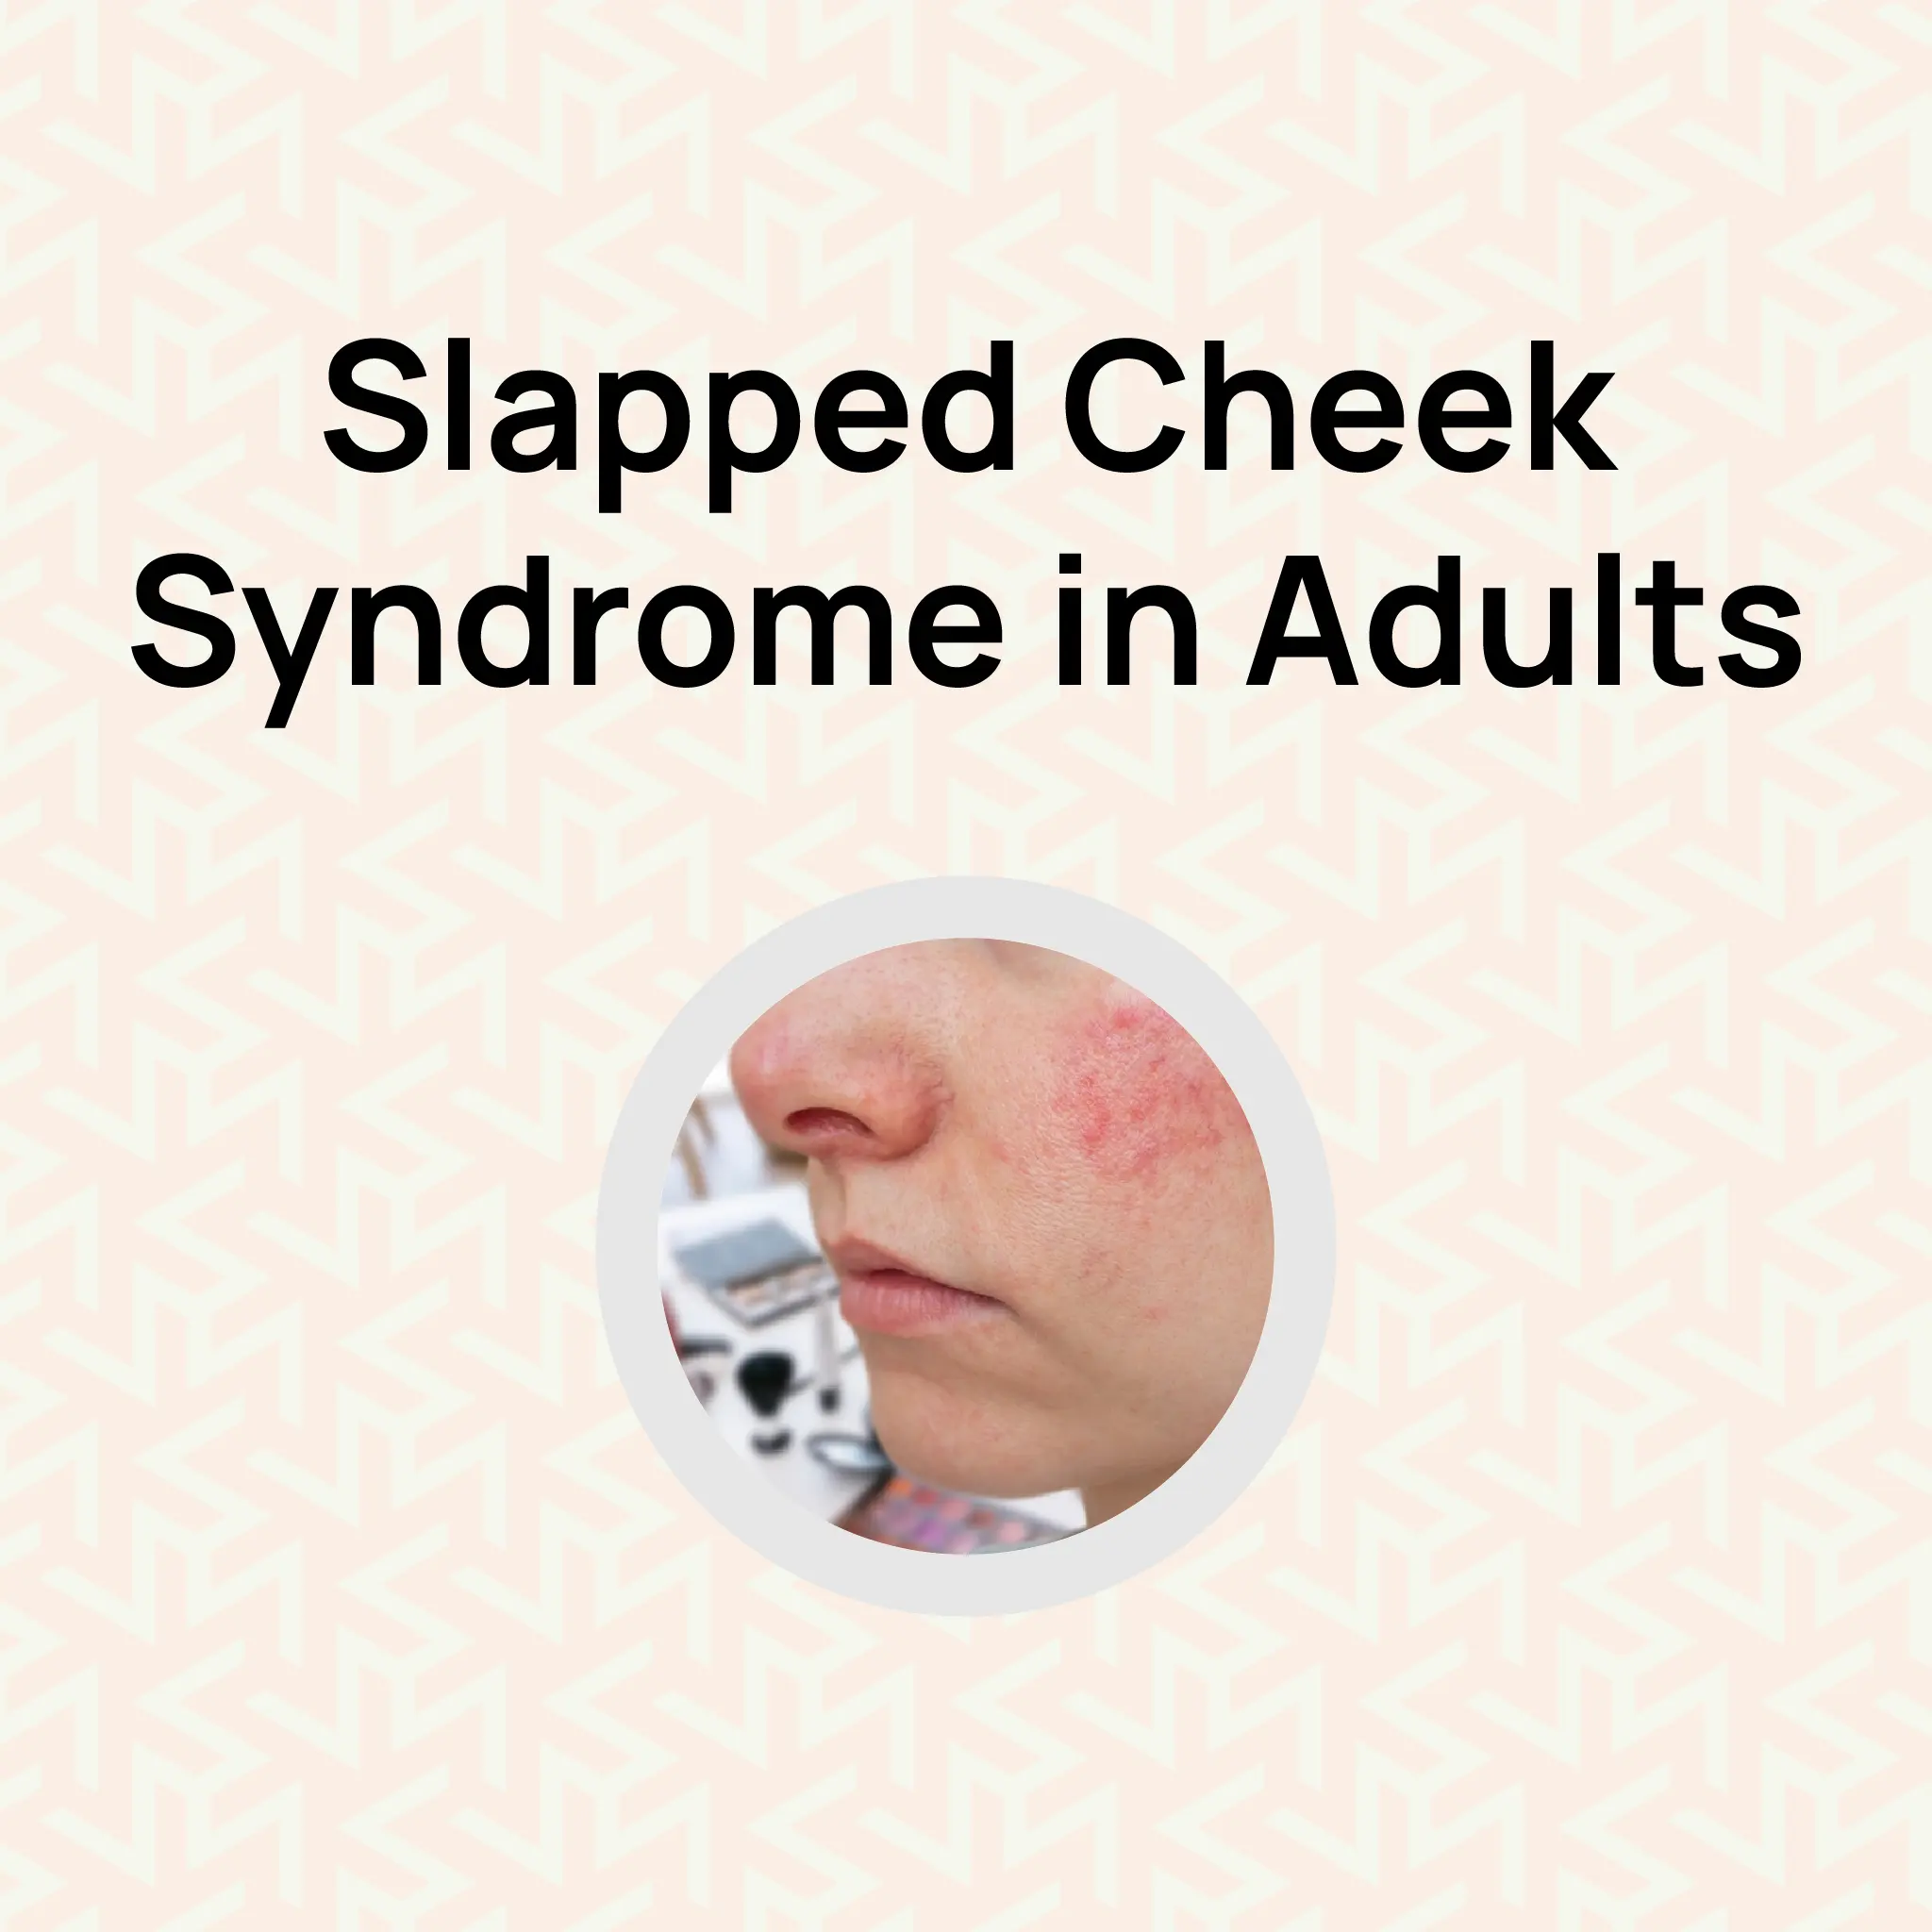
What is Slapped Cheek Syndrome?The fifth disease, slapped cheek syndrome, is a viral disease caused by parvovirus B19. It is commonly linked to children, although it is also possible at other ages of life. This condition�s name comes from the bright red rash, which is easily distinguishable on the skin of the cheeks, resembling a slap mark.Can Adults Get Slapped Cheek Syndrome?Yes, adults can get slapped cheek syndrome. Though it is more frequent in children and babies, adults are not safe from the viruses that cause this infection. Old people, individuals with low immunity, and those without previously encountered the virus are more vulnerable to the disease. Symptoms of Slapped Cheek in AdultsThe symptoms of slapped cheek syndrome in adults may differ from the signs observed in children. Here are some common signs:Facial Rash: A bright red rash on the cheeks, although not as distinct in adult patients.Joint Pain: Adults can develop joint pain or stiffness in different body parts, such as the wrists, knees, and ankles.Fatigue: A constant sleepy sensation for no apparent reason.Flu-like Symptoms: Fever, sore throat, headache, and cold.Body Rash: A red, lace-like rash may appear on the arms, chest, or legs.If you are experiencing these symptoms, especially after contacting a patient with slapped cheek syndrome, seek a doctor�s attention for a diagnosis.How to Treat Slapped Cheek Syndrome in AdultsLike all other viral illnesses, slapped cheek syndrome cannot be cured; only the symptoms can be treated. However, the condition is usually not severe and clears up. Here are some tips for managing the symptoms:Pain Relief: Use over-the-counter medications such as paracetamol or ibuprofen to treat joint pain and fever.Stay Hydrated: Drink plenty of water and other fluids to avoid dehydration.Rest: Give your body time to recover by getting enough sleep and avoiding exertion-related activities.Soothing Creams: Relieve itchy rashes with calamine lotion or antihistamines.� .main{ border:3px solid #0f7c90; border-radius:20px; position: relative; font-family:roboto; font-weight: 400; color: #000; } .main-two{ position: absolute; top:-25px; left:45px; background-color:white; } .img-div{ border-radius : 100%; padding:2px 7px; background-color:#0f7c90; margin-right:5px; width: 50px; height: 50px; } .img{ width:30px; object-fit:contain; height:auto; border-radius : 100%; } @media only screen and (max-width: 600px) { .heading{ font-size:20px; } .img{ width:20px; object-fit:contain; height:auto; border-radius : 100%; } .img-div{ width: 40px; height: 40px; } .main-two{ left:25px; } } Ready to Learn More? Want to learn more about slapped cheek syndrome management? Our First Aid courses offer complete training to help you handle critical situations. Whether you want to improve your skills or workplace safety, these courses help build confidence and expertise. View our Emergency First Aid at Work (EFAW) and Level 3 First Aid at Work courses. These courses meet the UK legal requirements and help you keep people safe. Slapped Cheek Syndrome in Children and BabiesSlapped cheek syndrome is usually mild in children and babies and lasts about 2�3 weeks. Some signs include bright red cheeks resembling slapped cheeks, mild fevers, and sometimes congestion or a sore throat. It may also spread to the body but is commonly not itchy.Learn how to perform first aid in schools in case of an emergency.When to Seek Medical AttentionSymptoms last for more than a couple of weeks.You are pregnant, as the virus can affect the baby�s development.You have a weak immune system due to a medical condition or medication.You experience severe joint pain or swelling that interferes with daily activities.ConclusionWhile slapped cheek syndrome is usually a childhood disease, adults are not immune to it. Some adults may experience joint pain in addition to the slapped cheek rash. Therefore, having an understanding of the signs and how the condition can be managed is very important. If you think you have developed it, remember that the condition is often relatively mild and does not require treatment. However, if symptoms persist or worsen after 48 hours, a doctor should be consulted.
How to Treat Bruises
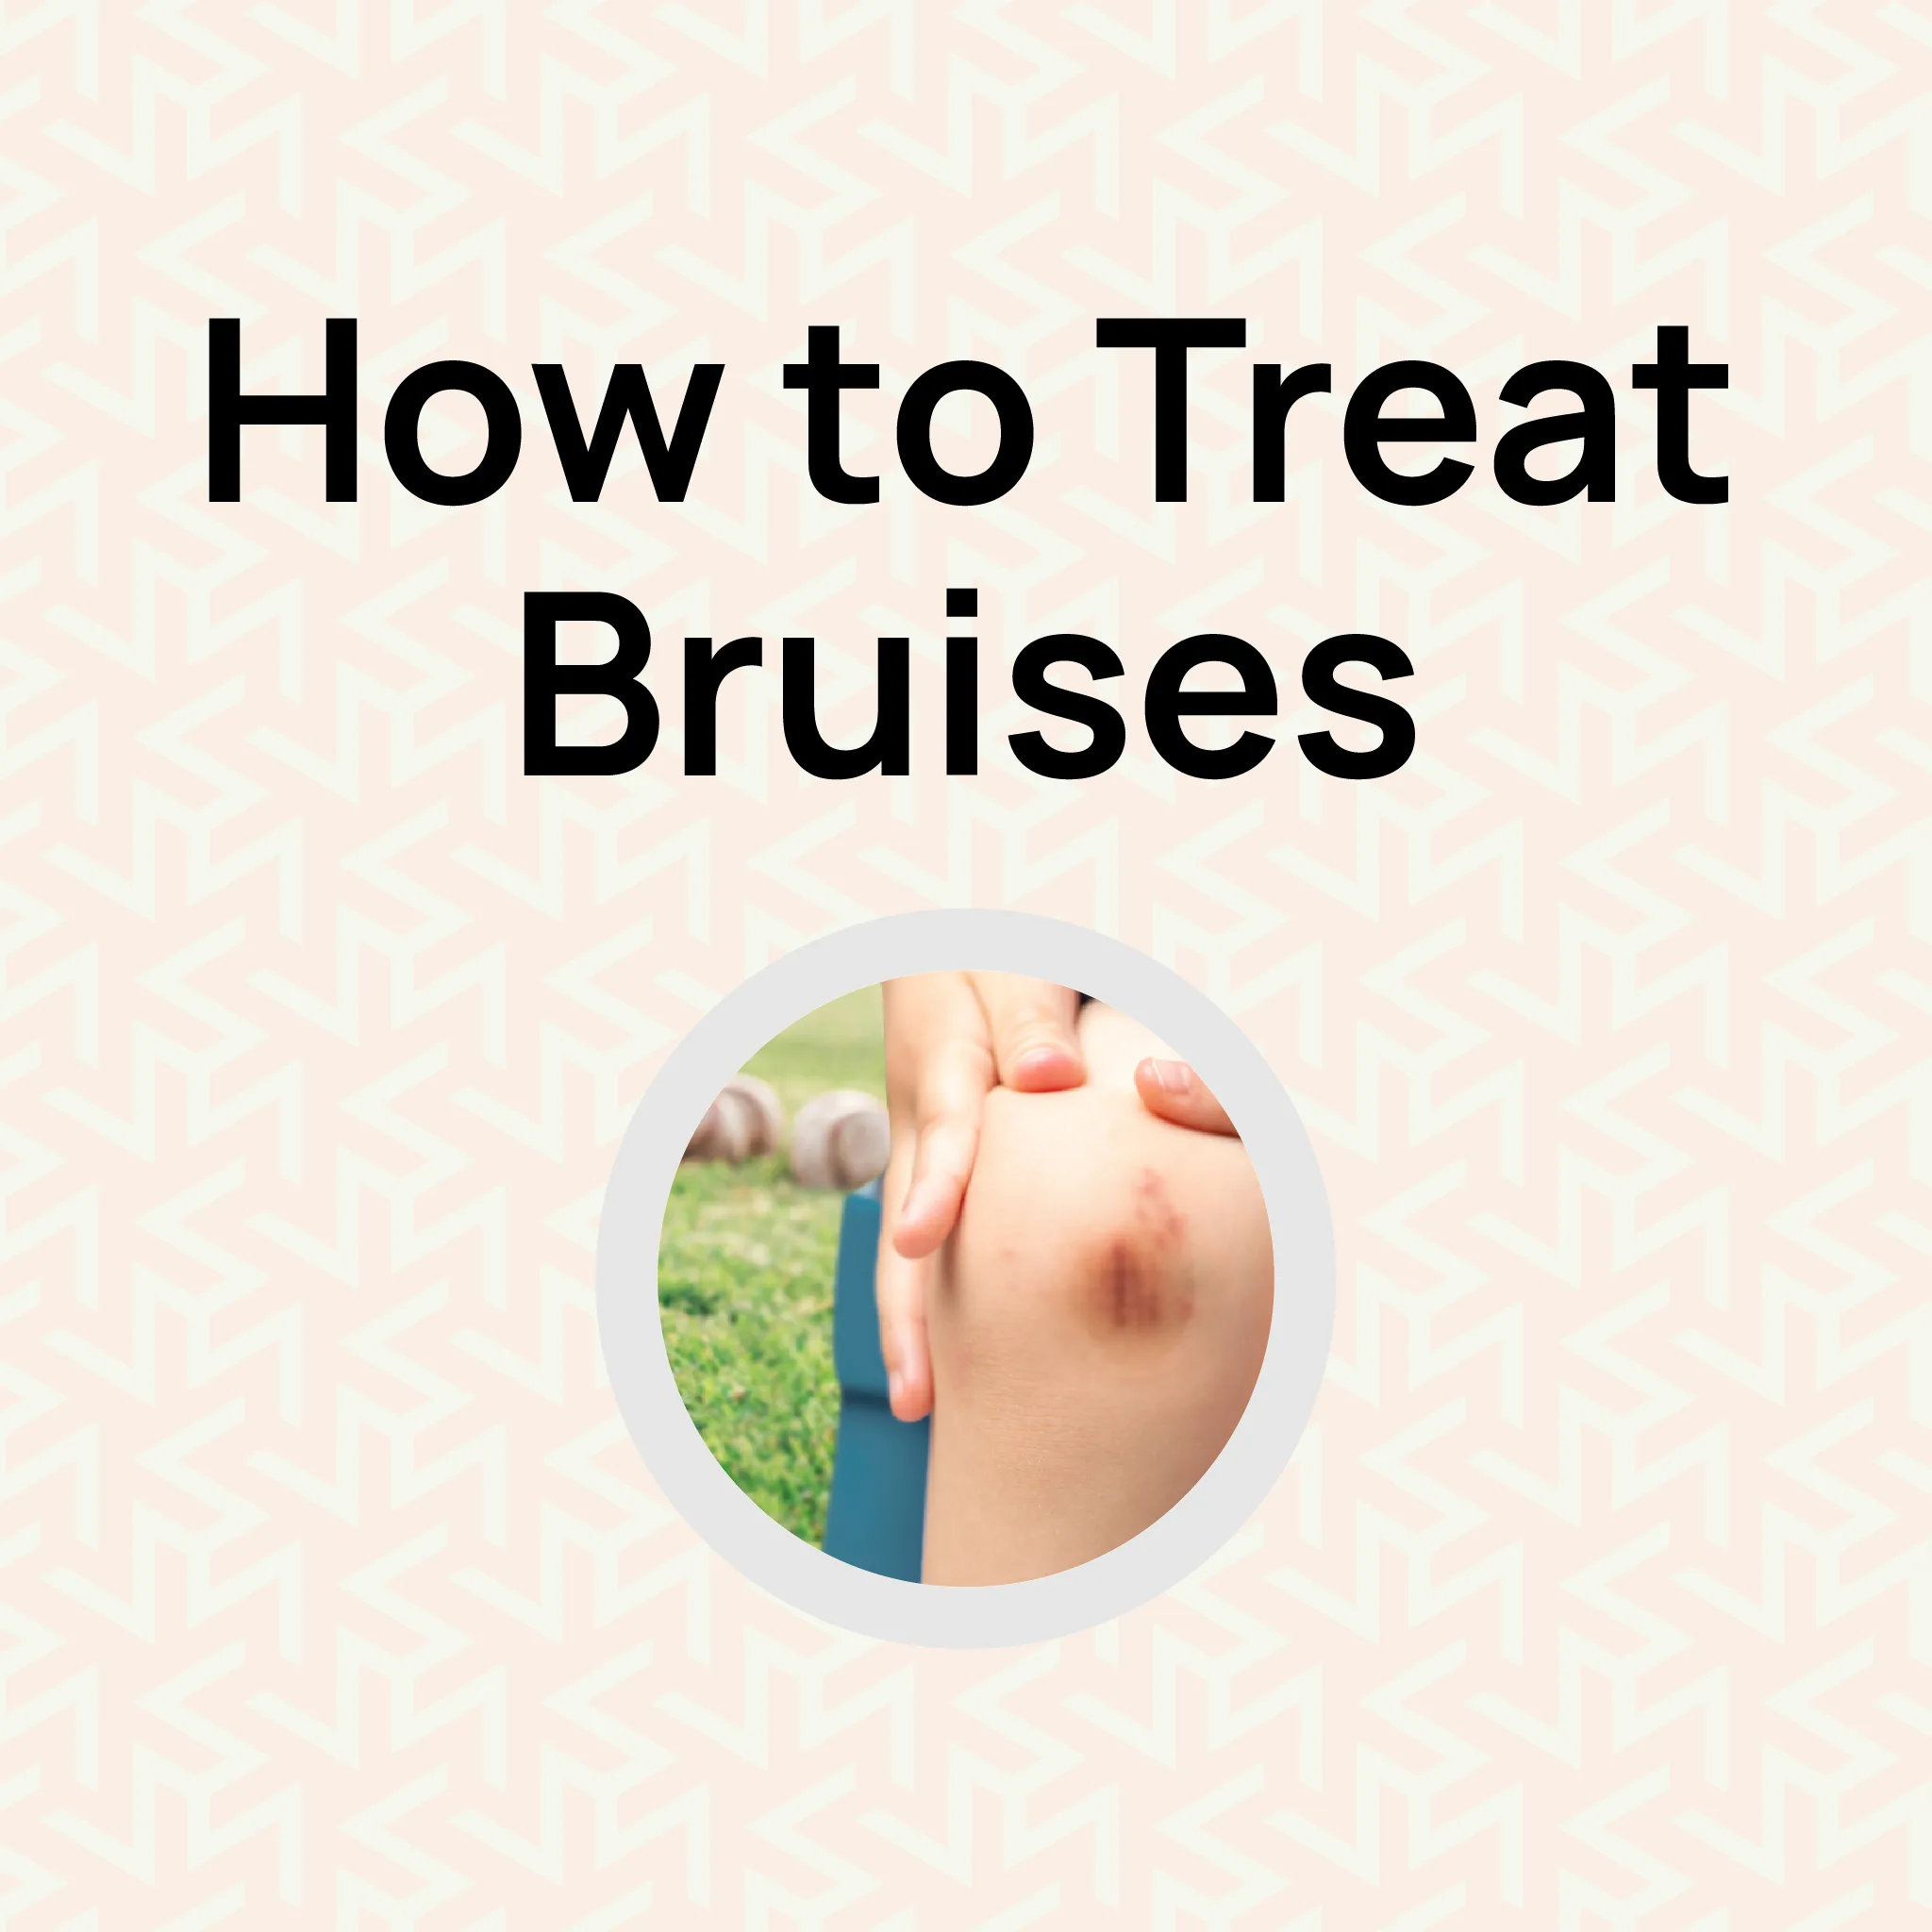
Bruising is not a disease but rather a response that the body gives to injury caused by impact, such as a fall. Information on the causes of bruising, optimal management techniques, how to deal with it, and how to minimise its appearance can be very helpful. Check out all the information presented here, including how best to treat bruises using first aid measures, natural cures, and treatments.What is Bruising?A bruise is caused by a tear in blood vessels beneath the skin. The trapped blood causes a bruise to be black, purple, or blue in colour, depending on the injury's healing stage. This process indicates that the blood vessels have been damaged, and you do not experience life-threatening pain when you get a bruise, but you should be more careful.How Long Do Bruises Last?Generally, bruises can take between 7 to 14 days to disappear, depending on their size and the area of the body where they are found. Healing is characterised by colour changes from reddish or purplish-blue to greenish-yellow until the wound finally disappears. Minor bruising can heal much faster than larger or deeper ones, especially if the area is often used or can easily be bumped.How to Treat Bruises: First Aid TipsImmediate first aid can significantly reduce the severity of a bruise. These simple methods are able to increase the healing of bruises:Rest and Protect: Do not apply pressure to the injured area to prevent further injury.Elevate: If possible, keep the bruised area above heart level to decrease blood flow and swelling.Apply Ice: Use an ice pack wrapped in a thin towel and leave it in place for 20 minutes. Repeat several times for a day or two after the injury. This helps reduce swelling and pain.Compression: If the bruised area is swelling, put an elastic bandage around it, but ensure it�s not too tight.Avoid Bandaging: You don�t need to bandage a bruise if the skin isn't broken.Pain Relief: Consider taking a nonprescription pain reliever if needed. .main{ border:3px solid #0f7c90; border-radius:20px; position: relative; font-family:roboto; font-weight: 400; color: #000; } .main-two{ position: absolute; top:-25px; left:45px; background-color:white; } .img-div{ border-radius : 100%; padding:2px 7px; background-color:#0f7c90; margin-right:5px; width: 50px; height: 50px; } .img{ width:30px; object-fit:contain; height:auto; border-radius : 100%; } @media only screen and (max-width: 600px) { .heading{ font-size:20px; } .img{ width:20px; object-fit:contain; height:auto; border-radius : 100%; } .img-div{ width: 40px; height: 40px; } .main-two{ left:25px; } } Ready to Learn More? Learn to treat bruises more effectively. Our First Aid courses offer complete training to help you handle critical situations. Whether you want to improve your skills or workplace safety, these courses help build confidence and expertise. View our Emergency First Aid at Work (EFAW) and Level 3 First Aid at Work courses. These courses meet the UK legal requirements and help you keep people safe. How to Reduce Bruising QuicklyWhile there is no instant cure for bruises, the following tips can help in accelerating the healing process:Warm Compresses: After 48 hours, switch to warm compresses to increase blood flow and promote healing.Topical Treatments: Arnica gel or Vitamin K creams are popular for reducing discolouration and swelling.Massage Gently: Lightly massaging the area can improve circulation, but avoid it if it causes pain.Home Remedies for BruisesNatural remedies can complement traditional methods for treating bruises. The following are some of the effective options:Aloe Vera: Known for its anti-inflammatory properties, fresh aloe vera gel can soothe the skin and reduce swelling.Apple Cider Vinegar: When mixed with water, it may be used to enhance circulation when applied gently to the bruise.Turmeric Paste: Mix turmeric with water or honey and apply it to the bruise for its anti-inflammatory benefits.Pineapple or Papaya: These fruits contain an enzyme called bromelain, which may help reduce swelling and promote healing when consumed or applied to the area.When to See a DoctorMost bruises heal without medical intervention, but consult a healthcare professional if you:Experience painful swelling of the bruised region.Suspect a bruise has been caused by child abuse, domestic violence, or elder abuse.I still have pain three days after a minor injury.Have frequent, large, or painful bruises.Notice bruising that appears without injury, which may be a sign of an autoimmune disease.Have bruises that begin suddenly or seem to develop for no reason.Have a personal or family history of easy bruising or bleeding.Notice a lump over the bruise, which may be a sign of pooling blood, also called a hematoma.Experience unusual bleeding, such as from the nose or gums.ConclusionBruises are caused by minor injuries and do not require medical intervention. However, having first aid knowledge and practising self-treatment can alleviate pain and shorten the recovery period. Bruises can thus be treated early by strictly following the first aid precautions while looking out for any warning signs.
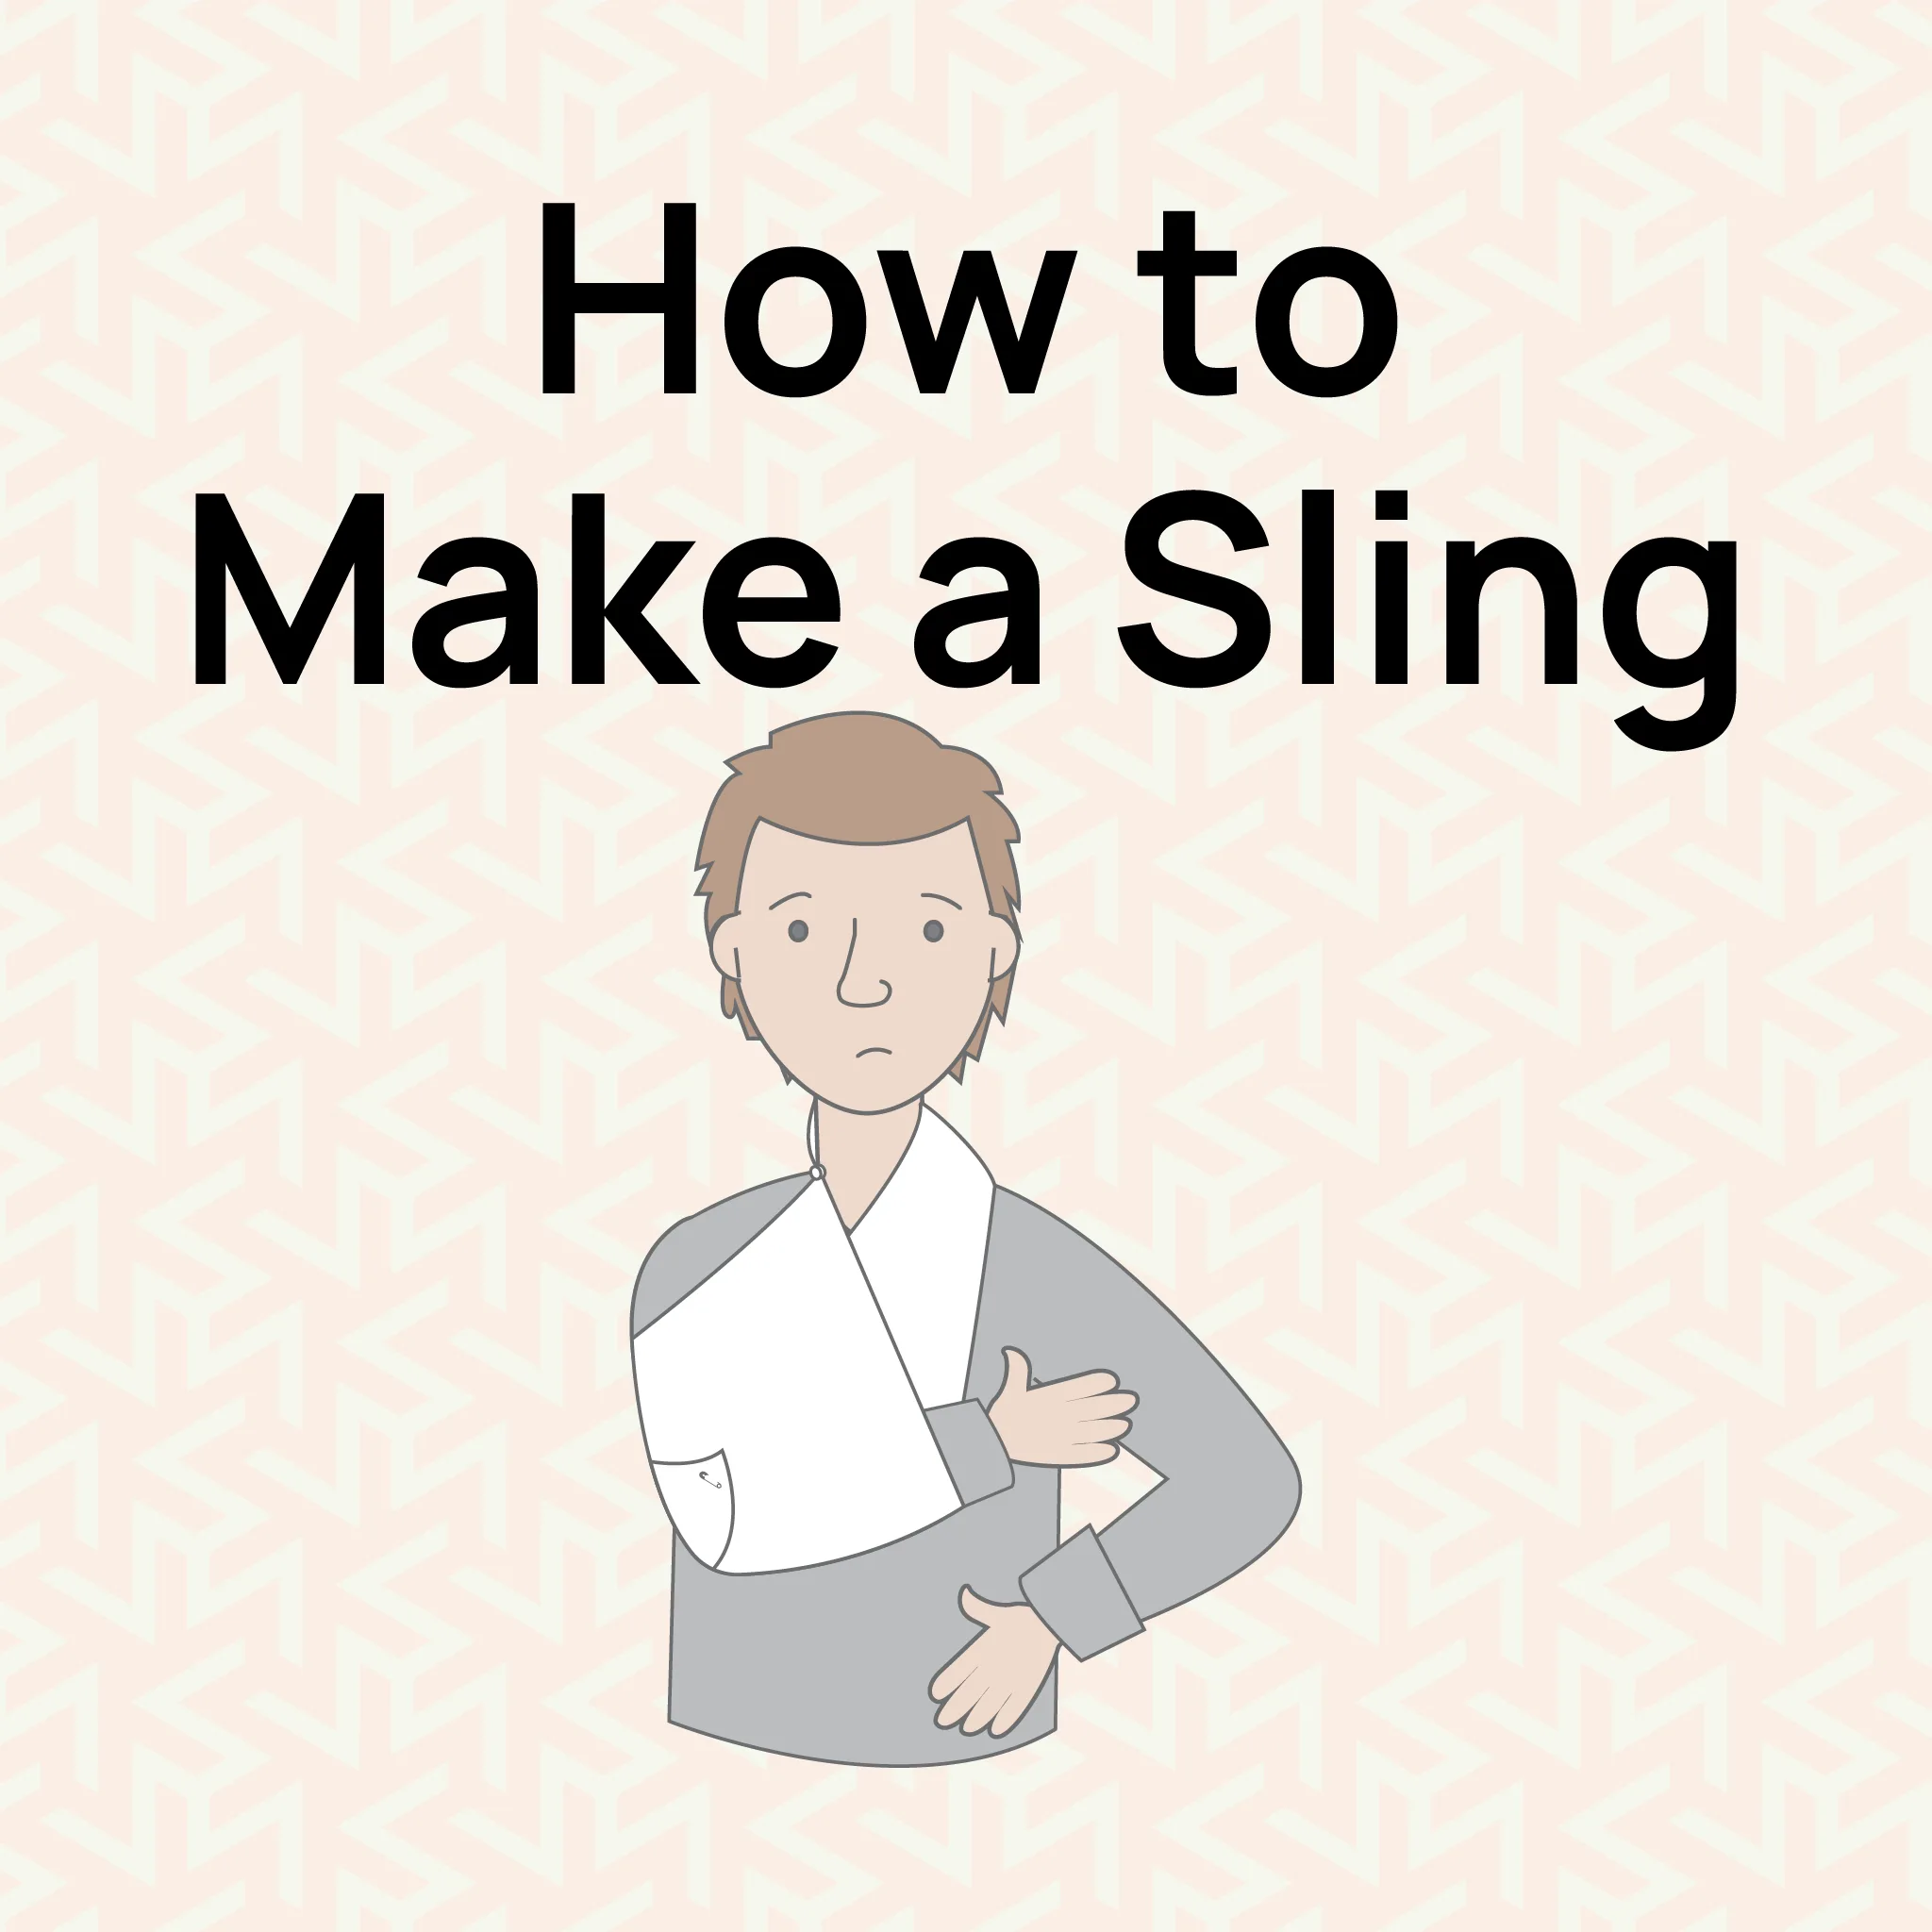
How to Make a Sling for Your Arm
An arm sling is crucial when one has a strained arm, shoulder, or wrist or after sustaining an injury or undergoing surgery. Knowing how to make a sling for your arm is very important, especially when an accident happens in remote areas where a doctor cannot be accessed immediately. Here are step-by-step instructions on how a sling can be fashioned using a triangular bandage or an improvised sling.Step-by-Step Triangular Bandage Sling InstructionsThe first step involves gathering your materials. To create the sling, you will require a triangular bandage or, alternatively, a large piece of cloth about 40 inches long. Once you have your materials ready, carefully position the injured arm. The arm should be bent gently at the elbow to form a 90-degree angle, with the forearm resting comfortably on the chest.Next, place the triangular bandage over the arm. Spread it evenly so that the apex of the triangle points toward the elbow to provide proper coverage and support for the injured arm. Then, take the two long ends of the bandage and tie them securely behind the neck, forming a loop to hold the arm in place. Adjust the sling so it is neither too tight nor too loose to ensure comfort and support.Finally, fold the loose end of the bandage at the elbow, secure it with a safety pin, or tuck it in neatly. This ensures the arm is well-supported and the sling is positioned correctly. Following these steps, you will successfully create a simple arm sling bandage to support an injured arm.� .main{ border:3px solid #0f7c90; border-radius:20px; position: relative; font-family:roboto; font-weight: 400; color: #000; } .main-two{ position: absolute; top:-25px; left:45px; background-color:white; } .img-div{ border-radius : 100%; padding:2px 7px; background-color:#0f7c90; margin-right:5px; width: 50px; height: 50px; } .img{ width:30px; object-fit:contain; height:auto; border-radius : 100%; } @media only screen and (max-width: 600px) { .heading{ font-size:20px; } .img{ width:20px; object-fit:contain; height:auto; border-radius : 100%; } .img-div{ width: 40px; height: 40px; } .main-two{ left:25px; } } Ready to Learn More? Want to gain life-saving skills and confidence in handling emergencies? Our First Aid courses offer complete training to help you handle critical situations. Whether you want to improve your skills or workplace safety, these courses help build confidence and expertise. View our Emergency First Aid at Work (EFAW) and Level 3 First Aid at Work courses. These courses meet the UK legal requirements and help you keep people safe. Difference Between Arm Sling and Elevation SlingArm slings and elevation slings both provide support but serve distinct purposes. An arm sling is used to prevent the movement of the arm, making it suitable for cases of fractures, strains, or dislocations. On the other hand, an elevation sling is designed to raise the arm higher. Its purpose is to reduce swelling or control bleeding, commonly applied in situations requiring compression or elevation to decrease inflammation.After Applying a Sling, How Elevated Should the Patient's Hand Be?When properly positioned in the sling, the patient�s hand should be slightly above heart level. This helps enhance blood flow, reduce swelling, and alleviate pain. Ensure the sling supports the arm securely without excessive pressure, which could increase the patient�s discomfort or impede blood circulation.The Importance of Arm Sling Instructions with PicturesThe application of visual aids, such as arm sling instructions with pictures, substantially improves sling-making accuracy. Photographs or diagrams can be invaluable for people unfamiliar with the process. Visual aids ensure the sling is applied correctly and securely, allowing it to support the injured arm adequately.Final TipsKnowing how to make a sling for arm injuries is invaluable during emergencies, as it allows immediate action to be taken. Ensure the material is clean and strong, and check the sling frequently for comfort. Adjust the fit as necessary to minimise strain or discomfort for the patient. In cases of severe injuries, always consult a qualified medical professional.By learning the basics of sling application, including arm and elevation slings, proper hand elevation, and the use of visual aids, you can provide early and practical support for an injured arm in critical situations.