Is NVQ Level 3 the Next Step for Bricklayers in 2025?
The construction industry is evolving rapidly, and bricklayers must stay ahead to remain competitive. With rising standards and employer expectations, NVQ Level 3 in Bricklaying is becoming an increasingly valuable qualification. It offers formal recognition of advanced skills and opens doors to better job opportunities, higher pay, and even leadership roles. In this article, we break down everything you need to know about NVQ Level 3 in 2025, from costs and benefits to real career impact.Explore the NVQ Level 3 in Bricklaying CourseView the Course on Hurak, it includes full assessor support, flexible payments, and fast-track completion.Why 2025 Is a Turning Point for BricklayersIn recent years, the bricklaying trade has seen significant change. Stricter site regulations, increasing demand for high-quality work, and the growing adoption of automated technologies are reshaping the industry's operations. However, skilled human bricklayers remain essential, especially those with advanced qualifications.Employers are no longer just looking for hands-on experience. Many now prefer bricklayers with Level 3 qualifications that demonstrate both technical ability and leadership skills. NVQ Level 3 in Bricklaying positions you to supervise teams, handle complex projects, and take on more responsibility on-site.What Does NVQ Level 3 Cover?This qualification builds on the foundational skills taught at NVQ Level 2. It focuses on advanced bricklaying techniques, quality assurance, and site supervision. You'll learn how to interpret detailed drawings, manage teams, solve on-site problems, and ensure work meets modern safety and performance standards.Most learners complete the NVQ through the OSAT (On-Site Assessment and Training) route. This means you�re assessed while working, using a portfolio of evidence, site visits, and professional discussions with your assessor. It�s a flexible and practical qualification that fits around your job.Eligibility and Entry RequirementsNVQ Level 3 is ideal for experienced bricklayers who want to formalise their skills and advance their career. You typically need at least 3 years of site experience, or an existing NVQ Level 2 in Bricklaying. There's no set age limit, and it suits both domestic and commercial bricklayers. If you�re still trying to gain site work as a bricklayer, check out our guide on gaining site work as a bricklayerThe Benefits of NVQ Level 3 in 2025Holding an NVQ Level 3 qualification comes with several significant advantages. One of the biggest benefits is that bricklayers with Level 3 certification often command better hourly rates and more lucrative contracts. It also makes you eligible for the Gold Skilled Worker CSCS Card, a respected credential on UK construction sites.Career progression is another key advantage. With this qualification, you can move into site supervisor roles, take on management responsibilities, or even pursue further study with NVQ Level 4 or 6. You�ll also find that many large contractors and government-funded projects now require higher-level qualifications, making this certification a gateway to more job opportunities. Additionally, certified workers tend to have stronger job security, especially during economic downturns when employers favour experienced, qualified professionals. Cost & Investment�The NVQ Level 3 in Bricklaying costs �899.99 at Hurak. This fee includes access to comprehensive learning materials, expert assessor guidance, and ongoing support throughout the qualification process. In addition to the course cost, there are a few other expenses to consider. The CSCS Card application carries a fee of �36, while the CITB Health, Safety & Environment (HS&E) Test costs �23.50.Some learners may be eligible for financial assistance through government-funded schemes, employer sponsorship, or Advanced Learner Loans. To help make the qualification more accessible, Hurak also offers interest-free payment plans, allowing learners to spread the cost over timeAssessment Process ExplainedTo achieve your NVQ Level 3, you will need to provide objective on-site evidence of your skills. This involves several components. First, you�ll be observed by a qualified assessor who will evaluate your practical capabilities on-site. Next, you�ll compile a portfolio of evidence that may include photos of your work, method statements, and completed risk assessments. Finally, you�ll participate in a professional discussion with your assessor to reflect on your problem-solving skills and decision-making processes. If you're consistently working on-site and can provide evidence quickly, the whole process can be completed in as little as four weeks.A strong portfolio requires clean, high-quality work. Make sure you avoid these common bricklaying mistakes that could cost you during the assessment.What the Industry SaysEmployers are clear: they want skilled, certified professionals. NVQ Level 3 gives them the confidence to lead a team, work to high standards, and adapt to complex site environments.According to the UK government, Level 3 vocational qualifications are key to bridging the skills gap in construction. Many bricklayers who complete this course go on to supervisory roles or even start their subcontracting businesses.NVQ Level 2 vs Level 3: What�s the Difference?For those just starting, you might want to understand how to become a bricklayer in the UK before considering advanced qualifications like NVQ Level 3.�If you're deciding between qualifications, it's essential to understand how NVQ Level 3 builds on what you learn in Level 2. While Level 2 is ideal for entry-level bricklayers, Level 3 is geared toward experienced professionals aiming for leadership roles, higher pay, and long-term career growth. Here's how the two compare side by side:FeatureNVQ Level 2NVQ Level 3FocusBasic bricklayingAdvanced techniques + supervisionSuitable ForEntry-level workersExperienced bricklayersCSCS CardBlue Skilled WorkerGold Skilled WorkerPay RateStandardHigherProgressionLimitedLeads to supervisory & management rolesWho Should Consider NVQ Level 3?This qualification is best suited for bricklayers with three or more years of experience, those looking to become team leaders or supervisors, workers seeking better pay and long-term job security, and anyone ready to qualify for the Gold CSCS Card.Conclusion: Is NVQ Level 3 Worth It in 2025?If you're serious about advancing your career in bricklaying, NVQ Level 3 is more than just a credential. With rising industry standards and growing competition, NVQ Level 3 is a pathway to respect, responsibility, and higher earnings.If you want long-term security, better jobs, and a chance to lead, this could be the right investment. And with flexible assessment routes and financial support available, there�s never been a better time to take the next step.Start Your NVQ Level 3 Bricklaying JourneyGet full assessor support, spread the cost interest-free, and qualify while working.View the NVQ Level 3 Bricklaying CourseFAQDo I need NVQ Level 3 to work as a bricklayer?�No, you can work as a bricklayer without NVQ Level 3, but having it significantly improves your career prospects and earning potential.Can I do NVQ Level 3 without doing Level 2?�Yes, if you have enough on-site experience, typically at least 3 year,s you can go straight to NVQ Level 3 without completing Level 2 first.How long does it take to complete NVQ Level 3 in Bricklaying?�It typically takes between 4 and 12 weeks, depending on your current workload, evidence readiness, and the availability of the assessor.Does NVQ Level 3 help with CSCS cards?�Yes, completing NVQ Level 3 qualifies you for the Gold Skilled Worker CSCS Card, which is a respected credential on UK construction sites.Can I study NVQ Level 3 while working?�Absolutely. NVQ Level 3 is designed for on-the-job learning, with flexible assessment methods that accommodate your site's schedule.
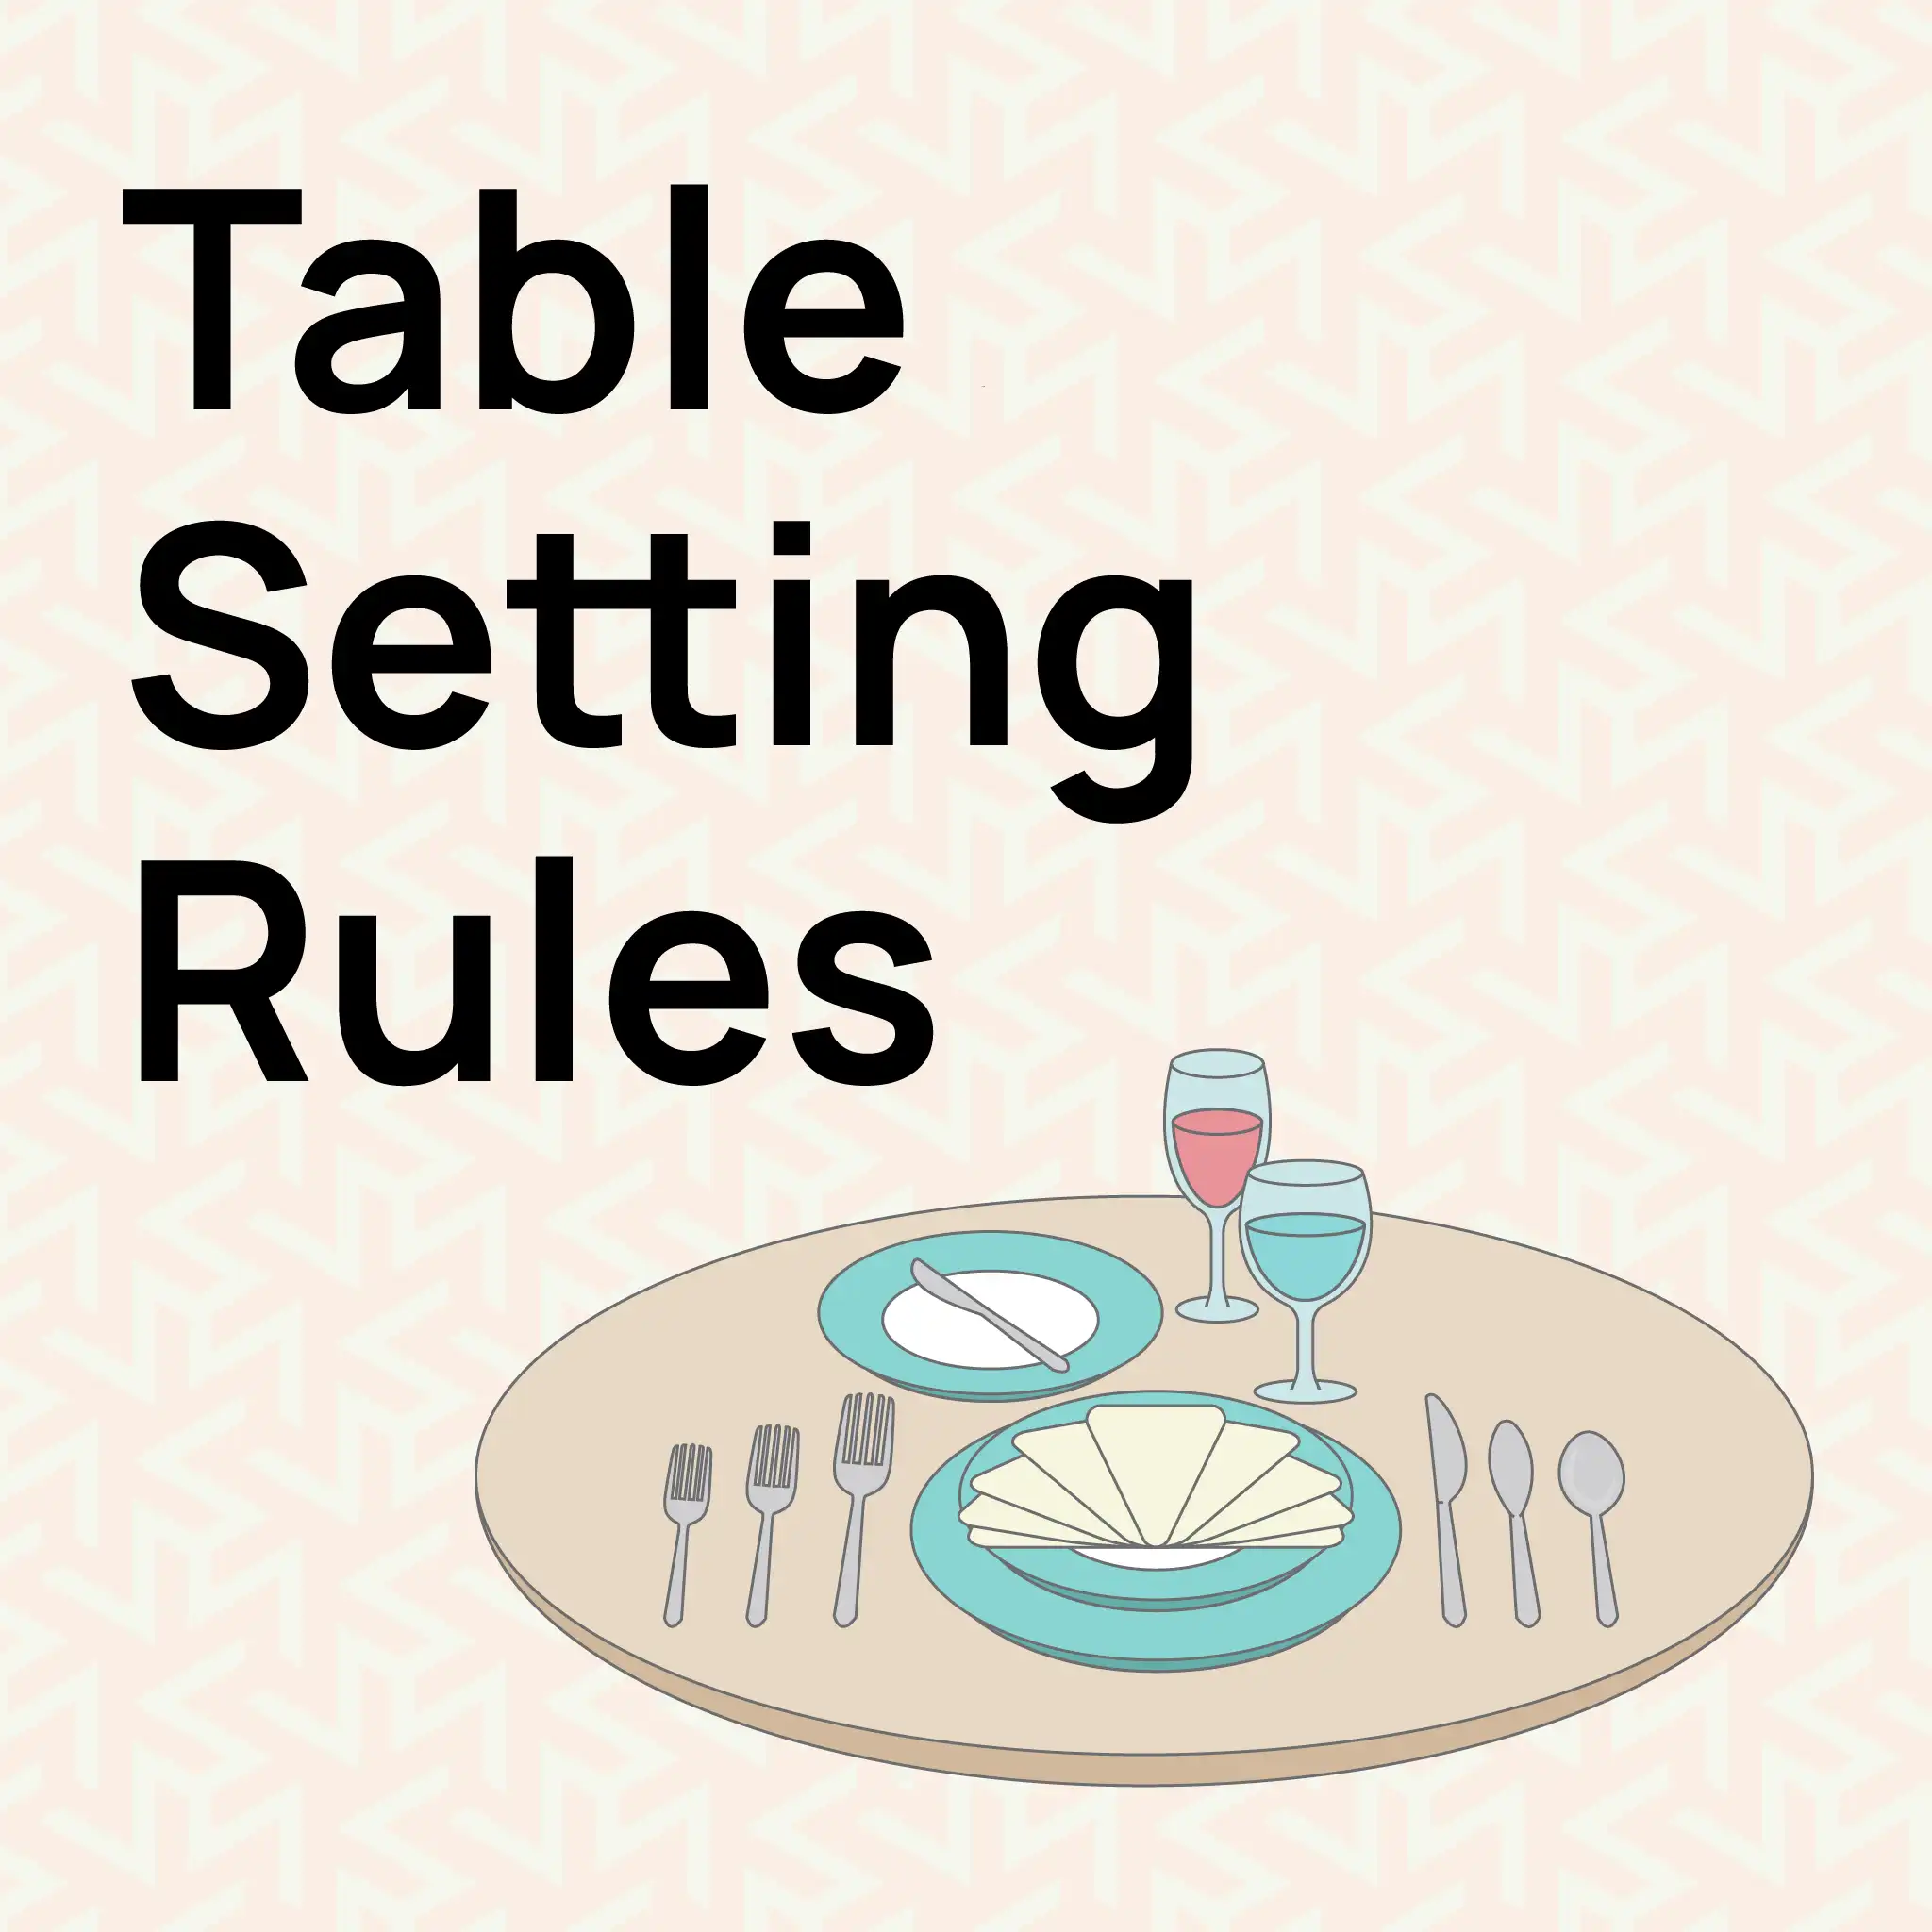
Mastering Table Setting Rules: From Basics to UK-Specific Etiquette
Do You Know Where the Oyster Fork Goes in a Formal Table Setting?Whether you're working in hospitality, catering, events, or corporate dining, knowing how to set a table correctly is a key part of presenting yourself and your organisation professionally. From high-end restaurants to formal banquets and client-facing events, a well-laid table sets the tone before a single word is spoken or dish is served.And it's not only the host or staff who need to know. If you're an attendee, manager, or guest speaker, understanding basic table etiquette helps you appear confident, polished, and in tune with industry expectations.In this article, we�ll guide you through the essential table setting rules - from the basics of cutlery placement to formal arrangements, UK-specific etiquette, and common mistakes to avoid. Whether you're refreshing your skills or training your team, you�ll find practical guidance that applies across industries.Sharpen Your Professional Edge with Certified TrainingIf you're serious about maintaining high standards in hospitality or catering, mastering table etiquette is just the start.�Our Level 2 Food Hygiene and Safety Course for Catering dives deeper into what every professional should know � from microbiological hazards to pest control, cross-contamination, cleaning procedures, and more.Get certified and show your commitment to industry best practices.Why Table Setting Rules Matter (Across Industries)First Impressions Begin at the TablePeople often form an opinion about you or your business, long before they�ve tasted the food or spoken to you. Your table setup is one of the first things they notice, and it instantly conveys professionalism (or the lack thereof).Whether you work in:Hospitality or cateringCorporate settingsEvent managementTraining or educationThe way you present a dinner table setting reflects your attention to detail and respect for the occasion.In Hospitality, Presentation is Half the ExperienceBefore guests even see the menu, they�re already observing:The restaurant�s exterior appearanceThe cleanliness and layout of the spaceHow the table setting looksIf the cutlery is placed correctly, napkins are folded neatly, and everything looks intentional, guests feel confident about the food before it's even served.Read our article Career Guide: Hospitality and Catering for a better understanding of this profession.In Corporate Environments, Etiquette Speaks Before You DoAt formal business lunches or networking dinners, your behaviour at the table can shape your professional reputation.People notice:How you carry yourself at the tableYour knowledge of cutlery etiquette (e.g., which fork to use firstWhether you know the difference between a formal table setting vs. casual diningYour team may get to know you over time, but first impressions are often built on small, visible habits like how you sit, talk, eat, and interact during meals.How to Set a Table: The BasicsIf you�re unsure where to start, here are a few fundamentals every professional should know:Plates: The dinner plate is placed at the centre; starter or side plates are placed on top or to the left.Cutlery: Forks on the left, knives and spoons on the right. Use cutlery from the outside in.Glassware: Water glass sits above the knife; wine glasses go slightly right and behind.Napkins: Placed either on the plate or to the left of the forks.Dessert utensils: Placed horizontally above the plate if needed.These are just the basics. For a more in-depth understanding, let�s break down the different styles of table layouts and learn how to place each item correctly.Types of Table SettingsThere are three types of table layouts. Each style suits different occasions, from casual meals to formal events.�Let�s take a closer look at each type.Basic Table SettingWhen to Use:This is perfect for a regular lunch or dinner at home. Think of meals with family.How to Set It:Dinner Plate: Place it in the centre.Knife: On the right side of the plate with the blade facing in.Fork: On the left side of the plate.Spoon: If needed (e.g. for soup), place to the right of the knife.Water Glass: Placed directly above the knife.Napkin: Either to the left of the fork or neatly on the plate.Practical Scenario Example:You're enjoying a quiet dinner at home with family after work. You place your cutlery and glass as described above -� just enough to dine comfortably without any unnecessary clutter.Casual/Informal Table SettingWhen to Use:Perfect for informal gatherings, such as dinner with friends, birthday lunches, or Sunday roasts. It�s a step up from basic but still relaxed.How to Set It:Dinner Plate: At the centre of the setting.Salad Plate or Soup Bowl: On top of the dinner plate (depending on what's served first).Cutlery:Small Fork (Salad Fork): To the left, outermost.Large Fork (Dinner Fork): To the left, closest to the plate.Dinner Knife: To the right of the plate, blade inward.Soup Spoon (if needed): To the right of the knife.Bread Plate: Above the forks, to the upper left.Butter Knife: Placed diagonally across the bread plate.Water Glass: Above the knife.Wine Glass (if needed): To the right of the water glass.Napkin: Folded to the left of the forks or placed on the plate.Practical Scenario Example:You�ve invited your colleagues for a weekend lunch at home. This setup conveys informality, yet you�ve made an effort to make them feel special and welcome.Formal Table SettingWhen to Use:This is the go-to for high-end events such as weddings, black-tie dinners, or formal restaurant service, where guests are served multiple courses.How to Set It:Charger Plate: This decorative base sits beneath the dinner plate and stays on the table until the main course is served.Plates: A soup bowl, salad plate, or fish plate is placed atop the charger in the order of the courses.Cutlery (Outside-In Rule):Left Side:Fish Fork: Far left.Salad Fork: Middle.Dinner Fork: Closest to the plate.Right Side:Soup Spoon: Far right.Fish Knife: Middle.Dinner Knife: Closest to the plate.Dessert Fork and Spoon: Placed horizontally above the plate.Oyster Fork (if needed): Far right, beyond the spoons.Bread Plate: Upper left above the forks, with a butter knife placed diagonally.Glassware:Water Goblet: Above the knives.White Wine Glass: Slightly right of the water glass.Red Wine Glass: Slightly behind and right of the white wine glass.Champagne Flute/Cocktail Glass: Behind the wine glasses.Napkin: Elegantly folded on the charger or to the left of the forks.Practical Scenario Example:You�re attending a black-tie fundraising dinner. As you approach the table, you know you�re in a professional, high-standard environment because the setup reflects it - layered cutlery, sparkling glassware, and proper placements signal care and class.Cutlery Etiquette and UsageWhen it comes to cutlery, knowing the proper etiquette not only helps you dine gracefully but also shows respect for tradition and your hosts. Here are the key points to remember:Outside-In RuleStart using the cutlery furthest from your plate first and work your way inward with each course. This classic rule helps guests know which utensils to use and when.Resting and Finished PositionsTo signal to servers you�re resting between bites, place your knife and fork in a slight �V� shape on your plate. When finished, place them parallel, usually diagonally from 4 o�clock to 10 o�clock on the plate.UK Cutlery EtiquetteIn the UK, traditional dining etiquette follows the Continental or European style. This is especially important in formal settings such as restaurants, catering events, and hospitality venues.The fork is held in the left hand, with the tines facing downward.The knife is held in the right hand, used to cut food and guide it onto the back of the fork.Unlike the American style, there�s no switching hands. The fork stays in the left hand throughout the meal.This method is seen as efficient, polite, and professional, and is widely taught in hospitality training and workplace dining protocols in the UK.How to Hold Cutlery CorrectlyKnife: Rest the handle in your palm and place your index finger along the top of the blade for better control.Fork: Hold it similarly to a pencil, but with a relaxed grip, and keep the tines facing down.Avoid stabbing food or waving cutlery while talking - these are considered poor manners.Why It MattersFollowing proper table etiquette not only shows respect in formal settings but also reflects positively on your professionalism, especially if you're working in or entering the hospitality or catering industry.Take Your Food Safety Knowledge to the Next LevelIf you're responsible for managing food handlers, overseeing hygiene standards, or training staff, it�s essential to have the right qualifications in place.�Our Level 3 Food Hygiene and Safety (RQF) course is designed for supervisors, managers, and business owners working in the food industry.? CPD-Certified�? Meets legal training obligations? Ideal for all supervisory roles in food businessesCommon Mistakes to Avoid When Setting a TableIn professional environments, minor errors in a table setup can create a negative impression.�Here are some common mistakes to watch out for while arranging the table:Placing cutlery in the wrong order - always follow the correct table setting by working from the outside in, course by course.Using mismatched tableware or leaving fingerprints on glassware while setting the table.Confusing the bread plate with the side plate or mixing up the placement of forks and knives.Ignoring napkin placement or simply tossing it on the table, continuously fold it neatly and place it appropriately.Tips to Enhance Your Table SettingOnce you�ve mastered the basic table layout, take it a step further by enhancing both its appearance and functionality:Add a centrepiece � A simple vase with fresh flowers, a decorative candle, or a seasonal item can give your dinner table setup a welcoming focal point. Just ensure it�s not too tall to block the view across the table.Use coordinated colours � Match your tablecloth, napkins, and tableware for a polished look. Neutral or earthy tones work well for a formal setting, while bright colours can bring life to casual meals.Upgrade your cutlery � Beautiful, polished cutlery not only enhances the dining experience but also reinforces good cutlery etiquette in the UK. Matching sets show attention to detail.Include place cards for formal meals � It adds a professional touch and helps avoid confusion in seating arrangements.Add texture and layering � Use placemats, chargers, or fabric napkins to introduce depth and elevate a basic table layout into something visually impressive.Glassware counts too � Clean, streak-free glasses arranged in the correct order add sophistication to any formal table setup.Lighting matters � Soft lighting, whether through candles or warm-toned bulbs, can instantly upgrade the dining atmosphere.These enhancements are subtle yet effective, transforming any table setup from functional to memorable, making them ideal for both home entertaining and professional hospitality settings.ConclusionMastering table setting rules isn't just about looks � it involves creating a clean, professional, and welcoming experience. Whether you're hosting at home, preparing for a restaurant service, or setting up a corporate event, understanding proper table setting layout and cutlery etiquette makes all the difference.From a basic to a formal table setting, paying attention to details and placing items in the correct manner helps elevate the occasion.You Might Also Like:Understanding table setting rules is just one part of mastering food service and safety. If you're looking to expand your knowledge, explore these helpful reads:TACCP vs VACCP: What's the Difference?Food Hygiene vs Food Safety: Why Both MatterChef vs Cook: Key Differences ExplainedHow Many Times Can You Reheat Food?Understanding the Kitchen Brigade System FAQsWhat are the basic table setting rules everyone should know?Place the fork to the left of the plate, the knife to the right with the blade facing inwards, and the spoon (if needed) to the right of the knife. The napkin can be placed to the left of the fork or on the plate. Glassware should be positioned above the knife.How do I set a table with the fork and knife on the same side?While traditional settings place the fork on the left and the knife on the right, for informal occasions or space-saving needs, both can be placed on the same side. Ensure they are aligned neatly, with the knife blade facing the fork.What is the correct table setup for a formal dinner?A formal table setup includes multiple courses and utensils: charger plate, soup bowl, salad plate, dinner plate, various forks and knives placed in order of use from the outside in, dessert utensils above the plate, and appropriate glassware for water, white wine, red wine, and champagne.How should I lay a table in the UK?In the UK, the fork is held in the left hand with tines facing down, and the knife in the right hand. Utensils are placed in the order of use from the outside in. Napkins are typically placed to the left of the forks or on the plate.What are some common mistakes to avoid while setting a table?Avoid overcrowding the table, mismatched or misplaced cutlery, using inappropriate settings for the occasion, and neglecting essential hygiene practices, such as clean linens and polished utensils.How can I enhance the aesthetics of my table setup?Incorporate elements like a tasteful centrepiece (e.g., a vase with fresh flowers), matching tablecloth and napkins, polished cutlery, and coordinated dinnerware to elevate the dining experience.What is cutlery etiquette in the UK?In the UK, it's customary to hold the fork in the left hand with tines facing down and the knife in the right hand. During pauses, place the knife and fork in an inverted V on the plate; when finished, place them parallel at the 6:30 position.Why is understanding table setting etiquette important?Proper table setting etiquette reflects professionalism, enhances the dining experience, and is essential in hospitality and catering industries to meet guest expectations and standards.
How to Repoint Brickwork: Tools, Techniques & Tips
Repointing brickwork might seem like a simple task, but when done incorrectly, it can lead to long-term damage to your home or property. Mortar joints play a vital role in the structural integrity and weather resistance of brick walls. When mortar deteriorates, repointing restores protection. But to get lasting results, it�s essential to use the right tools, materials, and methods and avoid common mistakes. Here is everything you need to know, from spotting when repointing is required to executing the job correctly.For those new to brickwork or looking to improve their technique, be sure to check out our Common Bricklaying Mistakes guide to avoid errors that could affect your project�s success.What Is Repointing Brickwork?Repointing is the process of renewing the external part of mortar joints between bricks. Over time, weather exposure and general wear can cause mortar to crack or crumble, compromising the wall�s strength. Repointing involves removing the weakened mortar and replacing it with a fresh mix, thereby sealing the joints and preserving the brickwork.Why is repointing important? Because while bricks can last a century or more, mortar often starts to fail after just 20-30 years. Ignoring damaged mortar can lead to water ingress, frost damage, and even structural instability.Signs Your Brickwork Needs AttentionIf you�re unsure whether your brickwork needs repointing, there are several signs to watch for. Look out for cracks or gaps in the mortar lines, loose or wobbly bricks, and visible crumbling or flaking mortar. Damp patches or water staining on internal walls can also indicate issues, as can plants or moss growing out of the joints. In some cases, these symptoms may signal deeper structural problems that require underpinning to stabilize the foundation before repointing. Regular inspections, particularly after winter, are crucial for identifying these issues early and preventing further damage.When�s the Right Time to Start?Repointing is best done in mild, dry weather. The ideal temperature range is between 8�C and 25�C. Spring and early autumn are typically the best seasons for repointing in the UK.Avoid repointing in poor weather conditions. Rainy weather can introduce excess moisture, weakening the mortar bond and interfering with proper curing. Similarly, frosty conditions pose a risk as freezing temperatures can cause the mortar to expand and crack. On the other end of the spectrum, working in hot, direct sunlight can cause the mortar to dry too quickly, reducing its adhesion and potentially resulting in weak joints.Is It Okay to Repoint in the Rain?It�s strongly advised not to repoint in the rain. Excess moisture prevents mortar from setting properly, reduces its strength, and increases the risk of staining. If rain is forecast, delay your project or use waterproof sheeting to protect the area until dry conditions return.Interested in mastering bricklaying skills professionally?�Explore the Bricklaying NVQ Level 2 course to build a strong foundation.Essential Repointing Tools & MaterialsTo carry out repointing effectively, you will need several basic tools, including a pointing trowel, a plugging chisel or cold chisel, a jointing tool, a mortar board or hawk, and a stiff brush. Additionally, some optional but useful tools include a mortar raking tool, either manual or power-assisted, a mortar gun for larger areas, and a bucket trowel.�In terms of materials, a suitable mortar mix (either lime-based or cement-based), clean water, and a brick cleaner (if needed) are essential. When choosing the right mortar, it�s important to consider the type of building: older or listed buildings typically require breathable and flexible lime mortar, while newer constructions generally use cement mortar, which must be matched carefully in strength and appearance to the existing mortar to ensure proper adhesion and durability.Choosing the right tools and materials is the foundation of any successful repointing job. The quality and compatibility of your mortar, the condition of your tools, and even the type of building you�re working on can all make a significant difference to the final result. To help you get started quickly and confidently, here�s a handy reference table outlining everything you�ll need.A Quick Reference Table of Tools & MaterialsCategoryItemBasic ToolsPointing trowelPlugging chisel or cold chiselJointing toolMortar board or hawkStiff brushOptional ToolsMortar raking tool (manual or power-assisted)Mortar gun for large areasBucket trowelMaterialsSuitable mortar mix (lime or cement-based)Clean waterBrick cleaner (if needed)Mortar SelectionLime mortar (for older or listed buildings)Cement mortar (for newer buildings, match strength)How to Restore Brick Joints: Step-by-StepPrepare the AreaBefore starting, ensure you wear protective gear, including gloves, goggles, and a dust mask. Lay down dust sheets to protect surrounding surfaces from debris. Use a stiff brush to clean the wall surface, removing any loose dirt or dust to ensure a clean working area.If you're looking to formalise your skills or advance your career, Everything You Need To Know About A Bricklayer CSCS Card is a great next step.Remove Old MortarUsing a plugging chisel or a mortar raking tool, carefully rake out the old mortar to a depth of about 15�20mm. Avoid using angle grinders unless absolutely necessary, as they can damage the edges of the bricks. Make sure all loose material is completely removed to provide a solid base for the new mortar.Clean the JointsBrush out all remaining dust and debris with a stiff brush. To improve adhesion, lightly spray water into the joints to dampen them, but be careful not to soak the area, as excess moisture can weaken the mortar bond.Mix the MortarPrepare the mortar by mixing sand with cement or lime, depending on the type of building you are working on. The mix should be firm and workable, not runny. Allow the mortar to rest briefly after mixing to improve its consistency and workability.Apply the New MortarUsing a pointing trowel, press the mortar firmly into the joints, starting with the horizontal (bed) joints before moving to the vertical (perp) joints. Compact the mortar well to remove any air pockets and ensure strong adhesion to the bricks.Shape the JointsOnce applied, use a jointing tool to finish the mortar, matching the existing style of the wall, such as flush, weather-struck, or recessed joints. Neaten the joints while the mortar is still slightly workable for a clean, professional look.Curing and Clean-UpAllow the mortar to cure slowly by protecting it from direct sunlight and rain. Mist the surface with water if needed to keep it damp during the initial curing phase. After the mortar has set, brush off any loose residue and clean the brick faces gently with a dry brush to complete the job.Avoid common pitfalls and errors by reviewing our article on Common Bricklaying Mistakes (And How to Fix Them)ConclusionRepointing brickwork is one of the most effective ways to preserve the structure and appearance of your property. By understanding when repointing is necessary, selecting the appropriate materials, and following best practices step-by-step, you can avoid common mistakes that lead to costly repairs. Whether you're tackling a minor repair or maintaining a larger wall, proper preparation, technique, and timing are key to achieving long-lasting results. With the right tools and know-how, you can protect your brickwork for decades to come. .main{ border:3px solid #0f7c90; border-radius:20px; position: relative; font-family:roboto; font-weight: 400; color: #000; } .main-two{ position: absolute; top:-25px; left:45px; background-color:white; } .img-div{ border-radius : 100%; padding:2px 7px; background-color:#0f7c90; margin-right:5px; width: 50px; height: 50px; } .img{ width:30px; object-fit:contain; height:auto; border-radius : 100%; } @media only screen and (max-width: 600px) { .heading{ font-size:20px; } .img{ width:20px; object-fit:contain; height:auto; border-radius : 100%; } .img-div{ width: 40px; height: 40px; } .main-two{ left:25px; } } Ready to take your skills further? The Bricklaying NVQ Level 3 course offers advanced training to help you become a qualified bricklayer. FAQsHow long does repointing last?When done properly, repointing can last anywhere from 30 to 50 years depending on weather conditions and the quality of materials used.How deep should I remove old mortar?You should remove mortar to a depth of around 15�20mm to ensure a strong bond with the new mix.Do I need planning permission to repoint?Generally no, unless your property is listed or in a conservation area. Check with your local authority if in doubt.Can I repoint in winter?It�s not recommended due to frost risks and poor curing conditions. If necessary, ensure the work area is adequately protected.Is lime mortar better than cement mortar?Lime mortar is better for older buildings as it�s more flexible and breathable. Cement mortar is harder and better suited to modern construction.Explore Other Popular NVQs to Boost Your Bricklaying CareerIf you�re interested in advancing your skills beyond repointing and bricklaying basics, pursuing NVQ qualifications is a great way to build your expertise and qualify for various CSCS cards.Level 2 NVQs (Skilled Worker � Blue CSCS Card)Level 3 NVQs (Advanced Worker � Gold CSCS Card)NVQ Level 2 in BricklayingNVQ Level 2 in PlasteringNVQ Level 2 in Roofing OccupationsNVQ Level 2 in Carpentry and JoineryNVQ Level 2 in Wall and Floor TilingNVQ Level 2 in Painting and DecoratingNVQ Level 2 in Passive Fire ProtectionNVQ Level 2 in StonemasonryNVQ Level 3 in BricklayingNVQ Level 3 in PlasteringNVQ Level 3 in Roofing OccupationsNVQ Level 3 in Wall and Floor TilingNVQ Level 3 in Painting and DecoratingNVQ Level 3 in Stonemasonry � Banker MasonryNVQ Level 3 in Stonemasonry � Memorial MasonryThese NVQs are typically completed through on-site assessments, allowing you to gain your qualification while continuing to work. Whether you want to enhance your bricklaying skills or explore related trades, pursuing these NVQs can open new doors and help you stay competitive in the construction industry.
Clean As You Go Simplified: Essential Tools and Implementation Tips
�Clean as you go� may appear to be a simple concept, but it can be challenging to implement in practice, especially in high-pressure workplaces with multiple staff members. Without proper structure and clearly defined responsibilities, this straightforward idea can quickly lead to confusion, missed tasks, and serious concerns regarding food safety and food hygiene. To be effective, the policy must be well-organised and embedded into the daily workflow to maintain a clean and safe environment.A clean as you go (CLAYGO) policy is a cleaning strategy that promotes continuous cleaning throughout the working day. It encourages staff to view cleaning as a routine responsibility, rather than a one-off task, thereby helping to maintain hygiene at all times.In this article, we�ll explain what clean as you go means, how CLAYGO policies work, the tools required, how to implement them effectively in the workplace, and more.What do you mean by Clean as you go?Clean as you go (CLAYGO) is a standard policy widely used in professional environments like hospitality and catering. It is a cleaning method that involves cleaning work areas immediately after completing a task, rather than leaving it for the end of the shift.For example, it could mean a chef wiping down their workstation after preparing a dish or staff disposing of food waste and spills right away. This proactive approach ensures that cleanliness is maintained throughout the day.Why Is It Important?Implementing a CLAYGO policy helps maintain consistent hygiene and reduces the risk of cross-contamination.It ensures compliance with food safety standards.It promotes a shared sense of responsibility - cleaning isn't limited to just one role. From junior staff to senior managers, everyone contributes to maintaining a clean, safe, and professional work environment.Types of CleaningNow that we understand what �Clean as You Go� means and why it matters, let�s take a closer look at the two main types of cleaning.In a professional setting, a Clean as You Go policy is typically divided into two key segments:Immediate CleaningThis type of cleaning is about acting fast. Spills, broken glass, or dropped food must be addressed immediately to prevent accidents or contamination. Staff should know precisely what to do and have cleaning materials readily available, such as gloves, paper towels, disinfectant spray, and warning signs. Quick action keeps the environment safe and prevents minor issues from escalating into major problems.Routine CleaningRoutine cleaning focuses on maintaining clean and hygienic work areas throughout the day. Tasks include wiping surfaces, clearing food waste, emptying bins, and cleaning tools or equipment after use. These jobs should be part of everyone�s daily schedule, not left until the end of a shift.By clearly separating urgent clean-ups from regular tasks, it�s easier to keep the workplace running smoothly, safely, and to a high standard of hygiene.Real Example: Cleaning Between Tasks to Prevent ContaminationA chef finishes prepping meat for lunch service and immediately disinfects the chopping board and work surface before starting on fresh vegetables to avoid contamination.How to Implement and Manage �Clean As You Go� in the WorkplaceTo make the 'clean as you go' policy effective, it must be incorporated into your daily routine. In a busy workplace, setting clear standards is essential.Everyone should know exactly what they are responsible for. This avoids confusion, reduces delays in action, and ensures tasks are not just left for �someone else� to handle. Assigning specific cleaning responsibilities to staff based on areas, tasks, or time slots helps maintain order and supports a hygienic environment.However, immediate cleaning tasks, such as spillages or breakages, must not require management's approval. Staff members must be trained to act on them promptly to prevent any hygiene and safety issues.A clear and clean-as-you-go approach not only promotes hygiene but also improves operational flow in high-paced environments, such as commercial kitchens.Make sure your workplace has a proper waste management plan to support daily cleaning efforts. If rubbish, packaging, or debris is left to pile up, even the best cleaning routines can fail. By working with trusted Lakeland dumpster services, you can ensure waste is removed regularly. This helps keep work areas clean, safe, and organized, allowing staff to focus on their tasks without interruptions.Real Example: Quick Action After a SpillA kitchen porter accidentally spills oil on the floor during a busy lunch service. Instead of waiting, they immediately place a wet floor sign, use absorbent granules to soak up the spill, and clean the area before anyone slips.Steps for smooth implementation:Once you�re clear on when and what to clean, the next step is to implement it and make this practice part of your team�s daily habits. Below are a few steps for implementing CLAYGO smoothly in your organisation.Outline cleaning duties clearly, specifying who is responsible for what and when.Train all staff, including both new and existing employees, so they understand the policy.Place cleaning equipment where it�s needed most, especially near food prep zones and walkways.Define disposal procedures, including waste management, and when bins must be emptied.Use signage or checklists, as visual reminders of key cleaning responsibilities.After putting your 'Clean as You Go' (CLAYGO) plan into action, it�s equally important to ensure that your staff are well-trained and consistently supported. Ongoing training and regular monitoring are crucial for maintaining the policy and ensuring it becomes an integral part of your workplace culture.Staff Training, Monitoring, and Refresher:How to Train StaffDeliver training as part of onboarding for all new employees.Use practical demonstrations�walk through what immediate vs routine cleaning looks like in real kitchen settings.Provide visual aids, such as cleaning checklists and the CLAYGO poster.How to Track ComplianceUse a daily cleaning checklist that staff must tick off and sign at the end of their shift.Supervisors should conduct spot checks to ensure that cleaning is done correctly and not just ticked off.Encourage peer accountability by having team members remind each other of their CLAYGO duties.�How to Refresh TrainingSchedule regular refresher sessions (monthly or quarterly).Review hygiene-related incidents during team meetings and utilise them as learning opportunities.Update posters and checklists if procedures change to keep materials relevant and engaging. Essential Tools to Support the Clean as You Go PolicyIn a busy kitchen, cleanliness and speed go hand in hand, and the staff needs to have access to the right tools at all times. These tools help ensure that food areas remain safe, hygienic, and clutter-free throughout the day.Here are the essential items every kitchen must have in a cleaning tool kit:Blue roll or absorbent paper towels � Ideal for wiping spills, drying hands, and keeping surfaces dry.Food-safe disinfectant spray � For sanitising worktops, utensils, and preparation areas.Rubbish sacks or waste bins � Easily accessible for immediate disposal of food waste and packaging.Absorbent granules or spill powder � Useful for soaking up oil, sauces, or any liquid spills quickly and safely.Sponges or disposable cloths � For regular cleaning of surfaces and kitchen tools.Dustpan and brush � To sweep up crumbs, food particles, or broken items efficiently.�Wet Floor� or hazard warning signs � To mark freshly cleaned areas and prevent slips or accidents.Having a well-stocked cleaning kit within reach supports hygiene and promotes a smooth and safe kitchen operation.To make it even easier for your team to stay on track, we�ve created a visual reminder you can display in your workspace.Clean As You Go Poster � Essential Tools and Tips for a Safer KitchenUse this poster to understand the CLAYGO (Clean As You Go) policy at a glance. It highlights the key cleaning tools your kitchen should have and outlines clear steps for effective implementation, even in the busiest work environments.Download our 'Clean as You Go' poster to help your team follow hygiene standards visually and consistently.FAQ'sWhat does "Clean As You Go" mean?Clean as you go means cleaning work areas, tools, and surfaces immediately after use rather than waiting until the end of a shift. It�s a proactive hygiene approach that helps reduce the risks of cross-contamination and supports a safer, more efficient workspace, especially in kitchens and food-handling environments.What is a Clean As You Go policy?A clean-as-you-go policy is a structured cleaning system that encourages staff to clean continuously throughout the day. It outlines responsibilities, schedules, and standards for maintaining hygiene throughout the workplace. This policy is particularly essential in industries such as food service, hospitality, and healthcare.What tools are needed for a Clean As You Go system?Essential clean-as-you-go tools include paper towels or blue roll, food-safe disinfectants, sponges, dustpans and brushes, rubbish sacks, spill granules, and 'Wet Floor' signs. Having these items readily available helps staff act quickly and maintain hygiene throughout the workday.Can I download a Clean As You Go poster?Yes, a clean as you go poster is available to help staff visualise and understand the policy. It outlines key tools and responsibilities, making it easier to train teams and maintain a high level of hygiene. Scroll up to download the CLAYGO poster directly from this article.What is the difference between "clean as you go" and "clear and clean as you go"?Clear and clean as you go refers to removing clutter (clearing) and cleaning surfaces simultaneously. This two-step process is especially effective in kitchens where hygiene and efficiency are crucial. It's a common practice recommended by food safety authorities in the UK.

Do You Need a CSCS Card to Earn More as a Bricklayer in the UK?
With construction projects booming and demand for skilled trades rising steadily, bricklaying remains one of the UK�s most in-demand and well-paid trades. In fact, searches for �bricklayers near me� have surged over the past year, showing no signs of slowing down. Entry-level bricklayers can expect to earn up to �32,000 per year (pre-tax), while experienced tradespeople running their own business may bring in upwards of �60,000 annually, especially when backed by recognised qualifications like a CSCS card.How Much Do Bricklayers Earn in the UK?According to the National Careers Service, bricklayers in the UK can expect to earn between �19,000 and over �50,000 annually, depending on their level of experience and qualifications.Those just starting out in the trade, with less than one year of experience, typically earn between �19,000 and �24,000 per year.Bricklayers with mid-level experience, usually holding an NVQ Level 2 qualification and having worked for two to four years, can expect to earn between �25,000 and �32,000 annually.More experienced bricklayers, especially those who hold CSCS Blue or Gold cards, generally command higher wages ranging from �34,000 to over �50,000 per year.Having a CSCS card often opens doors to better-paying commercial roles, longer contracts, and reduces the likelihood of being turned away at site entrances.Here�s a simple breakdown of expected salary ranges by experience:Experience LevelTypical Annual Salary (�)NotesStarters (less than 1 year of experience)�19,000 - �24,000Entry-level bricklayersMid-level (NVQ Level 2 + 2 - 4 years)�25,000 - �32,000Qualified bricklayers with some experienceExperienced (CSCS Blue/Gold Card)�34,000 - �50,000+Senior and highly qualified workersWhat Is a CSCS Card and Why Does It Matter for Pay?A CSCS card (Construction Skills Certification Scheme) proves you have the proper training and qualifications to work safely on a construction site.While not legally required, most UK construction employers and those with large sites typically demand it.If you're a bricklayer, the three main CSCS card types relevant to you are:Red CSCS Cards (Temporary)Red CSCS cards are issued to those currently training or working towards their NVQ qualification. If you're an apprentice bricklayer, you'll need the Apprentice CSCS Card.Those studying a recognised bricklaying qualification can apply for the Trainee CSCS Card.If you have more than one year of site experience but haven�t completed your NVQ Level 2, you may be eligible for the Experienced Worker CSCS Card.Similarly, experienced workers aiming for an NVQ Level 3 can apply for the Experienced Technical CSCS Card.Explore each card in detail here: Bricklayer CSCS CardBlue Skilled Worker CSCS CardThe most common card for bricklayers, available to those who hold NVQ Level 2 in Bricklaying and have passed the CITB Health, Safety and Environment Test.Blue cardholders often earn more, enjoy more consistent work, and have fewer site restrictions.Want to earn your Blue Card? Book your NVQ Level 2 in Bricklaying nowGold Skilled Worker CSCS CardThis card is for advanced bricklayers who hold NVQ Level 3 in Bricklaying and are often in supervisory roles. The Gold Card is a mark of seniority on-site and can increase access to higher-paying leadership positions.Ready to move up? Get qualified for the Gold Card todayDoes a CSCS Card Increase Your Earning Potential?A CSCS card can significantly boost your income potential as a bricklayer. Those who hold a CSCS card often qualify for higher-paying roles, especially on commercial and public sector projects where proof of qualification and health and safety training is essential. Employers tend to favour CSCS-certified workers because it assures them of a certain standard of professionalism and skill.Having a CSCS card also reduces the chances of being turned away at site gates and opens up long-term, better-paid contracts. Whether you're new to the trade or already experienced, holding a CSCS card enhances your employability and makes you more valuable in the eyes of employers.Other Factors That Affect Bricklayer SalariesWhile holding a CSCS card is essential, your overall earnings as a bricklayer also depend on a variety of other factors. Location plays a significant role; those working in London and the South East often command higher rates.Experience and the quality of your work also matter greatly, as do any additional skills you bring to the table, such as repointing, plastering, or site leadership.Bricklayers who own their tools and have their own transport are also more flexible and often more desirable to employers.Read more on� How to Become a Bricklayer in the UK or�See related NVQ�s on Hurak:NVQ Level 2 in Plastering � Builds complementary skills valuable for varied site work and completable alongside bricklaying.NVQ Level 2 in Wall and Floor Tiling � Adds versatility that makes you more attractive to a wider range of employers.NVQ Level 2 in Painting and Decorating � A finish skill that enables you to offer fuller job packages, especially in residential projects.NVQ Level 2 in Passive Fire Protection � A specialised qualification increasingly in demand on larger sites.NVQ Level 2 in Roofing Occupations � Broadens your trade skill set, often paired with external brickwork.NVQ Level 2 in Carpentry � Adds structural woodworking competence, making you more flexible on multi-trade projects.NVQ Level 2 in Stonemasonry � Ideal for bricklayers who want to work on heritage, restoration, or specialist stone jobs.Can You Work (and Get Paid) Without a CSCS Card?It is possible to work as a bricklayer without a CSCS card, but your opportunities will be limited. You can take on work with small contractors or private domestic clients and carry out labour-only tasks.However, most commercial and public-sector construction sites require a CSCS card to gain access and undertake work.As these larger sites often offer more secure, higher-paying jobs, not having a CSCS card can restrict your earning potential significantly.Read our article on Gaining Site Work as a BricklayerCareer Tips to Increase Your Pay as a BricklayerImproving your earnings isn't just about qualifications; it's also about maintaining quality and expanding your skill set. Poor workmanship, like messy pointing or uneven lines, can harm your reputation and limit future opportunities.Repointing is a valuable skill that many homeowners and contractors seek out, especially for restoration projects. Gaining experience in this area can help you stand out from other bricklayers.Finally, pursuing NVQ qualifications while working allows you to upskill without stepping away from your job. The more qualified and versatile you are, the more doors you'll open in your career.Read our articles on Common Bricklaying Mistakes and Common Mistakes When Repointing Brickwork or Book your NVQ Level 2 in BricklayingConclusionIf you're serious about earning more as a bricklayer, focus on two things: sharpening your skills and proving them. Getting the right NVQ and a CSCS card not only increases your earning potential but also opens the door to bigger projects, better clients, and longer-term work.Don�t let missed qualifications limit your income. Start your journey with the right training and get ahead on site. Get qualified. Apply for your CSCS card. Start building your future.Boost Your Skills While You WorkAlready on-site? You don�t need to step away from your job to get qualified. With our NVQ Level 2 Bricklaying course, you can gain certification through on-site assessment at your pace, on your schedule.Find out how the process worksFAQDo I need a CSCS card to become a bricklayer?No, it�s not legally required to start working as a bricklayer, but most employers especially on larger or commercial sites, will expect you to have one. A CSCS card proves your competence, training, and awareness of health and safety standards.Can I get a bricklaying job without qualifications?Yes, you can start as a labourer or trainee under the supervision of experienced bricklayers. However, gaining a recognised qualification like an NVQ Level 2 significantly improves your earning potential and career prospects.How do I get a CSCS card as a bricklayer?You�ll need to complete an NVQ in bricklaying (Level 2 for the Blue Card or Level 3 for the Gold Card) and pass the CITB Health, Safety and Environment test. Then you can apply for the appropriate CSCS card.What�s the difference between Blue and Gold CSCS cards?The Blue Skilled Worker card is for those with NVQ Level 2, while the Gold Skilled Worker card is for those who have completed NVQ Level 3 and often take on more senior or supervisory roles on-site.How long does it take to get a CSCS card?If you already have your NVQ and have passed the CITB test, you can usually receive your card within 10�20 working days after applying.Does the CSCS card expire?Yes. Most CSCS cards are valid for five years. You�ll need to renew your card before it expires by retaking the CITB test and, in some cases, showing continued competence in your role.Need Help Getting Qualified? Hurak makes it easy to book your NVQ, prepare for the CITB test, and apply for your CSCS card all in one place.Call us on 0333 344 1293 or visit Hurak.com to get started.

Further Education vs Higher Education | Key Differences
Choosing the right path in education can be confusing, especially when terms like further and higher education are often used interchangeably. Whether you're returning to study, exploring career progression, or supporting someone else's learning journey, understanding the difference is essential. This quick guide breaks down what sets further education and higher education apart, from qualifications and course levels to career outcomes, so you can make an informed decision that suits your goals.We�ll clearly explain what each pathway involves, what qualifications you can earn,�internships for high school students, and how they align with your personal or professional goals, helping you make the right decision with confidence.�Top NVQ Courses Offered by HurakLooking to boost your career with a nationally recognised qualification? Hurak provides a range of NVQ courses tailored to various industries. Here are some of their top offerings:Level 2 NVQ in Plant Operations: Perfect for operatives aiming for the CPCS Blue Card.Level 2 NVQ in Controlling Lifting Operations (Slinger Signaller): Ideal for those working in crane and lifting operations.Level 3 NVQ Diploma in Adult Health and Social Care: Advance your role in care with this popular qualification.Level 3 Award in Education and Training (AET): Start your journey to becoming a certified trainer or teacher.Browse All NVQ Courses at Hurak.What Is Further Education (FE)?Further education (FE) refers to any type of learning that takes place after secondary school but isn�t part of a university degree or higher education. It offers a diverse range of qualifications, from academic courses to practical and vocational training, providing individuals with the skills needed for the workforce or further studies.FE is typically delivered in colleges, training centres, or adult education providers. Common qualifications include:A-LevelsBTECsNVQs (National Vocational Qualifications)ApprenticeshipsFunctional Skills�The good thing about FE lies in its flexibility; courses are available part-time, in the evenings, or even online, making it an ideal option for those with work or family commitments. Whether you're looking to build practical skills, pursue a specific career path, or prepare for higher education, further education offers a variety of routes to meet your personal and professional goals.What Is Higher Education (HE)?Each year, thousands of UK adults enrol in higher education to gain specialist qualifications, switch careers, or advance in their current roles. Higher education refers to studies undertaken after completing further education, typically at university level. It includes qualifications such as:Bachelor�s DegreesFoundation DegreesHigher National Certificates (HNCs) and Diplomas (HNDs)Master�s DegreesDoctorates (PhDs)These programmes are more academically focused and often involve in-depth study, research, or theoretical learning.Most full-time HE courses take three to four years to complete, though part-time and distance learning options, such as online MBA, are available .Unlike further education, HE often leads to advanced qualifications required for roles in law, engineering, teaching, or healthcare.Key differences between further and higher educationFurther education (FE) and higher education (HE) serve as distinct milestones in your learning journey, each providing unique opportunities for career progression and academic development.�Level of StudyFE: Post-secondary study, often providing a foundation for future higher learning or specific job preparation.HE: Advanced academic study, typically pursued after completing FE, offering qualifications like Bachelor�s and Master�s degrees.Qualification TypesFE: Focuses on practical skills and vocational qualifications such as BTECs, NVQs, and apprenticeships.HE: Offers academic qualifications like degrees, which delve deeper into specialised knowledge and research.Duration & FlexibilityFE: Shorter, flexible study options, often one to two years, with part-time or online opportunities.HE: Longer courses, generally lasting three to four years, are usually full-time with more structure.Career PathwaysFE: Ideal for entry-level positions, apprenticeships, or preparation for higher study.HE: Leads to professional and specialist careers requiring advanced qualifications, such as law, engineering, and medicine.Below is a table for your quick reference of the key differences:CATEGORY�FURTHER EDUCATIONHIGHER EDUCATION�Qualification LevelsLevel 1 to Level 3Level 4 and aboveTypical Providers�College, Training CentresUniversities, HE institutionsEntry RequirementsOften minimal, depending on the courseUsually A-levels or equivalentCostOften free or low-costTuition fees apply (loans available)Study FocusPractical, job-ready skillsAcademic, subject-specific knowledgeTime CommitmentVaries, often short or part-time2�4+ years (mostly full-time)Which Path Is Right for You?Deciding between further education (FE) and higher education (HE) comes down to your goals, qualifications, and learning preferences. Each route offers valuable opportunities; it�s about finding what fits your current stage and career plan.Choose Further Education if you:Need to gain foundational or Level 2�3 qualifications.Need to develop job-ready skills quickly.Prefer practical, hands-on learning environments.Explore career options or return to study with flexibility in mind.Choose Higher Education if you:Aim to earn a university-level qualification (Bachelor�s, Master�s, etc.).Plan to enter a profession that requires a degree (e.g. law, teaching, healthcare).Enjoy academic study and want to explore a subject in depth.Prefer a longer-term learning commitment with research opportunitiesWhichever route you choose, both FE and HE can lead to rewarding careers. It�s about picking the one that aligns with your personal circumstances and long-term goals. For those who have already completed higher education and wish to take their expertise to the next level, postgraduate programs such as MBAs can be a powerful way to advance professionally. These programs, like the Evening MBA Degree, offer a flexible, innovation-driven curriculum designed for experienced professionals seeking leadership growth in dynamic industries.�Not Sure Which Path to Take?Hurak offers courses to support both Further and Higher Education goals:Choose Further Education if you want job-ready skills fast:Level 3 AET (Teaching) �Health & Safety in Construction�Food Hygiene & SafetyChoose Higher Education Prep if you're aiming for advanced roles:Level 4 CET (Teaching)Level 5 Diploma in Teaching (QTLS Route)Browse all our Courses at Hurak.FAQsWhat is the main difference between further education and higher education?Further education (FE): Courses below degree level (e.g. A-levels, BTECs)Higher education (HE): Degree-level and above (e.g. BA, BSc, Master�s)Do I need further education before I can do higher education?Often yes, as most university courses require Level 3 qualificationsAlternative pathways, like Access to HE or relevant work experience, may applyCan I go to university without A-levels?�Yes, through:Access to HE DiplomaBTEC Level 3NVQ Level 3Foundation degreesWork experience in some casesIs further education free in the UK?Yes, for most 16�19-year-oldsAdults may qualify for:Free Level 3 coursesAdvanced Learner LoansSupport based on income or employment statusHow long does further education take?Short courses: A few weeks or monthsFull-time courses: 1�2 yearsPart-time/evening options: Flexible durationWhat support is available for adult learners?Financial support (grants, bursaries, or personal loans)Flexible schedules (evenings, online, part-time)Free advice via the National Careers Service or local collegesIs higher education worth it?Yes, for careers that require degrees (e.g., teacher, nurse, lawyer). Vocational jobs may offer strong earnings with FE alone.Can I do both further and higher education?Yes, many learners progress from FE to HE. Example: BTEC Level 3 ? University degree.Final ThoughtsBoth further education and higher education play important roles in helping you reach your personal and professional goals. Whether you�re aiming to enter the workforce quickly, build practical skills, or pursue a degree for a specialised career, the right path depends on your current situation and long-term ambitions.Understanding the difference between further and higher education helps you make informed decisions about your future. FE provides flexible, skills-based learning, while HE offers academic depth and professional qualifications. Consider your career goals, study preferences, and current qualifications before deciding.You can also speak to an education provider or careers adviser to get tailored guidance and make the most confident choice for your future.Explore Hurak�s career guides to find the right path for your goals.Hurak offers accredited courses that open doors in teaching, assessing, and supporting roles in education.Start building your future today: Award in Education and Training (AET) �| Teaching Assistant Courses�We also offer pathways into quality assurance and assessment: Assessment Training | IQA Training

The Ultimate Guide to Food Safety Fridge Storage: Temperatures, Hygiene Best Practices
If you are involved in the food industry, proper food storage isn't optional � it's essential.Whether you are a chef, restaurant manager, food manufacturer, or small food business owner, safe food handling is part of your daily responsibility. Storing food properly keeps it fresh and protects both your customers' health and your business reputation.While you may use a fridge daily, do you know if you are using it correctly? Are you following the food storage guidelines and maintaining the correct fridge temperature for food safety? Understanding these basics can prevent your food from spoiling and ensure the safety of your customers.In this article, let�s learn the basics of safe fridge storage, fridge and freezer temperatures, proper food organisation, and hygiene practices.Why Proper Food Storage MattersIncorrect fridge storage can cause harmful bacteria to grow rapidly, putting people at risk of serious illness. This isn�t just about rotten food; it�s about unseen microbial threats that can multiply quickly if food is not stored at the right temperature or location.Storing food at the correct temperature:Keeps it safe to eatSlows the growth of harmful bacteriaHelps you meet legal food safety standardsSafe Fridge Temperatures: Legal Limits and Best PracticesTemperature is one of the most crucial factors in maintaining food safety. The legal maximum temperature for storing chilled food is 8�C, but to be on the safe side, it�s strongly recommended to keep your fridge at or below 5�C.Type of StorageTemperature RequiredWhy It MattersChilled Food (Legal Limit)8?�C or below (legal in England, Wales, NI)Slows down bacterial growth. Must be followed by law.Best Practice for FridgesBelow 5?�CSafer than the legal limit. Gives a buffer to keep food cold enough.Danger Zone8?�C to 63?�CBacteria grow fastest here. Avoid this range when storing or holding food.Freezing-18?�C or belowStops bacterial growth completely.?? What is the 'Danger Zone'?What is it? The danger zone is the temperature range between 8?�C and 63?�C where bacteria multiply rapidly.Why avoid it? Keeping food in this range for too long increases the risk of food becoming unsafe to eat.Safe practice:Keep chilled food below 8?�CKeep hot food above 63?�CClick to learn more about the food temperature danger zoneFrozen Food Safety: Key Temperature GuidelinesJust like chilled food, frozen food also needs careful temperature control. The ideal freezer temperature is -18�C or lower to keep food safe for longer periods.Here�s a quick reference chart for frozen storage:AspectDetailsLegal Freezer Temperature-18?�C or lowerBest Practice Temperature-18?�C (consistently maintained)PurposeSlows down bacterial growth and preserves food for longerStorage TipAvoid frequent door openings; ensure air can circulate around food itemsNote: Use a freezer thermometer to ensure the temperature stays consistent at -18�C or lower.When it comes to food safety, it�s not just about storing food at the right temperature; keeping your fridge clean is just as important.Safe storage helps stop harmful bacteria from growing, but good fridge hygiene helps prevent dirt, mould, and everyday germs from spreading to your food.Both food safety and food hygiene play crucial roles in ensuring the quality of food. Food safety focuses on how food is stored (e.g., keeping the fridge at a temperature below 5�C), while food hygiene focuses on where and in what condition it is stored.For example, meat kept at the right temperature can still become unsafe if stored in a dirty fridge.Take Your Food Safety Knowledge FurtherPut your food safety skills into practice by enrolling in our Level 2 Food Hygiene and Safety for Catering course.Learn more about food safety hazards, temperature control, cross-contamination, and proper food storage so you can keep food safe and avoid common mistakes.Ideal for individuals working in catering, hospitality, or the food service industry.Explore Now!How to Store Different Foods in the Fridge: A Simple GuideStoring different types of food correctly in the fridge is key to keeping them safe, fresh, and hygienic. It helps prevent cross-contamination, improves airflow, and ensures food stays at the right temperature.Take a quick look at the chart below to learn how to organise the food in your fridge.Additional Tip: Avoid storing high-risk items like milk or eggs in the fridge door, as it's the warmest area due to frequent opening.For a detailed breakdown on where and how to place foods in your fridge to avoid cross-contamination, check out our full guide on Fridge OrganisationFridge Hygiene and Safety Checks Using HACCPFood businesses across the U.K. use the food safety management system called �HACCP (Hazard Analysis and Critical Control Points) to manage both food safety and hygiene.It is a step-by-step method used to spot potential risks and prevent them before they become a real problem. Whether you run a caf�, restaurant, or food truck, HACCP helps you keep food safe from start to finish.Here�s how the 7 Principles of HACCP apply directly to fridge and freezer food safety:Conduct a hazard analysis � Identify risks such as temperature fluctuations, improper storage, or poor cleanliness.Determine critical control points (CCPs) � Fridge and freezer storage are essential CCPs in any food operation.Establish critical limits � Keep chilled food at or below 5�C, and frozen food at -18�C or lower.Set up monitoring procedures � Check and record fridge and freezer temperatures at least twice a day, ideally at the start and end of each shift. Use clearly labelled thermometers and ensure staff know what to do if readings are out of range.Additional Tip: Don�t rely solely on the fridge�s built-in display; place a separate fridge thermometer inside to cross-check accuracy.Establish corrective actions � Take clear steps if temperatures exceed safe limits (e.g. move food, call maintenance, record the issue).Additional Tip: If there�s a power cut, note the time and duration.�If the fridge exceeds safe limits for more than 4 hours, the affected food may need to be discarded.Verify procedures � Review temperature records and fridge performance regularly to ensure everything�s working as intended.Keep documentation � Maintain easy-to-read logs of temperature checks and basic cleaning records to stay compliant during inspections.In SummaryFridge food safety is more than setting the right temperature. It�s about following clean practices, storing each item correctly, and applying a system like HACCP to stay in control.? Learn MoreWant to ensure your business stays safe, clean, and up to standard? ? Explore our Food Safety Courses and get certified today.FAQ's�What is the recommended food safety fridge temperature in the U.K.?The food safety fridge temperature in the U.K. should be 5�C or lower. Although the legal limit is 8�C, keeping it below 5�C offers better protection.What is the correct cooling food temperature?The cooling food temperature should drop from 63�C to 8�C within 90 minutes to meet food safety standards.What are the food storage guidelines in the U.K.?According to food storage guidelines in the U.K., chilled foods should be kept below 8�C, and frozen foods at -18�C or lower. Raw and cooked foods must be stored separately to avoid cross-contamination.What is considered a safe fridge temperature in the U.K.?A safe fridge temperature in the U.K. is at or below 5�C. This helps slow down the growth of harmful bacteria and keeps food fresh.What is the ideal food hygiene temperature?The food hygiene temperature for cold storage is 5�C or below, and for hot holding, it�s above 63�C. These limits help prevent bacterial growth.
Where to Find Bricklaying Jobs on Construction Sites
Bricklaying is a skilled trade with steady demand across the UK�s construction industry. It�s not just about your skill with bricks and mortar; knowing where to find jobs and how to prepare is key. Here�s a simple guide to help you find bricklaying site work, build your experience, and grow your career.Get the Right Qualifications FirstMost construction sites require workers to have a valid CSCS (Construction Skills Certification Scheme) card. For bricklayers, this usually means the Blue Skilled Worker Card. To get this, you need an NVQ Level 2 Diploma in Bricklaying and a pass in the CITB Health, Safety, and Environment Test.The NVQ Level 2 is the industry standard that verifies your bricklaying skills and assures employers that you can carry out tasks safely, efficiently, and to a professional standard on site.You can earn this qualification through a full apprenticeship, a fast-track assessment if you already have experience, or an intensive course with on-site assessments. It�s essential to aim for this qualification early because it not only opens doors to jobs but can also increase your pay.If you want to know more about obtaining a CSCS card, check out our detailed article on Bricklayer CSCS Card. You can also explore the NVQ Level 2 Bricklaying course offered by Hurak to get qualified and site-ready quickly.�Start your training today with Hurak�s NVQ Level 2 Bricklaying course.Build Practical Experience EarlyQualifications matter, but hands-on experience is just as necessary. Try to get real site work during or after your training, even if it�s unpaid or short-term. Many employers value practical skills and learning on the job as much as formal certification.If you�re new, you might need to start with labouring or site assistant roles. This helps you understand how a construction site operates and allows you to build trust with supervisors. Don�t hesitate to accept these early roles; they�re stepping stones to more skilled bricklaying work.You can learn about the complete pathway into the trade in our article, How to Become a Bricklayer in the UK. Alongside bricklaying skills, consider additional courses like health and safety or manual handling through Hurak to strengthen your site readiness.Be Proactive. Don�t Wait for Job AdsWaiting for bricklaying job adverts can slow your progress. Many bricklayers find work by directly contacting local builders, small contractors, or site supervisors, even if no jobs are officially advertised. Drop off your CV, send an email with free link tracking, or visit sites to introduce yourself. Being proactive shows initiative and can lead to trial work or referrals.Build relationships with local building firms and subcontractors working on larger projects. The construction industry often relies on word of mouth, so these connections are valuable.Use Job Boards and Online PlatformsJob boards list many construction roles every day. Popular sites like Indeed, TotalJobs, CV-Library, and Reed regularly post bricklaying site work. Use search terms like �bricklaying site work,� �CSCS bricklayer,� or �construction bricklayer needed� to find relevant listings. Set up alerts so you don�t miss short-term contracts, especially during busy building seasons.Specialist platforms like Checkatrade, MyBuilder, and MyJobQuote are also great places to build your trade profile and connect with local clients. Create a professional profile, upload photos of your work, and collect reviews to boost your reputation. Even small home projects can help you get noticed and gain confidence.Register with Recruitment AgenciesRecruitment agencies specialising in construction can speed up your job search. They often know about site vacancies before they�re advertised and can place you in labouring or groundworking roles if you�re just starting. Look for agencies like Hays Construction, Daniel Owen Ltd, Building Careers UK, or Randstad Trades & Labour. Increasingly, many employers and agencies are also adopting Diversity Recruiting Software to reach a wider pool of candidates and ensure fair opportunities for skilled workers from all backgrounds.Typically, agencies will ask for your CSCS details, right to work proof, PPE, and references if you have them. Being registered means you get access to a range of site work opportunities across the UK.Network with Other TradespeopleNetworking is a powerful tool in the construction industry. Join local trade Facebook groups, WhatsApp job boards, or attend trade events and site safety courses. Talk to other tradespeople and share job leads. Your next opportunity might come from someone you meet while buying tools or at a training session.Accept Entry-Level Work While You LearnIf you�re new to bricklaying, don�t shy away from starting with labouring or site clean-up roles. These jobs may pay less but help you get a foot in the door, prove your reliability, and learn how sites operate. Supervisors often promote workers who show a good attitude and punctuality into bricklaying roles over time.Keep Up with Training and Site StandardsStay competitive by renewing your CSCS card and attending refresher courses on site safety and manual handling. If you�re working but not yet fully qualified, ask about on-site NVQ assessments. These allow experienced workers to gain certification while on the job, often without the need for classroom time.Upskilling can make a real difference. Explore our range of courses that can help you improve your knowledge and stand out on-site.ConclusionBricklaying is a practical and rewarding trade, but getting your first few jobs takes more than just technical skill. Start by getting the right qualifications, especially your CSCS card and NVQ Level 2 Diploma. Then, be proactive and seek out experience by connecting with builders directly, exploring job boards, agencies, and networking groups. With the right mindset and support from training providers like Hurak, you�ll be well on your way to a solid career in bricklaying.Want More Than Just Labouring Work?Get NVQ-certified with Level 2 in Bricklaying.Earn qualifications on the job and increase your chances of securing consistent, higher-paying site contracts.�FAQ'sCan I work without a CSCS card?Almost all legal construction sites require a CSCS card. Without it, your job options will be minimal.What basic tools do I need?A typical bricklaying toolkit includes trowels, levels, a bolster chisel, a tape measure, and personal protective equipment (PPE).Is bricklaying a seasonal job?Work is usually busier in summer, but indoor projects and renovations continue year-round.How much can I earn?According to the UK government's National Careers Service, bricklayers typically earn between �25,000 at the entry level and �45,000 with experience annually. Based on a standard full-time working year (around 230 working days), that equates to approximately �110��200 per day, depending on your level of experience, location, and the complexity of work involved.
Common Bricklaying Mistakes (And How to Fix Them)
Even the most experienced bricklayers make mistakes, especially when working under pressure. Whether it�s something as simple as misjudging mortar consistency or skipping key prep steps, small errors can quickly turn into big problems if left unchecked.Here�s what you need to know about the most frequent issues in brickwork and how to get it right, from uneven brickwork to repointing issues, we�ll walk you through what to watch out for, how to correct poor habits, and why improving your technique matters for both quality and safety. Think of this as a quick check-in on what to avoid and how to maintain your bricklaying skills.Why Avoiding Mistakes MattersIn bricklaying, precision isn�t just about appearances, it affects the strength, safety, and durability of the entire structure. Poor workmanship can compromise structural integrity, reduce weather resistance, and lead to long-term issues that require costly repairs. Even small errors, when repeated, can set you back professionally and result in rework. Whether you�re just starting out or have years of site experience, many bricklaying mistakes stem from the same causes: rushing, skipping important checks, or not fully understanding the process. The good news is that most of these can be avoided with the right knowledge and habits.In the sections that follow, we�ll break down these common mistakes and show you how to fix, or better yet, avoid them altogether.Incorrect mortar mixingOne of the most frequent issues is incorrect mortar mixing. Too much water, not enough cement, or inconsistent batches can all weaken the mix and cause premature cracking. Using clean materials and sticking to proper ratios is key. Mix in small batches so the mortar remains workable, and always pay attention to consistency, it�s the foundation of everything that follows.Drainage and Clean-UpWhile focusing on structure, many bricklayers overlook the importance of drainage or fail to remove excess mortar. Water trapped without proper drainage can slowly damage the wall from within, while dried mortar on bricks makes the finish look rushed and unprofessional. Always plan for water runoff and wipe away spills before they set.Misaligned or uneven bricksAnother issue is misaligned or uneven brick courses. Even if you�re working quickly, it�s important to use a spirit level and string line frequently to keep things straight. A single slanted course can throw off an entire wall, leading to a finished product that looks unprofessional and may need reworking.Skipping wall ties or reinforcementSkipping wall ties or reinforcement is a structural mistake that can seriously weaken a wall, especially in cavity construction. It�s essential to check the building plans for tie spacing, embed them correctly, and ensure they�re aligned properly. Overlooking this step compromises the wall�s stability and longevity.Leaving out expansion jointsSometimes, it�s what you don�t include that causes problems like leaving out expansion joints. These small gaps are critical for absorbing movement caused by temperature changes or settling. Without them, walls can crack over time, especially on long or exposed surfaces.Poor weather planningPoor weather planning is another common pitfall. Cold, wet, or windy conditions can interfere with mortar setting and brick adhesion. Working in unsuitable weather or failing to protect fresh work can lead to frost damage or weakened bonds. Always check site conditions and be prepared to adapt; sometimes, waiting a day can save days of repair.Improper joint toolingWhen it comes to finishing, improper joint tooling, especially during repointing work, can lead to both aesthetic and functional issues. Tooling too early, leaving gaps, or applying uneven pressure can weaken the joint or lead to moisture ingress. The trick is to let the mortar cure slightly before striking, ensuring full, clean, and uniform joints.Poor Repointing TechniquesMistakes like raking out too deeply, using the wrong mortar mix, or striking too early can lead to weak joints and moisture ingress. If repointing is done poorly, the whole wall can deteriorate faster than it should. �Read our full guide on Brickwork Repointing Mistakes and How to Get It RightIgnoring drawings or building regulationsIgnoring drawings or building regulations is another common error that often leads to problems down the line. Misplacing damp-proof courses, getting cavity widths wrong, or misaligning openings can all result in failed inspections or the need for costly corrections. Double-checking plans before and during your build helps avoid these headaches.Inconsistent perp jointsInconsistent perp joints, the vertical gaps between bricks, may seem like a small detail, but they can make good brickwork look messy. Using gauges or spacers and taking the time to align each brick properly leads to a more professional finish.Overworking laid bricksThere�s also the habit of overworking laid bricks. Tapping or adjusting bricks after placement might seem harmless, but it can break the mortar bond and reduce strength. It�s better to take your time placing the brick correctly the first time, instead of correcting it later.Rushing the jobFinally, rushing the job is a mistake that leads to many of the issues listed above. From uneven courses to incomplete joints, trying to move too fast usually costs more time in the long run.Bricklaying rewards a steady rhythm, one that comes from experience, not speed alone. If you want to work on UK construction sites, getting a CSCS card is essential for most bricklaying jobs. Here�s how to get your Bricklayer CSCS Card.Turn Experience Into Certification and Lay the Foundation for Your Bricklaying CareerAlready working on-site? Get officially recognised with the NVQ Level 2 in Bricklaying practical, respected, and built for professionals like you.Get Certified with NVQ Level 2Ready to Lead and Take On Bigger Projects?The NVQ Level 3 Diploma in Bricklaying is built for skilled tradespeople looking to move into supervisory roles, tackle complex builds, and grow their career in construction.�Take the Lead with NVQ Level 3ConclusionBricklaying is as much about avoiding errors as it is about getting the basics right. From mixing mortar correctly to maintaining level brick courses, every decision on site impacts the strength, safety, and appearance of the final build. Mistakes like skipping expansion joints, repointing poorly, or misreading drawings can seem small in the moment but lead to significant consequences later.The best bricklayers are those who keep learning, stay precise under pressure, and understand the �why� behind every task, not just the �how.�Need Help Getting Your Bricklaying CSCS Card?If you�re unsure about the process or need to book your NVQ Level 2 or 3 in Bricklaying, contact Hurak at 0333 344 1293.We offer a wide range of trade-specific NVQs and provide full support with CSCS card applicationsFrequently Asked Questions on BricklayingWhy is mortar mix consistency so important?If your mortar is too wet or too dry, it won't bond properly with the bricks. This can lead to weak joints, cracks, or crumbling over time. Always follow the recommended mix ratio and use clean, consistent materials.What happens if you don�t use expansion joints in a wall?Without expansion joints, brickwork can crack as it expands and contracts with temperature changes. They�re especially important in long or exposed walls.How can weather impact bricklaying?Wet, cold, or windy conditions can cause mortar to dry too slowly or too quickly, weakening the bond. It�s important to plan ahead and use protective covers or additives when needed.How do I keep brickwork level and neat?Use a string line, spirit level, and brick gauge consistently. It takes practice, but attention to detail is what separates neat, professional brickwork from amateur jobs.Advance Your Career with These Popular Construction NVQsLevel 2 NVQs (Blue CSCS Card � Skilled Worker)These are ideal if you�re early in your career or want to get formally recognised for your current skills:NVQ Level 2 in Bricklaying�NVQ Level 2 in StonemasonryNVQ Level 2 in PlasteringNVQ Level 2 in CarpentryNVQ Level 2 in Wall and Floor TilingNVQ Level 2 in Roofing OccupationsNVQ Level 2 in Painting and DecoratingNVQ Level 2 in Passive Fire ProtectionLevel 3 NVQs (Gold CSCS Card � Advanced Worker/Supervisor)Perfect if you�re experienced and ready to lead on-site or take on complex projects:NVQ Level 3 in Bricklaying�NVQ Level 3 in Stonemasonry � Banker MasonryNVQ Level 3 in Stonemasonry � Memorial MasonryNVQ Level 3 in PlasteringNVQ Level 3 in Roofing OccupationsNVQ Level 3 in Wall and Floor TilingNVQ Level 3 in Painting and DecoratingEach of these NVQs can be completed through an on-site assessment, so you don�t have to stop working to qualify. Take the next step in your trade and stay competitive in the construction industry.